Crochet Deer Pattern: Make an Adorable 24 cm Fawn
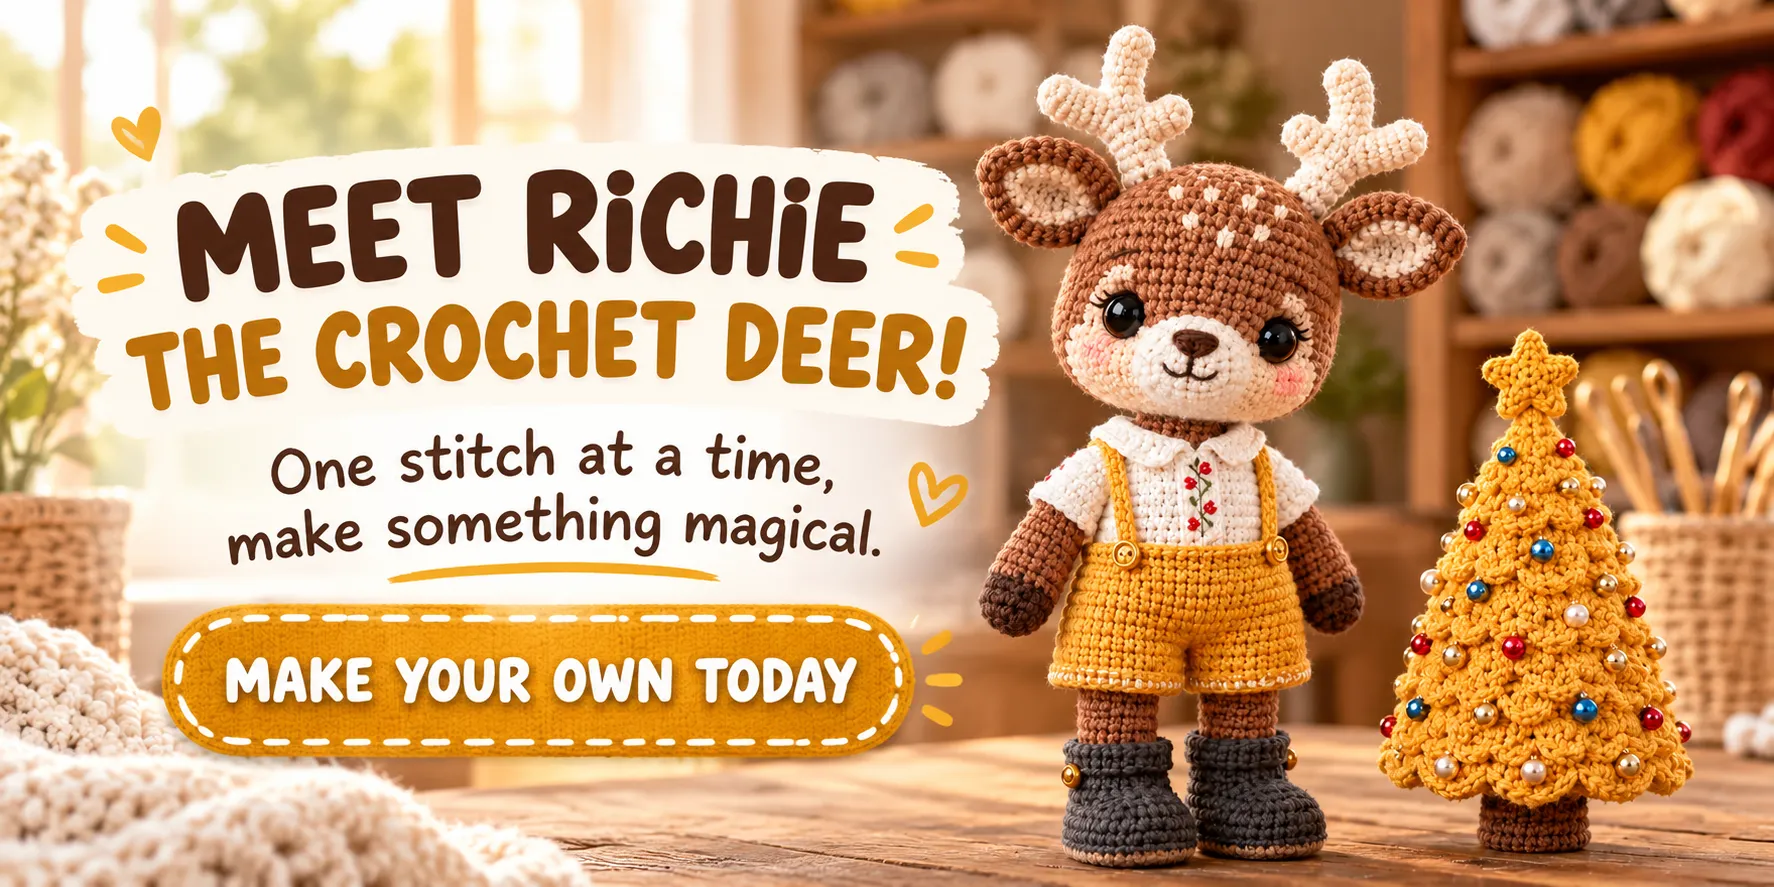
A sweet little deer, tiny boots, a stitched face, and a bright yellow outfit: Richie brings a lot of personality to a small amigurumi project. This crochet deer pattern includes the head, ears, antlers, muzzle, arms, legs, body, clothes, and a matching miniature tree.
The finished toy measures about 24 cm when made with the listed materials. The pattern uses US crochet terms and gives the stitch counts for each round. Follow the notes about the stitch marker, stuffing, and wire frame as you work.
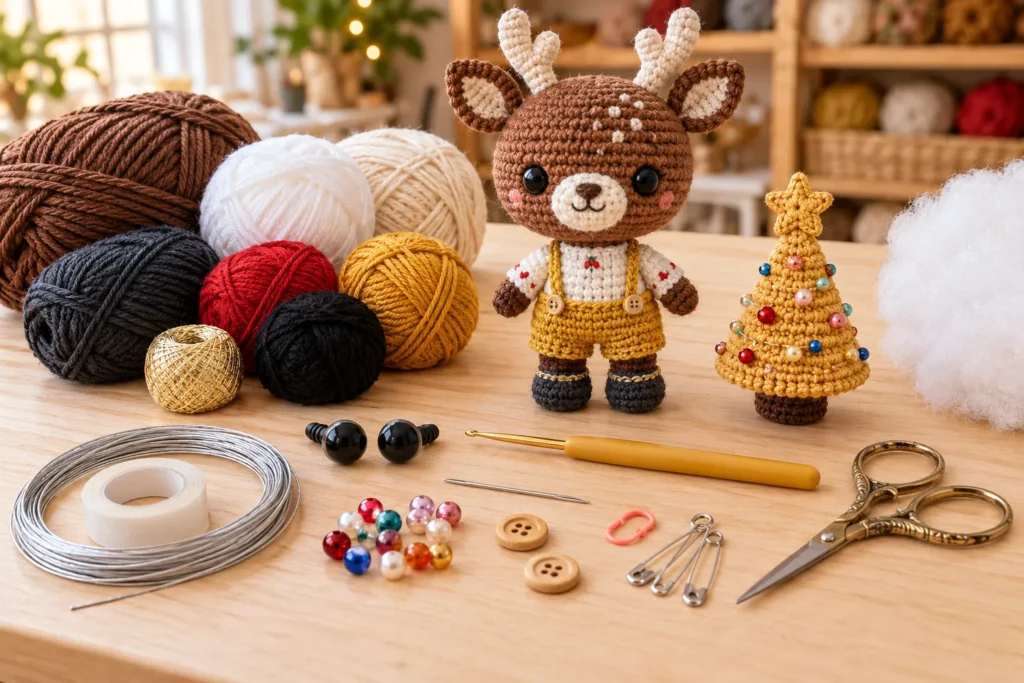
Materials
Yarn
- YarnArt Jeans, 50 g / 160 m, 55% cotton and 45% acrylic:
- White for the clothes and muzzle
- Coffee brown for the body
- Yellow for the shorts and tree
- Graphite for the boots
- Red for embroidery on the shirt
- Cream for the antlers
- YarnArt Iris, 20 g, 100% mercerized cotton:
- Black
- YarnArt Camellia, 20 g / 190 m, 70% polyester and 20% metallic:
- Gold
- Alize Cotton Gold, 100 g / 330 m, 55% cotton and 45% acrylic:
- Brown for the tree trunk
Other supplies
- Sewing needle
- Fiberfill stuffing
- Tulip 1.75 mm crochet hook
- 12 mm eyes for the deer
- Glue, if using glue-on eyes
- Scissors
- 1.5 mm wire for the body frame
- Medical adhesive tape for covering the wire ends
- Stitch marker
- Safety pins for sculpting the face
- Pastel for the cheeks
- Two 15 mm buttons for the shorts
- Beads for the tree
The pattern notes that a regular hook may need to be 0.25 mm larger than a Tulip hook. Choose the hook according to your yarn.
US Crochet Abbreviations
- MR: magic ring
- sc: single crochet
- ch: chain
- inc: increase; work 2 sc in the same stitch
- dec: decrease; work 2 stitches together
- sl st: slip stitch
- BLO: back loop only
- FLO: front loop only
A number at the end of a round shows the total stitch count. For example, /12 means 12 stitches. A repeat written as ( … ) × 3 means to repeat the stitches inside the parentheses three times.
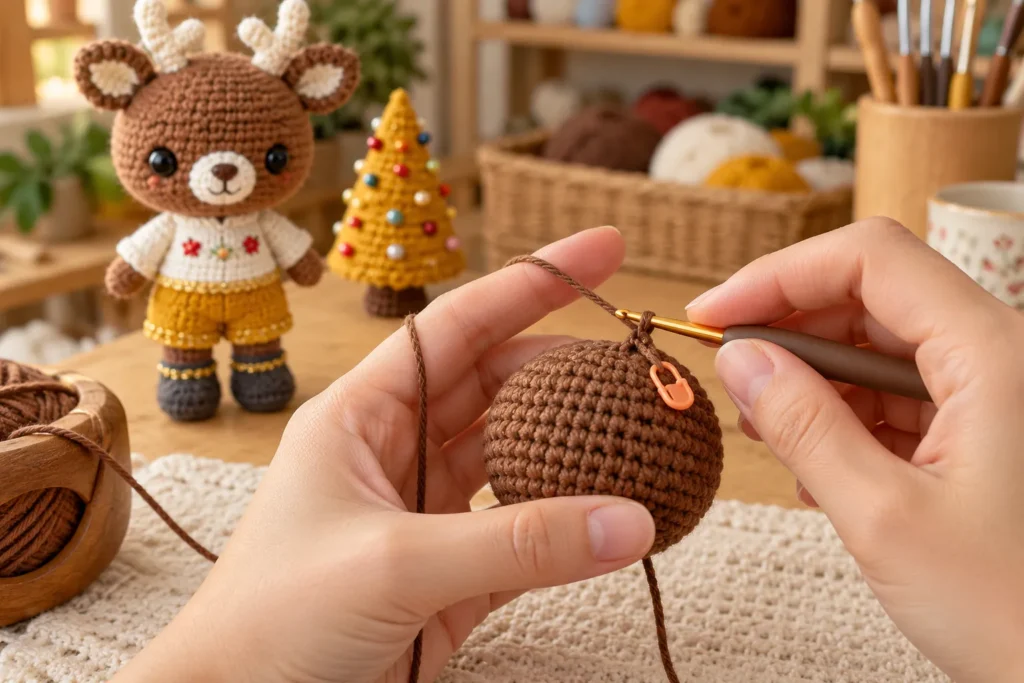
Unless a section says otherwise, work in a continuous spiral. Stuff the pieces wherever the pattern directs.
Before You Begin
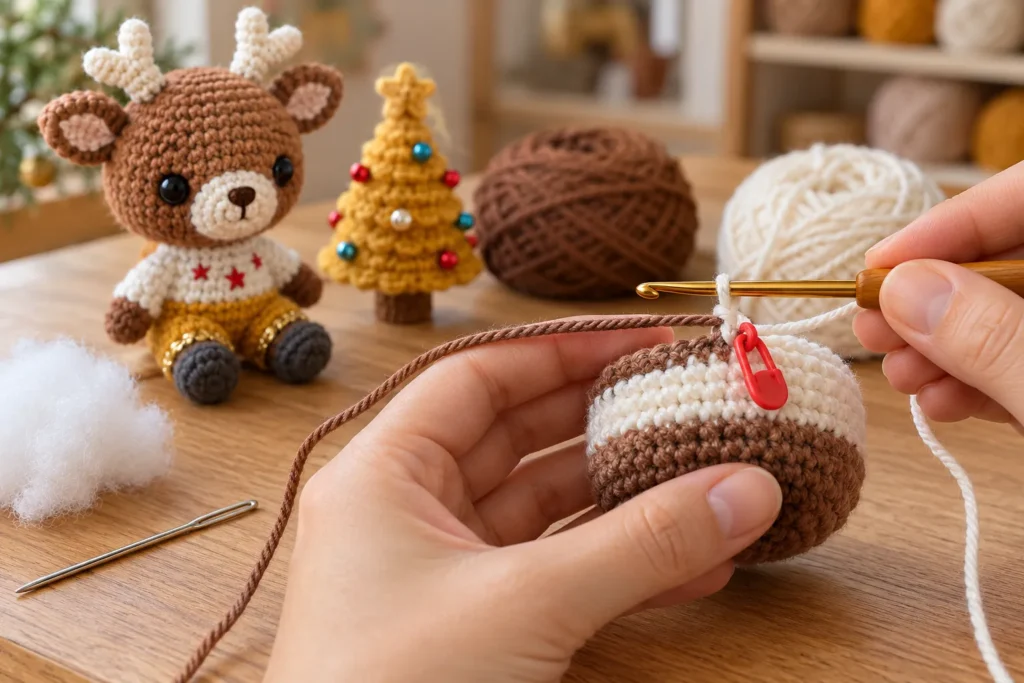
Some sections say to follow the stitch marker, while others say not to follow it. For the head and legs, keep the marker aligned as described. For sections marked “do not follow the marker,” work the stated stitches without adjusting the marker.
A shift stitch is an extra single crochet worked from the next round and is not included in that round’s stitch count.
Changing yarn color
- Stop before completing the last single crochet in the old color, leaving two loops on the hook.
- Draw the new color through those two loops.
- Continue crocheting in a spiral with the new yarn.
Stuffing and finishing a piece
Stuff each piece as directed while crocheting. Where the pattern says to stuff firmly, add stuffing gradually so the piece holds its shape.
To finish a piece, complete the final round and cut the yarn, leaving a long tail only when the pattern says it is needed for sewing. Pull the yarn through the final loop to secure it.
To close an opening, leave a 10 cm yarn tail. Thread it onto a large-eye needle, pick up the front loops of the remaining stitches, and pull the yarn tight. Pass the needle through the center of the closed opening and bring it out on the opposite side. Trim the yarn.
Wire Frame
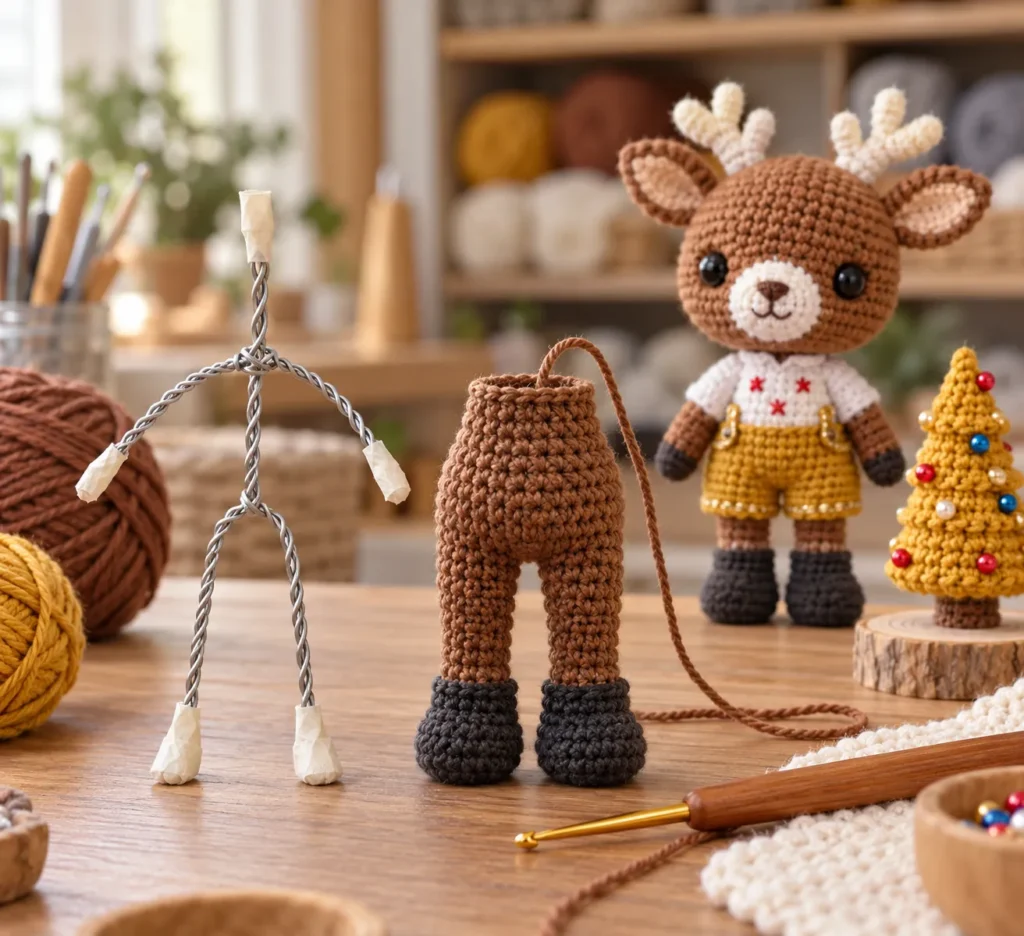
The frame is assembled as the toy is crocheted. The pattern lists about 4 meters of galvanized steel wire, 1–1.5 mm in diameter, cotton medical tape about 3 cm wide, wire cutters, and scissors.
Leg frame
- Cut two wire pieces. Each should be about twice the length of the finished leg piece.
- Take a 90 cm piece of wire, fold it in half, and twist it.
- Bend one side of each leg wire to form a support for the foot.
- Bend the sharp wire end and cover it with medical tape.
- Place the wire inside the boot so the toy can stand.
- Stuff the boot firmly.
- Repeat for the second leg.
Connecting the body frame
- Bend each leg wire at the top to mark the hip joint.
- Bend the wire upward again a little above each fold.
- Bring the two leg wires together and twist them around each other. Keep the joined wire centered through the torso.
Arm frame
After the arms have been attached to the body:
- Take a 60 cm piece of wire, fold it in half, and twist it.
- Cover the sharp wire end with medical tape.
- Bend the wire to mark the shoulder joint, then bend it upward a little above the fold.
- Insert the wire into the arm.
- Add stuffing to the arm if the pattern calls for it.
- Twist the main frame to hold the arm wire in place.
- Leave 5–10 cm of wire above the body for the head and cut off the excess.
- Cover all wire ends with medical tape.
Head
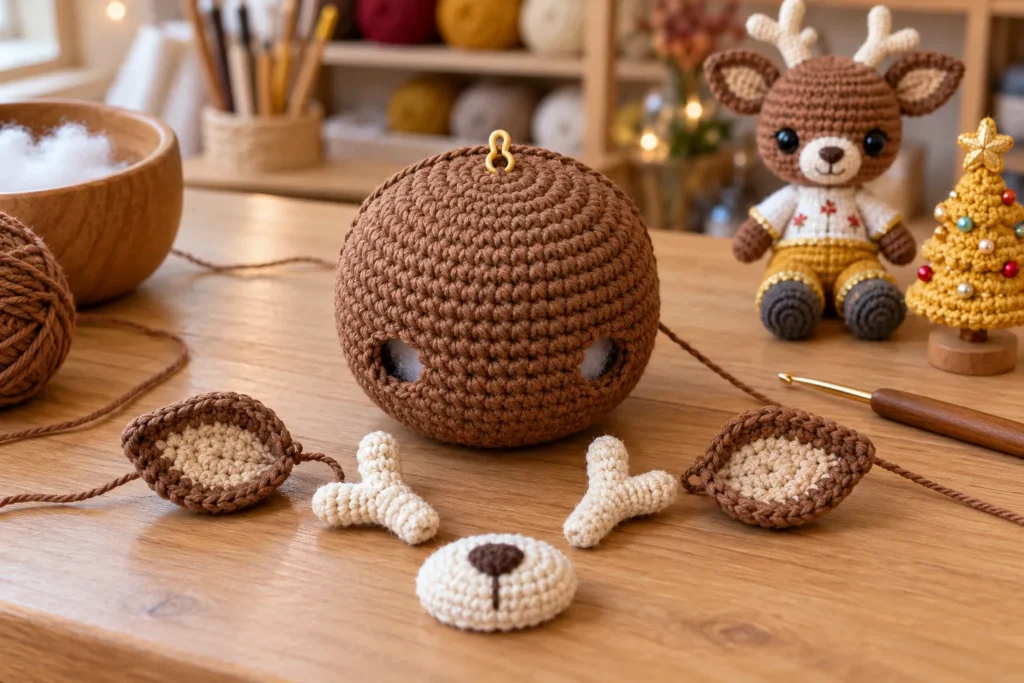
Work from the top down in coffee-brown yarn. Keep the stitch marker centered along the back of the head and stuff firmly as you go.
- 6 sc in MR
- inc × 6 (12)
- (1 sc, inc) × 6 (18)
- (2 sc, inc) × 6 (24)
- (3 sc, inc) × 6 (30)
- (4 sc, inc) × 6 (36)
- (5 sc, inc) × 6 (42)
- (6 sc, inc) × 6 (48)
- (7 sc, inc) × 6 (54)
- (8 sc, inc) × 6 (60)
11–14. 60 sc for 4 rounds - 12 sc, (inc, 1 sc) × 2, (1 sc, inc) × 2, 20 sc, (inc, 1 sc) × 2, (1 sc, inc) × 2, 12 sc (68)
16–17. 68 sc for 2 rounds
For safety eyes, work Round 18 as follows:
- 28 sc, ch 1, skip 1 stitch, 10 sc, ch 1, skip 1 stitch, 28 sc (68)
For glue-on eyes, work 68 sc for Round 18 instead.
19–24. 68 sc for 6 rounds
If using safety eyes, insert them into the openings from Round 18.
- (6 sc, dec) × 8, 4 sc (60)
- (8 sc, dec) × 6 (54)
- (7 sc, dec) × 6 (48)
- (6 sc, dec) × 6 (42)
- (5 sc, dec) × 6 (36)
- (4 sc, dec) × 6 (30)
- (3 sc, dec) × 6 (24)
- (2 sc, dec) × 6 (18)
Fasten off, cut the yarn, and hide the end.
Sculpting and Embroidering the Face
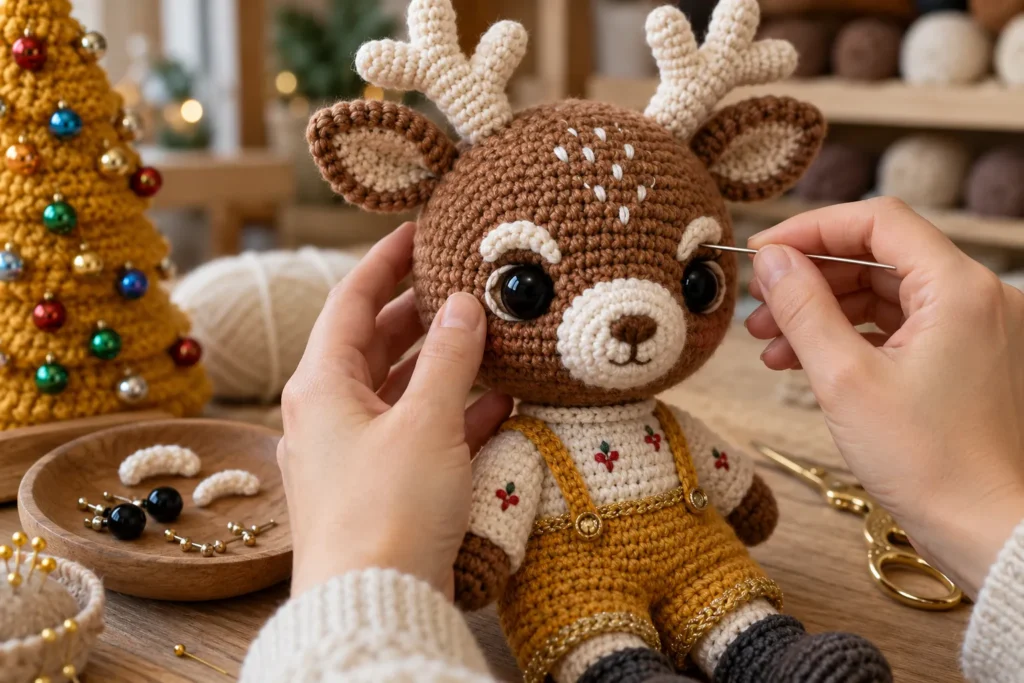
The eye-sculpting method is the same for glue-on eyes and safety eyes. Use the eye spacing given for the head.
Sculpting for glue-on eyes
You will need a large-eye needle, eight safety pins, and scissors. Use the coffee-brown yarn from the head.
- Count 16 rounds down from the magic ring.
- Place Points 3 and 4, and Points 7 and 8, between Rounds 16 and 17.
- Place Points 1 and 2, and Points 5 and 6, between Rounds 19 and 20.
- Leave 8 stitches between the glue-on eye positions.
- Leave 8 stitches between Points 1 and 5, and 8 stitches between Points 3 and 7.
- From Point 1, count 3 stitches to the right for Point 2 and 3 stitches up for Point 3.
- From Point 2, count 3 stitches up for Point 4.
- From Point 3, count 3 stitches to the right for Point 4.
For each pair below, take the needle from the base of the head out through the first point, then insert it through the second point and bring it back out through the base. Pull the yarn tight after each pass:
- Point 1 to Point 2
- Point 1 to Point 3
- Point 2 to Point 4
- Repeat the same sequence with Points 5, 6, 7, and 8:
- Point 5 to Point 6
- Point 5 to Point 7
- Point 6 to Point 8
Repeat the passes several times, then secure and cut the yarn. Pull firmly but carefully so the yarn does not break.
Sculpting for safety eyes
Place the pins at the eye corners as shown in the pattern. Use the same needle paths and pairs as above: 1–2, 1–3, 2–4, then 5–6, 5–7, and 6–8. Repeat the passes several times, then secure and cut the yarn.
Attaching the eyes
For glue-on eyes, apply glue to the back of each eye, place it at the sculpted position, and hold it for a few seconds.
For safety eyes, insert the eyes into the openings left in Round 18. Attach the backs from inside the head using pliers.
Embroidering the face
- If using glue-on eyes, attach them first.
- With white yarn, embroider the white around the eyes.
- With cream yarn, embroider the eyebrows. Place them 4 rounds above the eyes, around Rounds 12–13. Each eyebrow is 4 sc wide and angled, with 10 sc between the eyebrows.
- With black yarn, embroider the short lines above the eyes.
- Add pink pastel to the cheeks.
- With white yarn, embroider the small V-shaped details shown in the pattern.
Ears
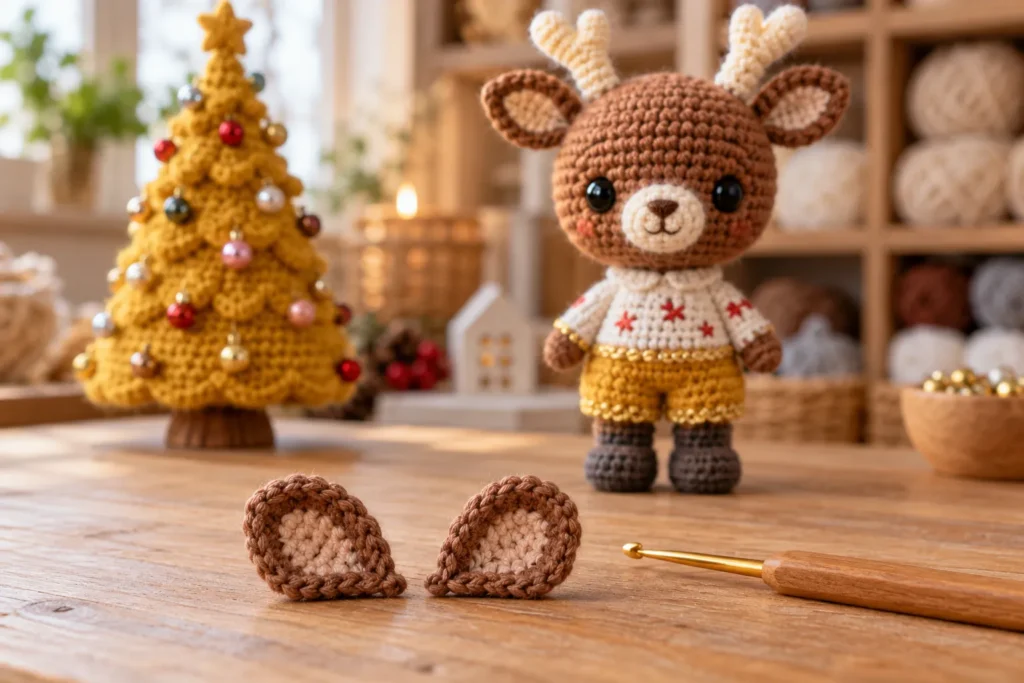
Make 2 identical pieces in coffee-brown yarn. Do not follow the stitch marker. Do not stuff the ears.
- 6 sc in MR
- (1 sc, inc) × 3 (9)
- (2 sc, inc) × 3 (12)
- (3 sc, inc) × 3 (15)
- (4 sc, inc) × 3 (18)
- (5 sc, inc) × 3 (21)
7–8. 21 sc for 2 rounds - (5 sc, dec) × 3 (18)
- (4 sc, dec) × 3 (15)
Fold the piece with the sides together and work 7 sc through both layers. Fasten off, leaving a tail for sewing.
Antlers
Make 2 pieces. Begin each piece in cream yarn. Do not follow the stitch marker.
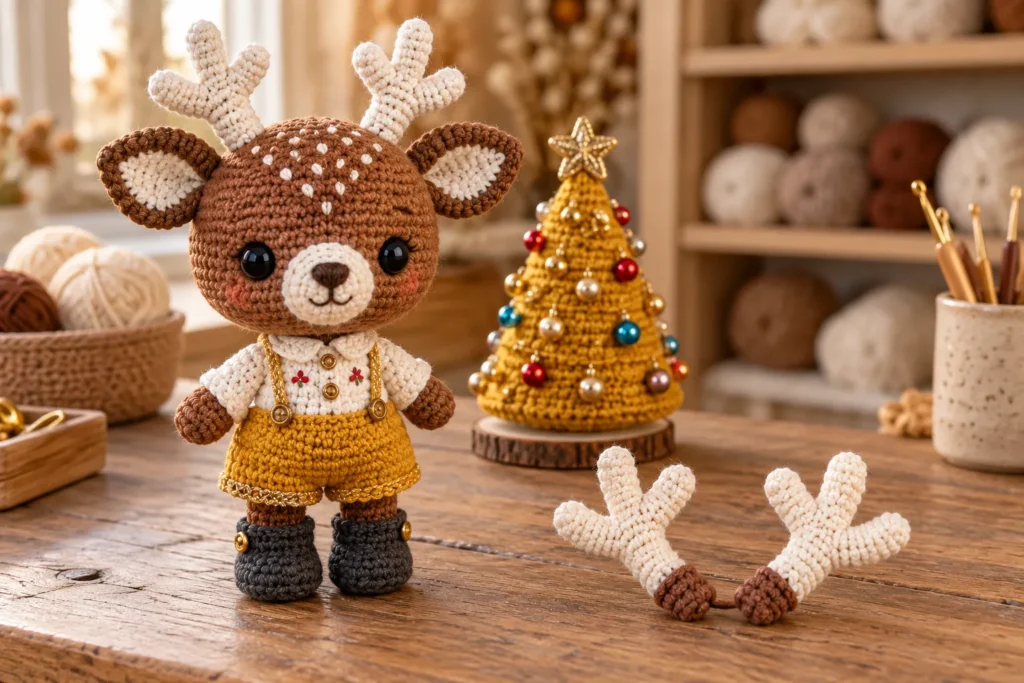
First piece
- 6 sc in MR
- inc × 6 (12)
- (3 sc, inc) × 3 (15)
- 15 sc
- (3 sc, dec) × 3 (12)
- (2 sc, dec) × 3 (9)
Fasten off the cream yarn and join coffee-brown yarn.
- (1 sc, dec) × 3 (6)
8–9. 6 sc for 2 rounds
Stuff the piece. Fasten off, cut the yarn, and hide the end.
Second piece
Repeat Rounds 1–6 in cream yarn, then change to coffee-brown yarn.
- (1 sc, dec) × 3 (6)
- 6 sc
Stuff the piece. Do not cut the yarn yet. Join the two pieces:
- From the second piece, join to the first piece with 1 sc, work 5 sc on the first piece, then 6 sc on the second piece (12).
- 12 sc
Fasten off, leaving a tail for sewing.
Nose and Muzzle
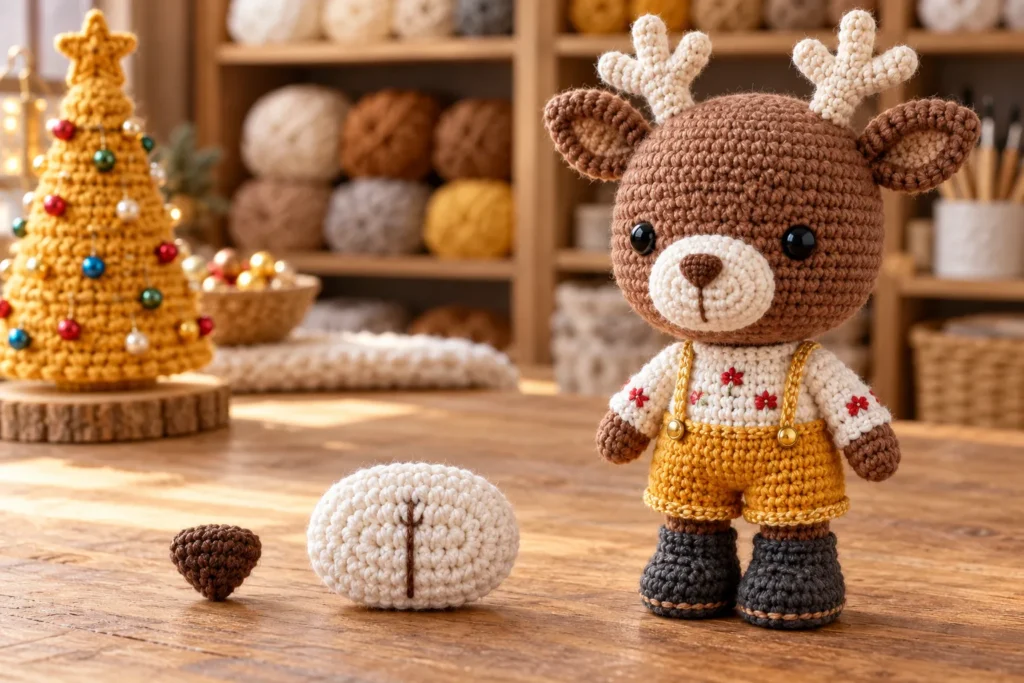
Nose
Work in coffee-brown yarn. Do not follow the stitch marker.
- 7 sc in MR
- 7 sc
Fasten off, leaving a tail for sewing.
Muzzle
Work in white yarn. Do not follow the stitch marker.
- 6 sc in MR
- inc × 6 (12)
- (1 sc, inc) × 6 (18)
- 3 sc, inc × 3, 5 sc, inc × 3, 4 sc (24)
- 3 sc, (1 sc, inc) × 3, inc × 5, (inc, 1 sc) × 3, 4 sc (35)
Fasten off, leaving a tail for sewing.
Attach the head pieces
- Sew the antlers between Rounds 4 and 8 of the head.
- Sew the ears below the antlers between Rounds 9 and 10.
- Sew the muzzle between Rounds 18 and 27.
- Sew the nose to the top of the muzzle.
- With coffee-brown yarn, embroider a line from the nose down the muzzle.
Arms and Sleeves
Make 2 identical arms. Do not follow the stitch marker.
Work the hand in coffee-brown yarn. If using wire, insert it before stuffing the arms lightly. If not using wire, stuff as you crochet.
- 6 sc in MR
- inc × 6 (12)
- (2 sc, inc) × 4 (16)
4–6. 16 sc for 3 rounds - (2 sc, dec) × 4 (12)
- (2 sc, dec) × 3 (9)
- 9 sc
Cut the coffee-brown yarn and join white yarn for the sleeve.
- (2 sc, inc) × 3 (12)
- In BLO: (2 sc, inc) × 4 (16)
12–25. 16 sc for 14 rounds - (2 sc, dec) × 4 (12)
Fasten off, cut the yarn, and hide the end.
Sleeve edging
Turn the piece so the hook points down. Join white yarn to the front loops of Round 10 and work 12 sc. Fasten off, cut the yarn, and hide the end.
Finish the arms
Insert the wire frame if using it, then stuff the arms to the end. With red yarn, embroider French knots on the sleeves.
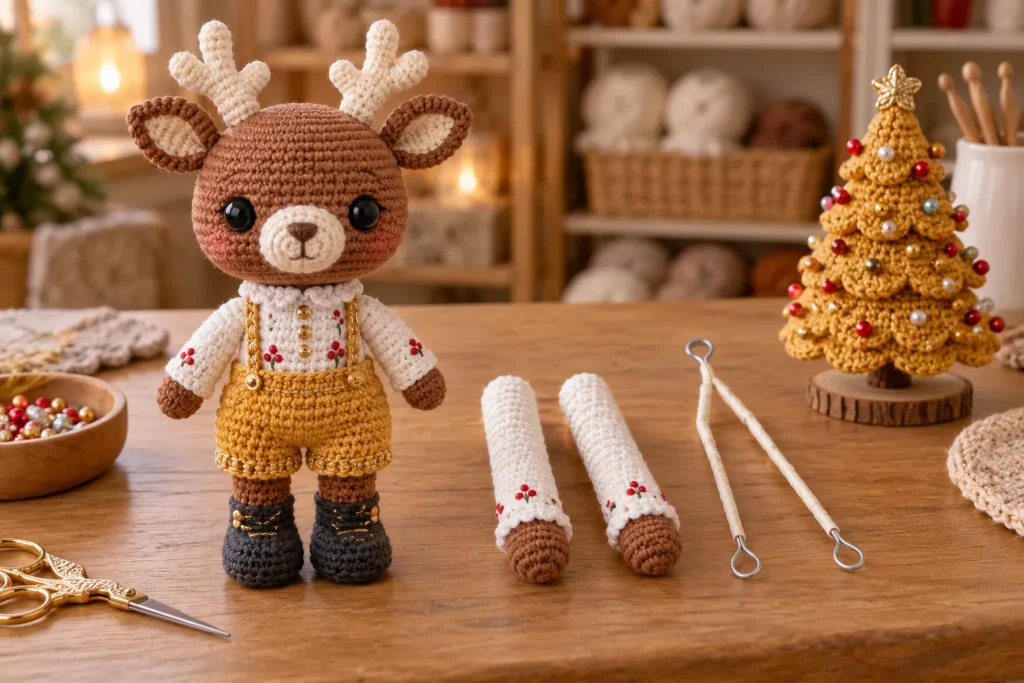
Legs, Boots, and Socks
Make 2 identical legs. Work from the bottom up and keep the stitch marker centered along the back of each leg. Stuff the legs firmly as you crochet. If using wire, insert it after Round 13, then continue stuffing.
Sole
Begin in white yarn.
- Ch 6. Starting in the second ch from the hook: inc, 3 sc, 4 sc in 1 stitch, 3 sc, inc (14)
- inc × 2, 3 sc, inc × 4, 3 sc, inc × 2 (22)
- (1 sc, inc) × 2, 3 sc, (1 sc, inc) × 2, (inc, 1 sc) × 2, 3 sc, (inc, 1 sc) × 2 (30)
Cut out the insoles. If the stitch marker has moved away from the center of the heel, work 1 or 2 shift stitches so it is centered.
- In BLO: 30 sc
Cut the white yarn and join graphite yarn for the boots.
Boots
5–8. 30 sc for 4 rounds
Insert the insoles.
- 9 sc, (dec, 1 sc) × 2, (1 sc, dec) × 2, 9 sc (26)
- 9 sc, dec × 4, 9 sc (22)
- 9 sc, dec × 2, 9 sc (20)
12–13. 20 sc for 2 rounds
Insert the wire frame into the legs. The wire continues from the legs through the body and into the head. Keep the graphite yarn attached and bring it to the front for the boot-top edging.
Socks
Join white yarn.
- In BLO: (3 sc, dec) × 4 (16)
15–17. 16 sc for 3 rounds
Keep the white yarn attached and bring it to the front for the sock-top edging.
Legs
Join coffee-brown yarn.
- In BLO: 16 sc
19–32. 16 sc for 14 rounds
Leave the yarn attached to one leg so you can continue with the body.
Boot and sock edging
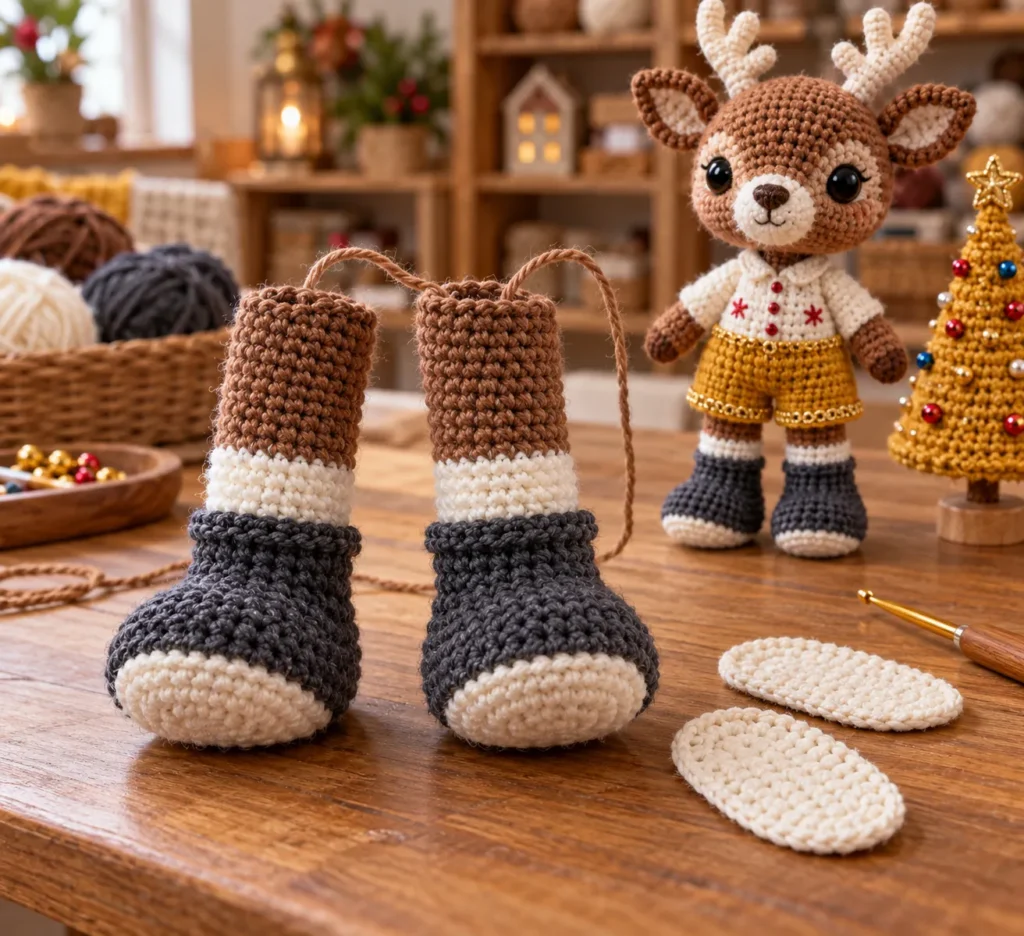
For the boot edging, point the hook upward relative to the piece. Join graphite yarn to the front loops of Round 13 and work 20 sc. Fasten off, cut the yarn, and hide the end.
For the sock edging, point the hook upward relative to the piece. Join white yarn to the front loops of Round 17 and work 16 sc. Fasten off, cut the yarn, and hide the end.
Join the Legs and Crochet the Body
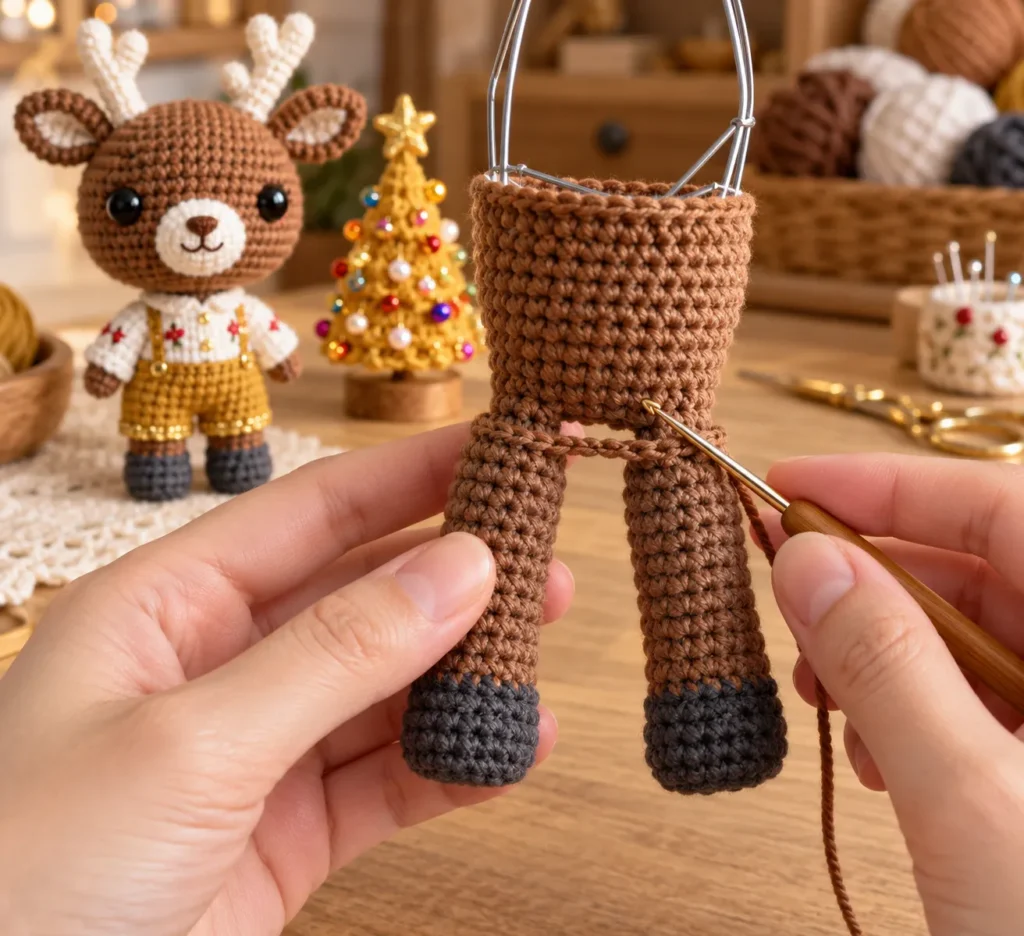
Before joining the legs, mark the center stitches on the inner thighs.
- Hold the legs parallel, with the toes pointing the same way, and mark the outer stitches.
- On the left leg, count backward from the marker to the fold line parallel to the toe. The pattern example uses 5 sc; the count may differ with your crochet tension.
- On the right leg, where the yarn is attached, work the number of sc needed to reach the fold line. The pattern example uses 6 sc. Keep the yarn attached to this leg.
With the right leg positioned with its heels facing you:
- Ch 8 from the right leg and join to the left leg with 1 sc. Work 15 sc around the left leg, 8 sc across the chain, 16 sc around the right leg, and 8 sc across the chain (48).
Twist the wires together into one body frame.
34–37. 48 sc for 4 rounds
Work 8 sc forward so the marker is centered on the left side of the thigh when the heels face you. Cut the coffee-brown yarn.
Shirt and Neck
Join white yarn for the shirt.
38–42. 48 sc for 5 rounds
43. (6 sc, dec) × 6 (42)
44–47. 42 sc for 4 rounds
48. (5 sc, dec) × 6 (36)
49–52. 36 sc for 4 rounds
53. (4 sc, dec) × 6 (30)
54–55. 30 sc for 2 rounds
Attach the arms evenly at the sides of the body. Work shift stitches if needed to position them.
- Work 6 sc through the stitches of the arm and body together, 9 sc around the body, 6 sc through the stitches of the other arm and body together, then 9 sc around the body (30).
Twist the wires together into one frame.
- Work 6 sc through the arm stitches only, without catching the body stitches, 9 sc around the body, 6 sc through the other arm stitches only, then 9 sc around the body (30).
- (3 sc, dec) × 6 (24)
- (2 sc, dec) × 6 (18)
60–61. 18 sc for 2 rounds
Keep the white yarn attached and bring it to the front for the neckline edging.
Neck
Join coffee-brown yarn.
- In BLO: 18 sc
- 18 sc
Do not close the opening. Stuff the neck to the end. Trim the extra wire, leaving 5–10 cm to insert into the head, and cover the wire ends with tape. Fasten off, leaving a tail for sewing.
Collar edging
Point the hook upward relative to the toy. Join white yarn to the front loops of Round 61 and work 18 sc. Fasten off, cut the yarn, and hide the end.
Shirt embroidery
With red yarn, embroider French knots on the shirt.
Yellow Shorts
Do not follow the stitch marker. The shorts are worked in turning rows. At the end of each row, ch 1 and turn.
Begin with yellow yarn.
- Ch 21. Starting in the second ch from the hook, work 20 sc, ch 1, and turn.
2–54. In BLO, work 20 sc, ch 1, and turn for 53 rows. - In BLO, work 20 sc.
Lower edge and seam
Turn the piece and work 54 sc, one in each row end.
Fold the piece with the sides together and work 20 sc through both layers.
Top of the shorts
Turn the piece and work 54 sc, one in each row end. Then work:
(4 sc, dec) × 9 (45)
Fasten off, cut the yarn, and hide the end. The top should remain loose. If the shorts are too large, work another decrease row.
Leg openings
- Fold the shorts with the sides together.
- Find the center and mark 6 sc.
- Sew the center of the shorts with yellow yarn to create the leg openings.
Straps
For the first strap, find the center of the shorts and count 6 sc to the right. Join yellow yarn to the sixth stitch.
- Work 2 sc along the shorts, ch 1, and turn.
2–29. Work 2 sc, ch 1, and turn for 28 rows. - Work 2 sc.
Fasten off, cut the yarn, and hide the end.
For the second strap, find the center again and count 6 sc to the left. Join yellow yarn to the sixth stitch and work the same strap rows.
Gold edging
Use two strands of gold YarnArt Camellia for the edging. If using a different yarn, work with one strand.
For the lower edge, point the hook down relative to the toy. Join gold yarn to the front loops along the bottom of the shorts and work 24 sc. Fasten off, cut the yarn, and hide the end.
For each strap, point the hook up relative to the toy. Join gold yarn to one side and work 29 sl st through every other row. Fasten off, cut the yarn, and hide the end.
Sew the straps to the opposite side of the shorts and sew a button onto each strap.
Assemble the Deer
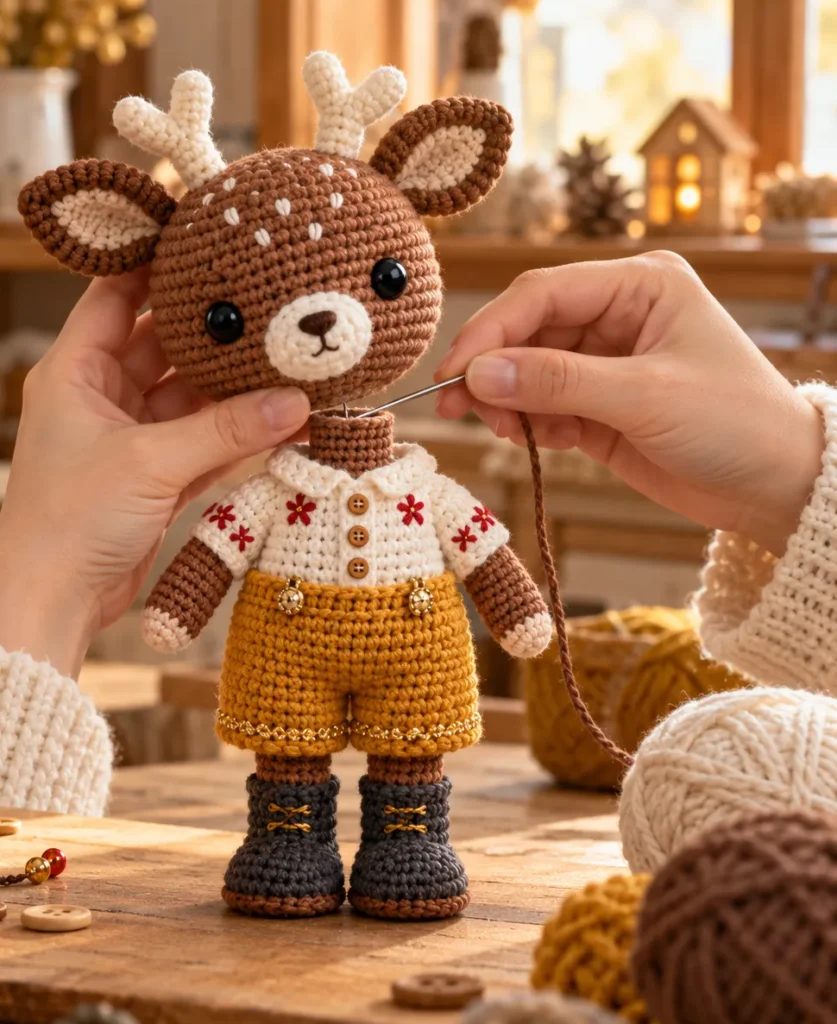
- Sew the head to the body, stuffing the neck firmly as you sew.
- Put the shorts on the deer.
Miniature Tree
Work the tree in yellow yarn. Do not follow the stitch marker.
Tree
- 8 sc in MR
- 8 sc
- inc × 8 (16)
- 16 sc
- (1 sc, inc) × 8 (24)
- 24 sc
- In BLO: (2 sc, inc) × 8 (32)
- 32 sc
- (3 sc, inc) × 8 (40)
- 40 sc
- In BLO: 40 sc
12–14. 40 sc for 3 rounds - In BLO: (3 sc, dec) × 8 (32)
- (2 sc, dec) × 8 (24)
- (1 sc, dec) × 8 (16)
- dec × 8 (8)
Stuff the tree and cut the yellow yarn.
Tree trunk
Join brown yarn.
19–41. 8 sc for 23 rounds
Insert wire into the trunk. Do not stuff the trunk. Close the opening, fasten off, and hide the yarn end.
Tree edging
Join yellow yarn to the front loops of Round 6 and work 24 sc. Fasten off, cut the yarn, and hide the end.
Join yellow yarn to the front loops of Round 10 and work 40 sc. Fasten off, cut the yarn, and hide the end.
Join yellow yarn to the front loops of Round 14 and work 40 sc. Fasten off, cut the yarn, and hide the end.
Embroider the tree with multicolored beads.
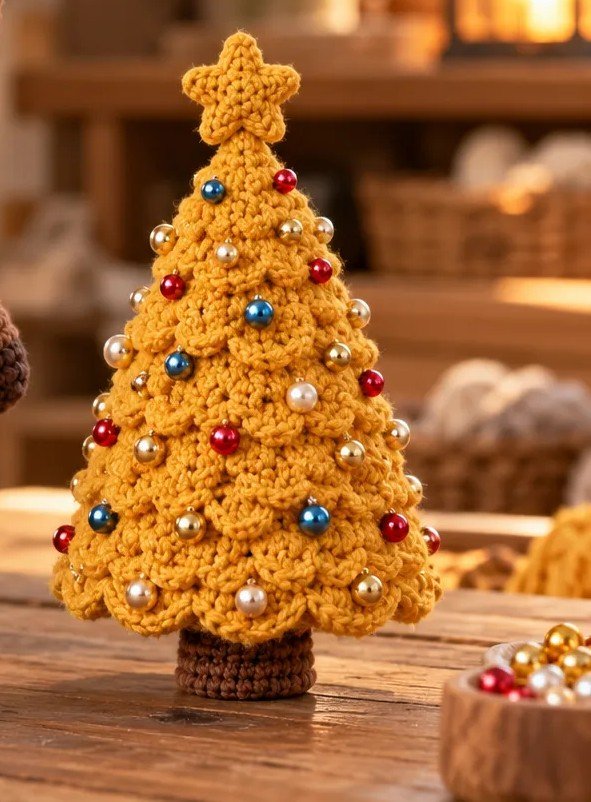
Richie’s bright yellow outfit and tiny tree make this crochet deer a cheerful amigurumi to add to your handmade collection.
Ready for another project? Try the Panda Crochet Pattern or the Hello Kitty Crochet Pattern.
Follow us on Facebook for more crochet inspiration and patterns.