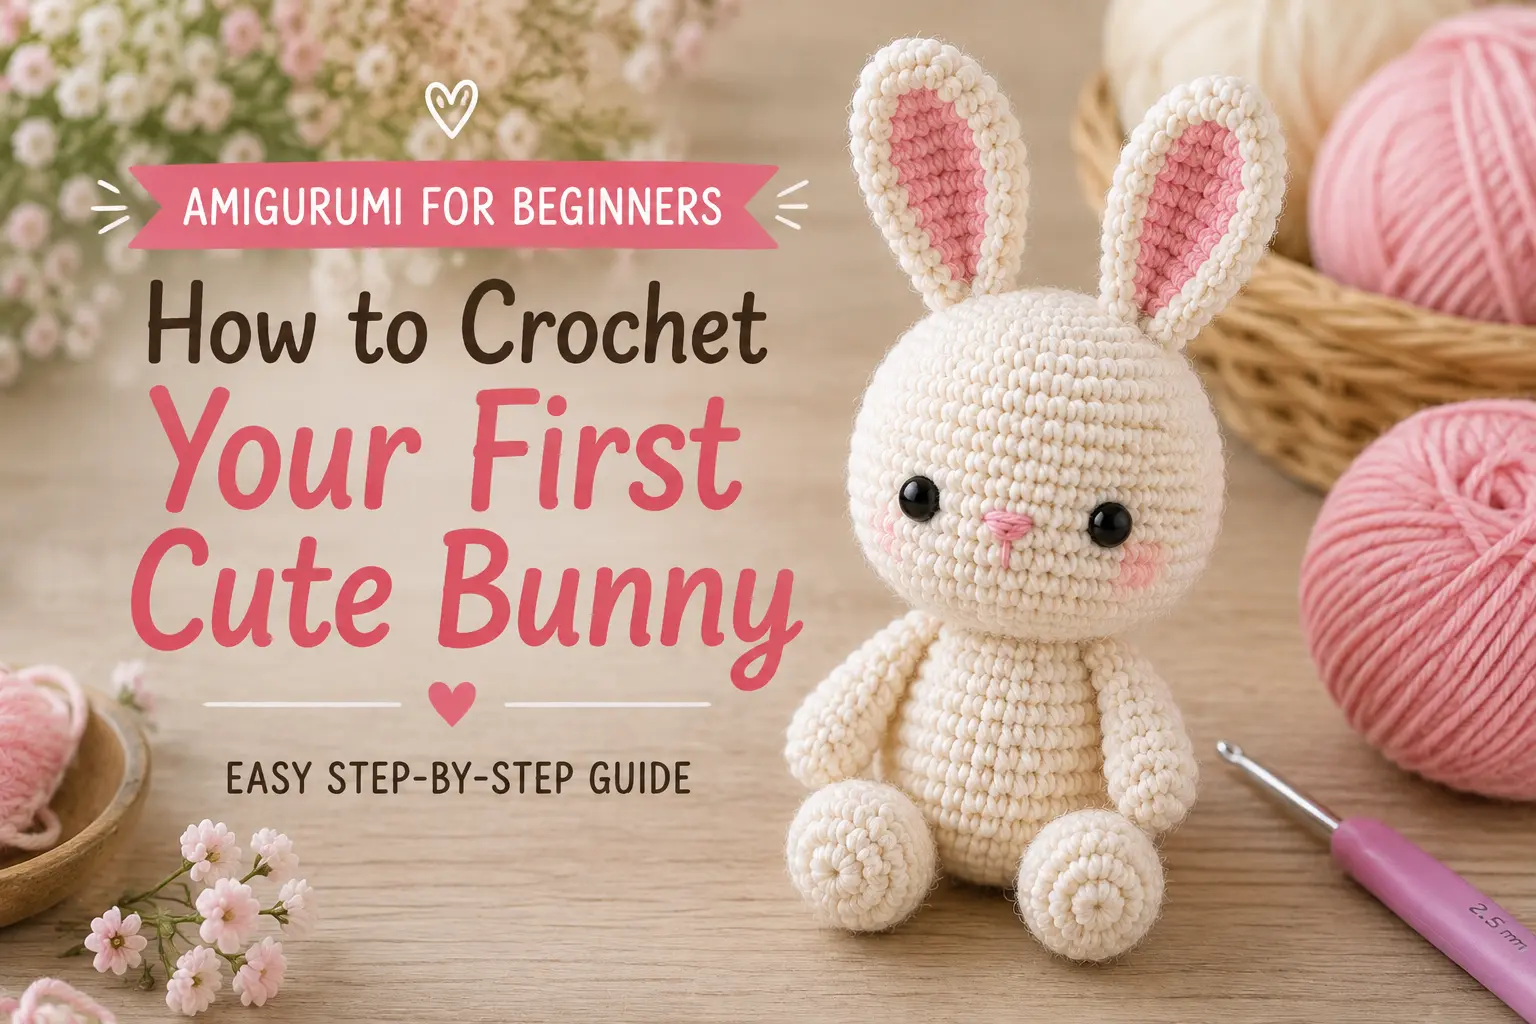
Amigurumi for Beginners: How to Crochet Your First Cute Mini Bunny
Have you ever seen an adorable little crochet animal and thought, I wish I could make that?
Good news: you absolutely can.
Amigurumi may look complicated when you’re just starting out, but many of those cute little crochet animals are made with only a few basic stitches and simple shapes.
This amigurumi for beginners guide will walk you through everything you need to know, from choosing your yarn and learning the essential stitches to crocheting your very first mini bunny.
The bunny is intentionally simple, small, and beginner-friendly, so you can focus on practicing the basics without feeling overwhelmed.
Grab your yarn and crochet hook, and let’s make something cute. ♡
What Is Amigurumi?
Amigurumi is the Japanese art of crocheting or knitting small stuffed toys and characters.
You’ll often see adorable crochet bears, bunnies, cats, bees, dolls, food, flowers, and tiny fantasy creatures described as amigurumi.
One of the best things about amigurumi is that complicated-looking characters often begin with very simple crochet shapes.
A round ball can become a bunny’s head.
A small tube can become an ear.
A few carefully placed stitches can create an adorable little face.
Once you learn the basic techniques, you can use them again and again to create completely different characters.
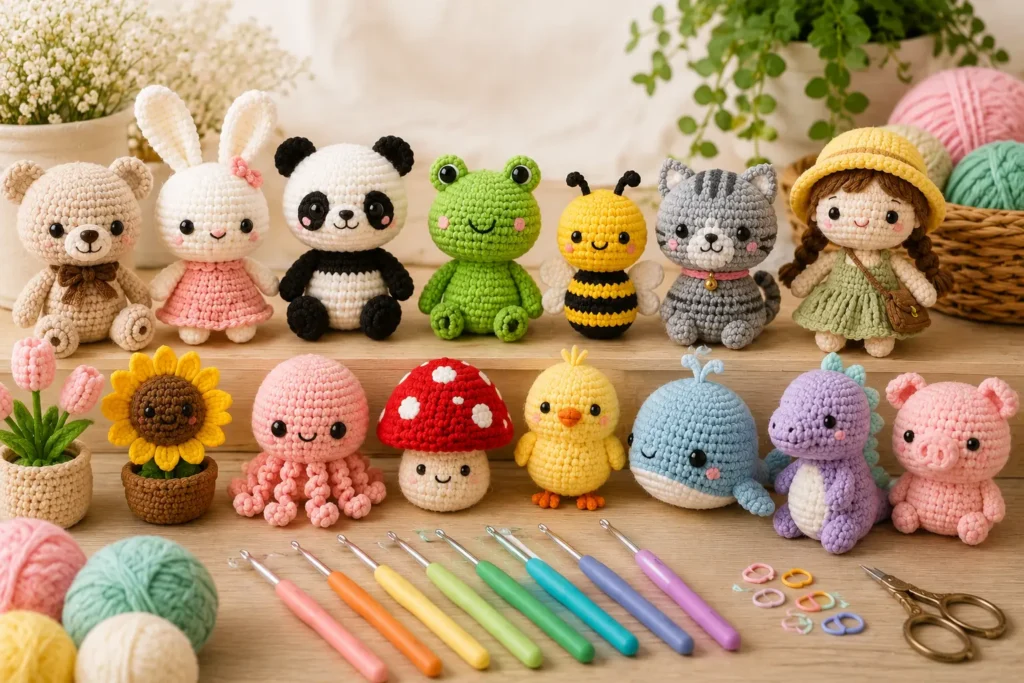
What You’ll Need for Your Mini Bunny
You don’t need a huge collection of crochet supplies for this beginner project.
Materials
You’ll need:
- Worsted or DK weight yarn
- A crochet hook suitable for your yarn
- Polyester fiberfill
- A yarn needle
- Scissors
- A stitch marker
- Black embroidery thread or yarn for the eyes
- Pink embroidery thread or yarn for the nose
- Optional pink yarn for ear details
For your first amigurumi, I recommend using smooth, light-colored yarn.
Very dark, fuzzy, or textured yarn can make it harder to see individual stitches, which isn’t ideal when you’re still learning.
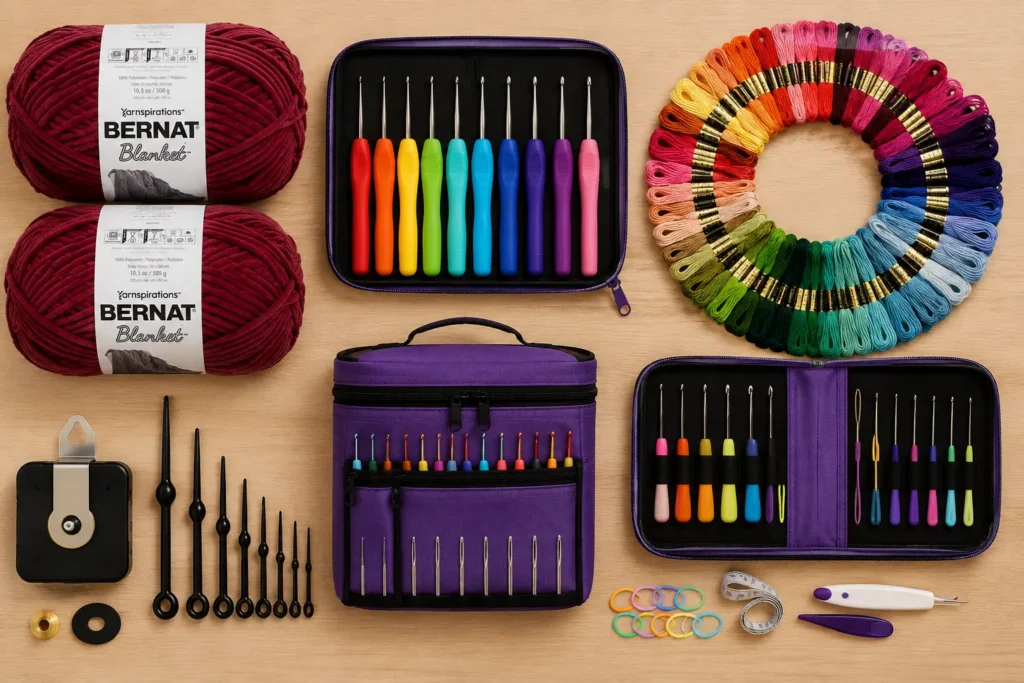
Bernat Blanket Crimson Yarn
Soft super bulky polyester yarn that’s great for plush crochet projects and cozy amigurumi creations.
18-Size Lighted Crochet Hook Set
Rechargeable lighted crochet hook set with interchangeable sizes from 2.0 mm to 14.0 mm for different crochet projects.
LOVIMAG 140-Color Embroidery Floss
A colorful embroidery thread set for adding bunny eyes, noses, cheeks, and other cute amigurumi details.
As an Amazon Associate, I earn from qualifying purchases.
A Note About Crochet Hook Size
Amigurumi is usually crocheted more tightly than other crochet projects.
Using a slightly smaller hook can help create a dense fabric so the stuffing doesn’t show through your stitches.
Your stitches should feel firm, but you shouldn’t have to struggle to insert your hook.
Crochet Abbreviations Used in This Pattern
Before we begin, here are the abbreviations you’ll see:
MR – Magic Ring
sc – Single Crochet
inc – Increase
dec – Decrease
st / sts – Stitch / Stitches
R – Round
An increase means working two single crochet stitches into one stitch.
A decrease means turning two stitches into one. An invisible decrease works especially well for amigurumi because it creates a cleaner finish.
Basic Amigurumi Skills to Know
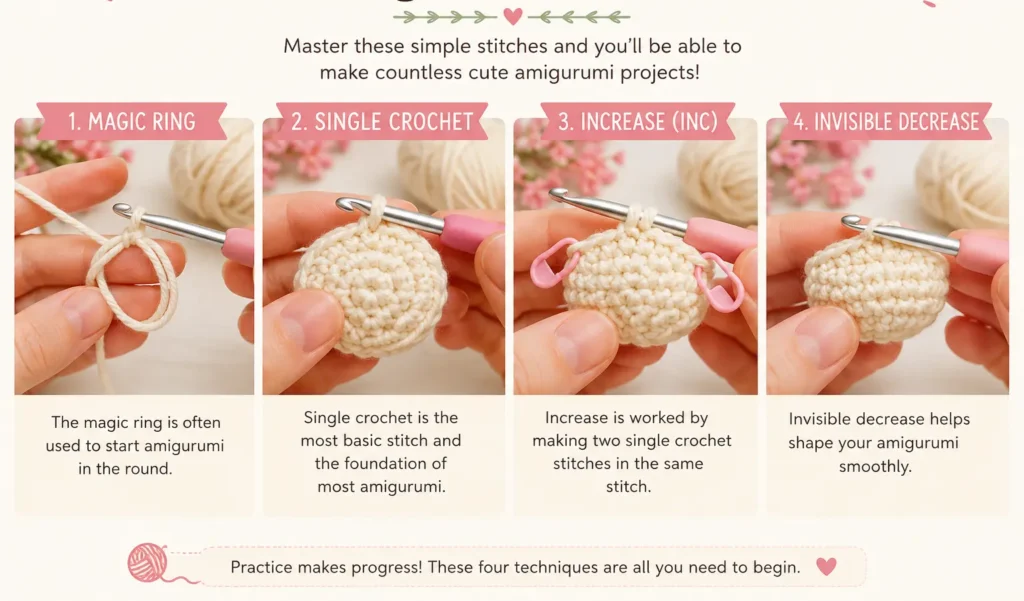
If this is your first amigurumi project, there are four techniques worth practicing before starting your bunny.
1. Magic Ring
Most round amigurumi pieces begin with a magic ring, sometimes called a magic circle.
It creates an adjustable loop that can be pulled closed after you’ve worked your first stitches into it.
This prevents a large hole from appearing at the center of your crochet piece.
Don’t worry if your first magic ring feels awkward. It’s one of those techniques that becomes much easier after you’ve done it a few times.
2. Single Crochet
Single crochet is the main stitch used throughout this mini bunny pattern.
Its compact structure creates the dense fabric we want for stuffed crochet projects.
3. Increase
To make a round piece grow larger, you’ll add increases.
For example:
inc : means you crochet 2 single crochet stitches into the same stitch.
4. Invisible Decrease
Decreases make your crochet piece narrower.
For amigurumi, an invisible decrease helps keep the surface smooth and reduces noticeable gaps.
Beginner Tip: Always Use a Stitch Marker
This tiny tool will save you a lot of frustration.
Most amigurumi is worked in continuous rounds, which means you don’t necessarily join each round with a slip stitch.
Because there isn’t an obvious beginning and end, it’s very easy to lose your place.
Put your stitch marker into the first stitch of every round and move it up as you work.
Also count your stitches at the end of each round.
It takes only a few seconds and can prevent you from having to unravel several rounds later.
Mini Bunny Amigurumi Pattern for Beginners
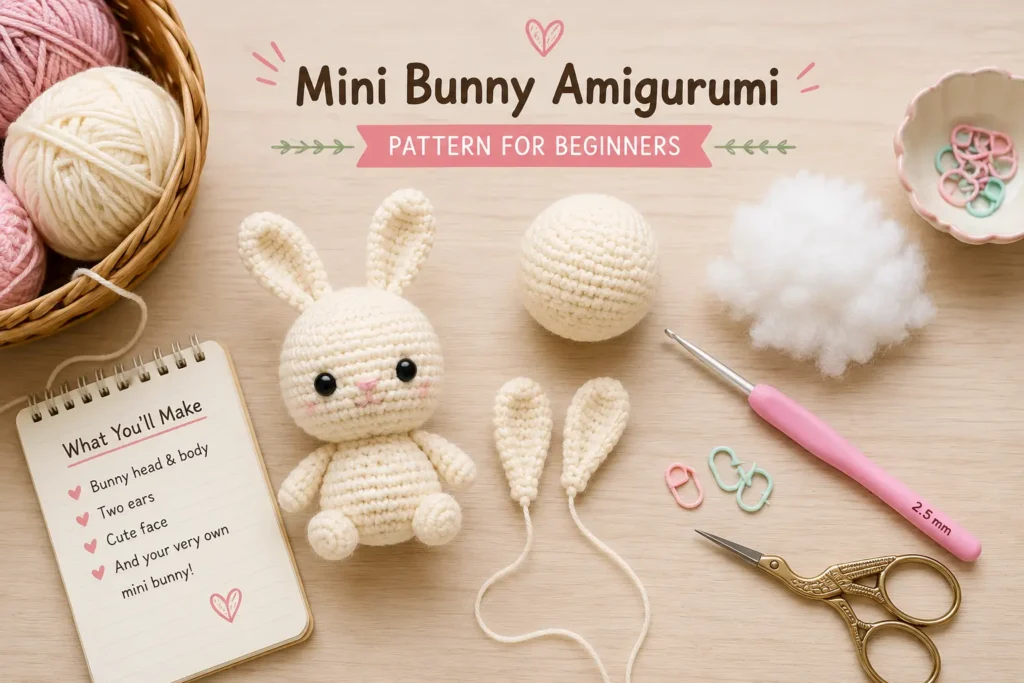
Now for the fun part.
We’re going to create a simple mini bunny using basic shapes.
For this project, we’ll make:
- One head/body piece
- Two ears
- A simple embroidered face
Keeping the number of separate pieces small makes this a much friendlier amigurumi for beginners project.
Bunny Head and Body
Start with your main yarn color.
R1: 6 sc into MR (6)
R2: inc in each stitch around (12)
R3: (1 sc, inc) repeat around (18)
R4: (2 sc, inc) repeat around (24)
R5–R9: sc around (24)
At this point, your crochet should begin looking like a small bowl.
Now we’ll start shaping the bunny.
R10: (2 sc, dec) repeat around (18)
R11: sc around (18)
This is a good time to start adding stuffing.
Use small pieces of fiberfill instead of one large clump. Gently distribute the stuffing with your fingers so the shape stays smooth.
R12: (1 sc, dec) repeat around (12)
Add a little more stuffing if needed.
R13: dec around (6)
Fasten off, leaving a yarn tail.
Use your yarn needle to weave the tail through the remaining stitches and gently pull the opening closed.
Secure and weave in the end.
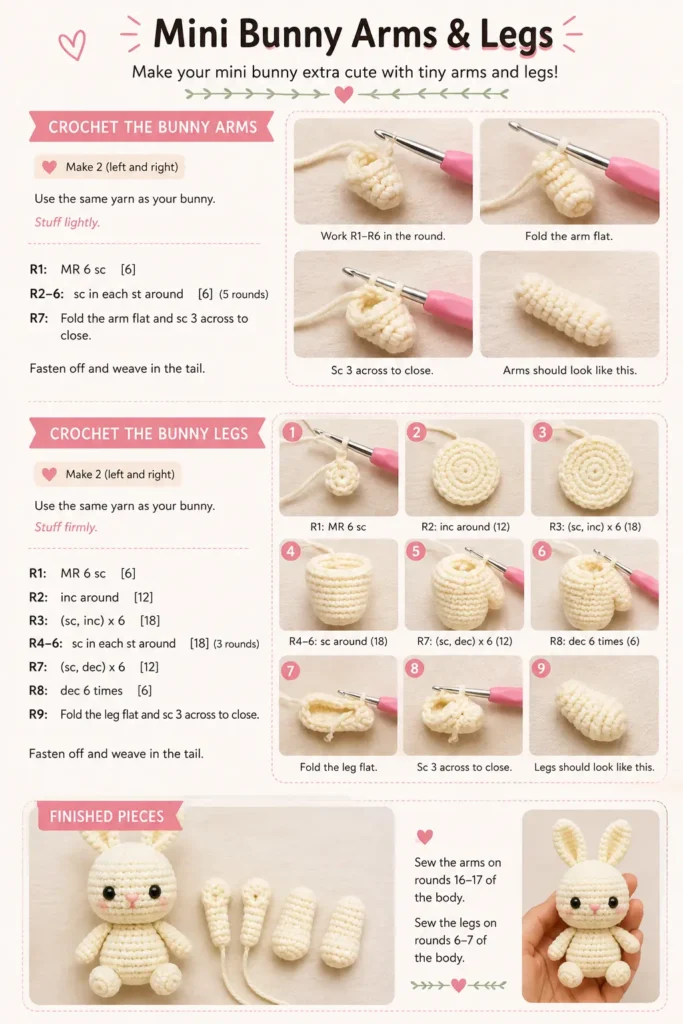
Crochet the Bunny Ears
Make two.
R1: 6 sc into MR (6)
R2: (1 sc, inc) repeat around (9)
R3–R6: sc around (9)
R7: (1 sc, dec) repeat around (6)
Fasten off, leaving a long tail for sewing.
You can leave the ears lightly stuffed or unstuffed depending on the look you prefer.
For a soft floppy-ear effect, I would leave them unstuffed.
Flatten the bottom of each ear gently before attaching it to the head.
Assemble Your Mini Bunny
Before sewing anything permanently, position both ears on top of the bunny.
Use stitch markers or pins to hold them temporarily.
Then look at your bunny from the front.
Are the ears evenly spaced?
Would one look cuter tilted slightly outward?
This is the perfect time to experiment.
Once you’re happy with their position, use the long yarn tails to sew the ears securely to the head.
Weave in the remaining ends.
Add the Bunny’s Face
This is where your little crochet shape suddenly develops a personality. ♡
Using black embroidery thread or thin yarn, embroider two small eyes.
Then use pink yarn or embroidery thread to create a tiny nose between them.
You can also add:
- Tiny eyebrows
- A small mouth
- Pink cheek stitches
- Inner-ear details
Keep the features simple for your first bunny.
Sometimes two tiny eyes and a little nose are all you need.
How to Stuff Amigurumi Without Lumps
Stuffing sounds simple, but it can completely change the appearance of your finished project.
Instead of pushing one large piece of fiberfill inside, tear off small amounts and add them gradually.
Use your fingers to push the stuffing toward the edges.
As you work, rotate your bunny and check the shape from different angles.
You want it firm enough to hold its shape but not so full that the stitches stretch apart.
If you can clearly see white stuffing through your crochet fabric, you’ve probably added too much.
Common Amigurumi Mistakes Beginners Make
Learning amigurumi for beginners becomes much easier once you know which mistakes to watch for.
Losing Track of Your Rounds
Always use a stitch marker in the first stitch.
If you lose track of where the round begins, your increases and decreases may end up in the wrong places.
Forgetting to Count Stitches
It’s tempting to skip counting when everything looks right.
Don’t.
A missing increase or accidental extra stitch can change the shape several rounds later.
Crocheting Too Loosely
Loose stitches can create gaps that expose the stuffing.
Try using a slightly smaller crochet hook or gently tightening your tension.
Crocheting Too Tightly
The opposite can happen too.
If you’re struggling to insert your hook into every stitch, loosen your tension slightly.
Crochet should still feel comfortable.
Overstuffing
More stuffing doesn’t necessarily create a better shape.
Too much can stretch the stitches and make your project look uneven.
Add fiberfill gradually.
Sewing Pieces on Too Quickly
Don’t immediately sew your bunny ears in place.
Position them first and look at the bunny from several angles.
Moving an ear just a little can completely change the expression.
How to Make Your First Amigurumi Look Neater
Your first crochet toy doesn’t need to look perfect, but a few small habits can improve the final result.
Try to maintain consistent tension throughout the project.
Use your stitch marker.
Count every round.
Stuff gradually.
When sewing pieces together, use small stitches and yarn that matches the project.
And most importantly, don’t rush the finishing details.
Crocheting the pieces is only part of making amigurumi. Assembly and facial features are what give your character its personality.
Cute Ways to Customize Your Bunny
Once you’ve made the basic version, you can start having fun with it.
Try making another bunny with:
- Pastel pink yarn
- Cream or beige yarn
- Two-tone ears
- A tiny crochet bow
- A miniature scarf
- Embroidered cheeks
- Longer floppy ears
- A little flower near one ear
You could even make several bunnies in different colors and turn them into a tiny handmade collection.
That’s one of the lovely things about amigurumi: once you understand the basic construction, it’s easy to start adding your own personality.
What Should You Crochet After Your Bunny?
Once you’ve finished this project, don’t stop there.
Your bunny has already introduced you to many of the techniques used in other easy amigurumi projects.
Next, you could try:
- A mini crochet bee
- A small whale
- A tiny bear
- A crochet mushroom
- A simple chick
- A mini cat
- A small heart
- A cute octopus
Look for patterns based on simple round shapes with only a few pieces to sew together.
As your confidence grows, you can gradually move on to projects with more detailed shaping and color changes.
Safety Note for Handmade Crochet Toys
If your bunny is purely decorative, you can have fun experimenting with different embellishments.
If you’re making it for a baby or young child, however, be careful with small or detachable pieces.
Buttons, beads, and some other small components can present a choking hazard.
For projects intended for very young children, embroidered facial features may be preferable to attached decorative pieces.
Frequently Asked Questions
Is amigurumi hard for beginners?
Amigurumi can look complicated, but many beginner projects use only a few basic crochet techniques.
If you can learn the magic ring, single crochet, increases, and decreases, you already have the foundation needed for many simple projects.
What is the easiest amigurumi to crochet?
Projects made mostly from balls, cylinders, or other simple shapes are usually easiest.
Mini bees, whales, bunnies, simple bears, and similar small characters can all make good beginner projects.
What yarn is best for beginner amigurumi?
A smooth cotton or acrylic yarn in a light or medium color is usually easier to work with.
For your first project, avoid very fluffy, fuzzy, or dark yarn because it can make individual stitches difficult to see.
Why can I see stuffing through my crochet?
Your stitches may be too loose, your hook may be too large for the yarn, or the project may be overstuffed.
Try using a slightly smaller hook and adding less stuffing.
Do I need safety eyes for amigurumi?
No.
You can embroider the eyes using yarn or embroidery thread, which also creates a lovely handmade look.
Do I need advanced crochet skills to make amigurumi?
Not at all.
A simple amigurumi for beginners pattern can be made using just a few basic skills. Start small and learn one technique at a time.
Your First Amigurumi Is Finished! ♡
If you’ve made it this far, you’ve done more than crochet a cute mini bunny — you’ve learned the essential skills that will help you create many more adorable amigurumi projects.
You’ve practiced the magic ring, single crochet, increases, decreases, working in continuous rounds, stuffing, shaping, and assembly — the core techniques you’ll use again and again.
And don’t worry if your first bunny isn’t perfectly symmetrical.
Maybe one ear leans slightly to the side. Maybe your stitches aren’t completely even yet. That’s part of the charm of handmade crochet, and every project will help you become more confident with your hook.
Keep your first little bunny somewhere special. A few projects from now, you’ll look back and be amazed at how much your crochet has improved. ♡
Love Cute Bunny Crochet Projects?
Don’t put your crochet hook away just yet!
If you enjoyed making this mini bunny, try our Crochet Bunny Wall Clock next. It’s a fun and creative bunny-inspired project that combines crochet with adorable nursery or home decor.
Looking for more crochet ideas and creative videos? Follow Amigurumi Studio on Facebook for inspiration for your next crochet project. We’d love to see you there! ♡