Hello Kitty Crochet Pattern: 7 Easy Steps for Beginners
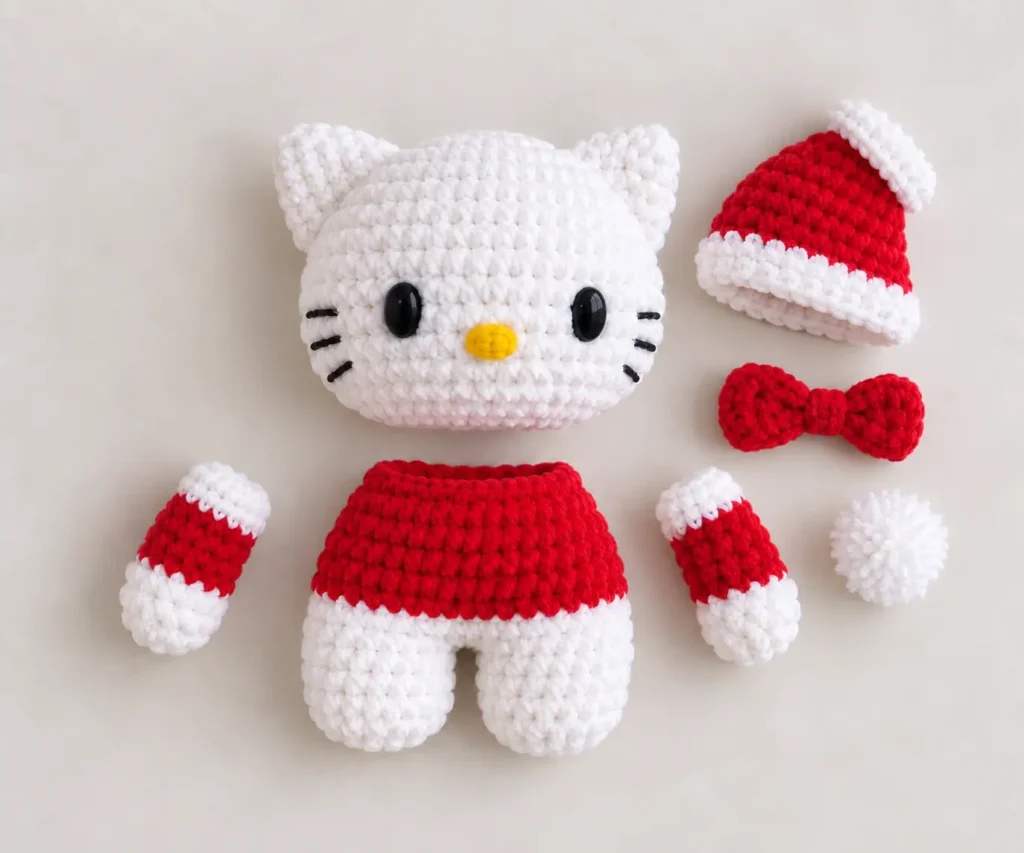
There is a funny moment in almost every amigurumi project when your table is covered with tiny crocheted pieces and none of them looks much like the finished character yet.
Then you sew on the ears, position the eyes, add those unmistakable whiskers and finish the little bow—and suddenly the personality appears.
That is exactly what makes a Hello Kitty crochet pattern so satisfying to make.
This soft amigurumi project combines a large white head, tiny ears, a compact stuffed body, simple arms, a colorful outfit and the facial details that give the finished doll its recognizable kawaii look. If you already know how to single crochet, increase, decrease and work in a magic ring, the construction is surprisingly approachable.
Materials You’ll Need
The source pattern uses size 6 yarn and suggests white plus a contrasting color, with fluffy white yarn as an optional texture. You’ll also need polyester stuffing, a stitch marker, tapestry needle, felt or safety features, and a pompom.
For a soft, plush-style Hello Kitty amigurumi, gather:
- Size 6 chenille or plush yarn in white
- Red or pink plush yarn for the outfit and bow
- Optional fluffy white yarn for trim
- Crochet hook appropriate for your yarn
- Polyester fiberfill
- Stitch markers
- Tapestry needle
- Scissors
- Black and yellow felt or embroidered facial details
- Pins for positioning pieces before sewing
#6 Super Bulky Chenille Yarn
Soft chunky chenille yarn in cream, perfect for plush crochet projects and soft amigurumi dolls like this Hello Kitty crochet project.
Fairfield Poly-Fil Polyester Fiber Fill
Soft polyester stuffing designed for stuffed animals, toys and amigurumi. Great for shaping the head, body, arms and legs.
8 mm Ergonomic Crochet Hook
Comfortable ergonomic crochet hook with a soft grip, suitable for chunky yarn and plush crochet projects.
Crochet Abbreviations to Know
The project uses familiar amigurumi techniques: MR (magic ring), sc (single crochet), inc (increase), dec (decrease), ch (chain), sl st (slip stitch), BLO/FLO (back/front loop only), and FO (fasten off). It also uses a bobble stitch for one decorative detail.
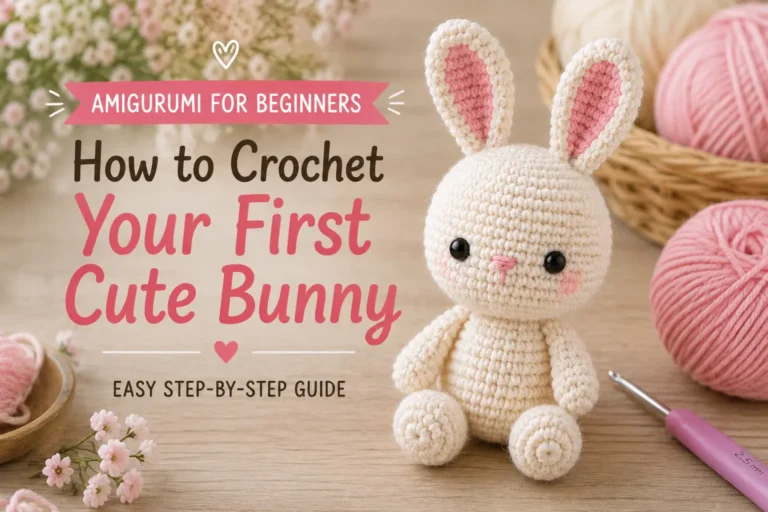
If this is your first stuffed crochet toy, our Amigurumi for Beginners guide is a useful companion before you begin.
How This Hello Kitty Amigurumi Is Constructed
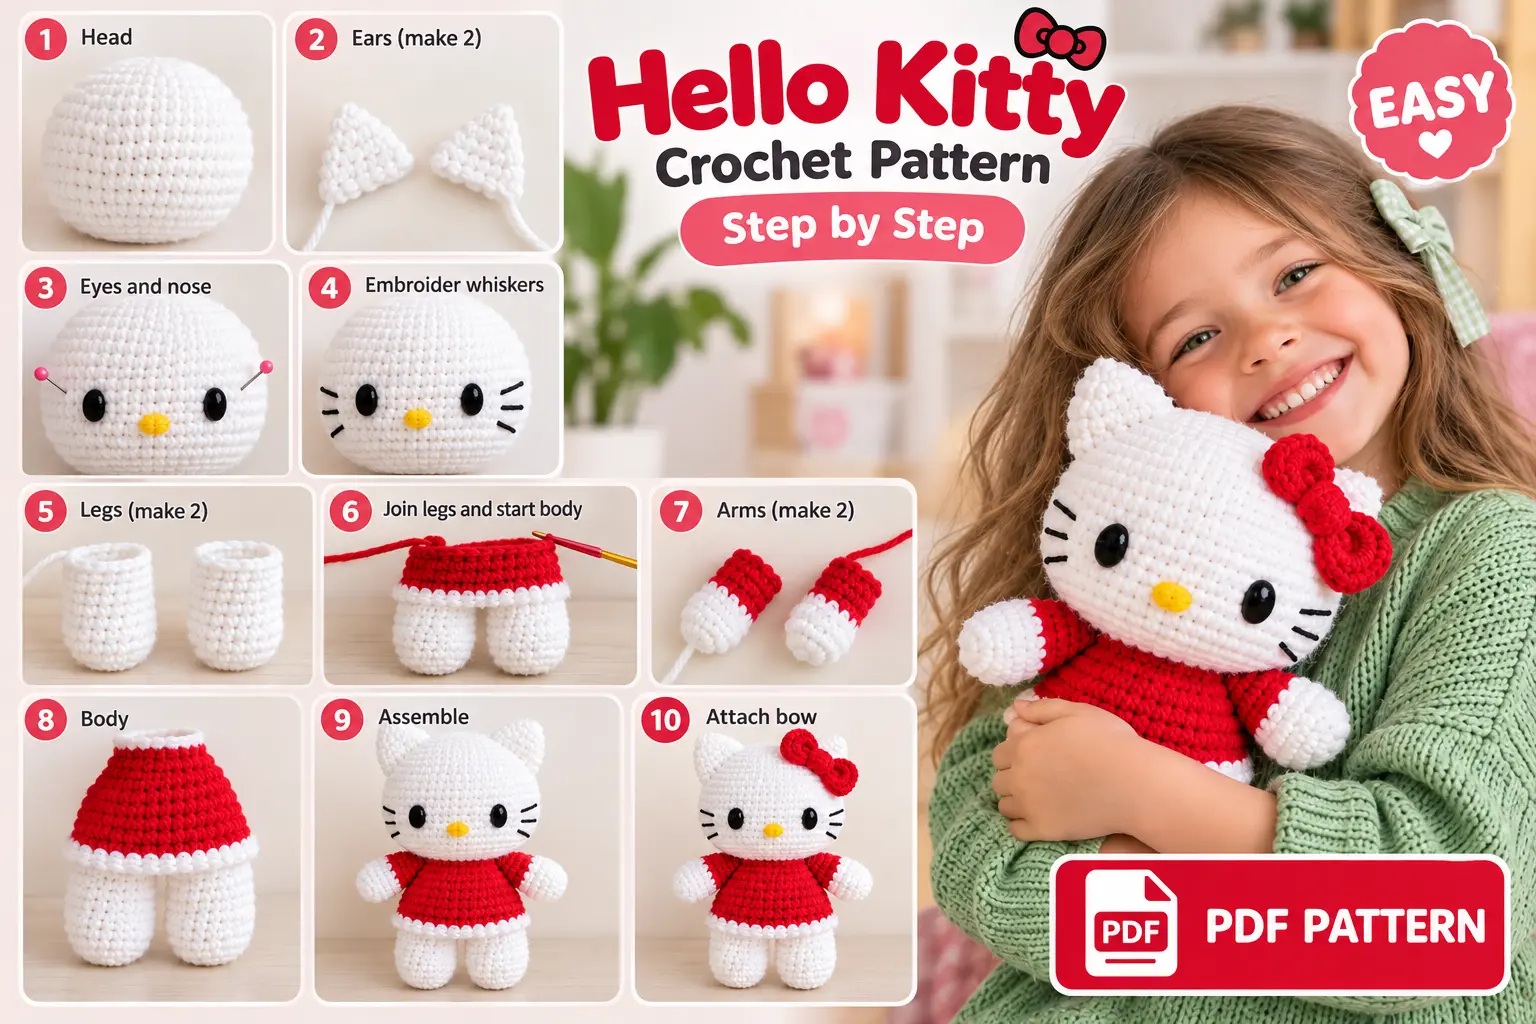
Rather than trying to visualize the whole doll at once, think of this hello kitty crochet pattern as several small projects that come together at the end.
You’ll make the head, joined legs and body, two arms, two ears and decorative accessories separately. The final stage is all about careful placement and assembly.
1. Crochet the Head
Start the head in white with a magic ring.
The source design begins with 7 single crochets, then increases evenly through successive rounds until the head reaches 35 stitches. Several even rounds build the height before decreases begin shaping the lower portion. Stuffing is added during the decrease section.
The most important part isn’t rushing the stitch work—it’s getting the stuffing right.
Add small amounts of fiberfill at a time and distribute it toward the edges. You want a smooth, firm shape without stretching the spaces between stitches.
2. Position the Face Carefully
Facial placement can completely change an amigurumi.
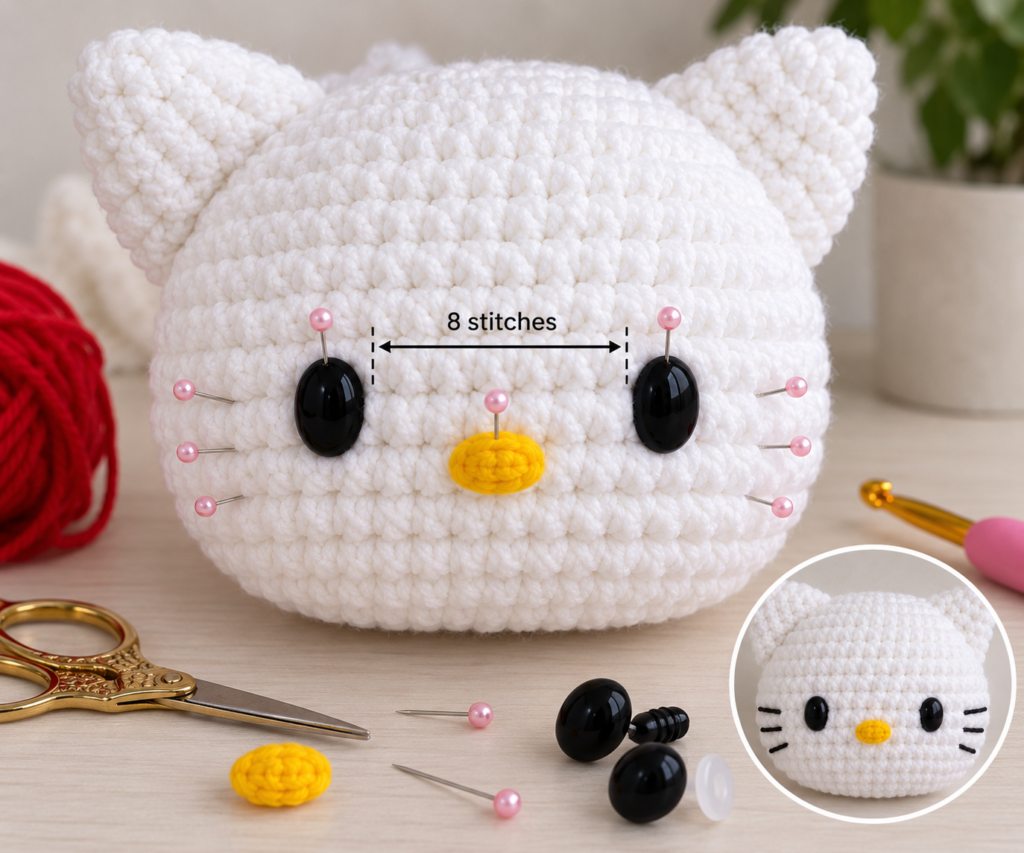
The source pattern positions the eyes around rounds 10–11, with approximately 8 stitches between them, and centers the nose between the eyes.
Before permanently attaching anything, use pins or temporary markers to test the placement.
For a child’s toy, consider embroidered or securely attached felt features instead of removable components.
3. Crochet and Join the Legs
Each leg begins separately in white.
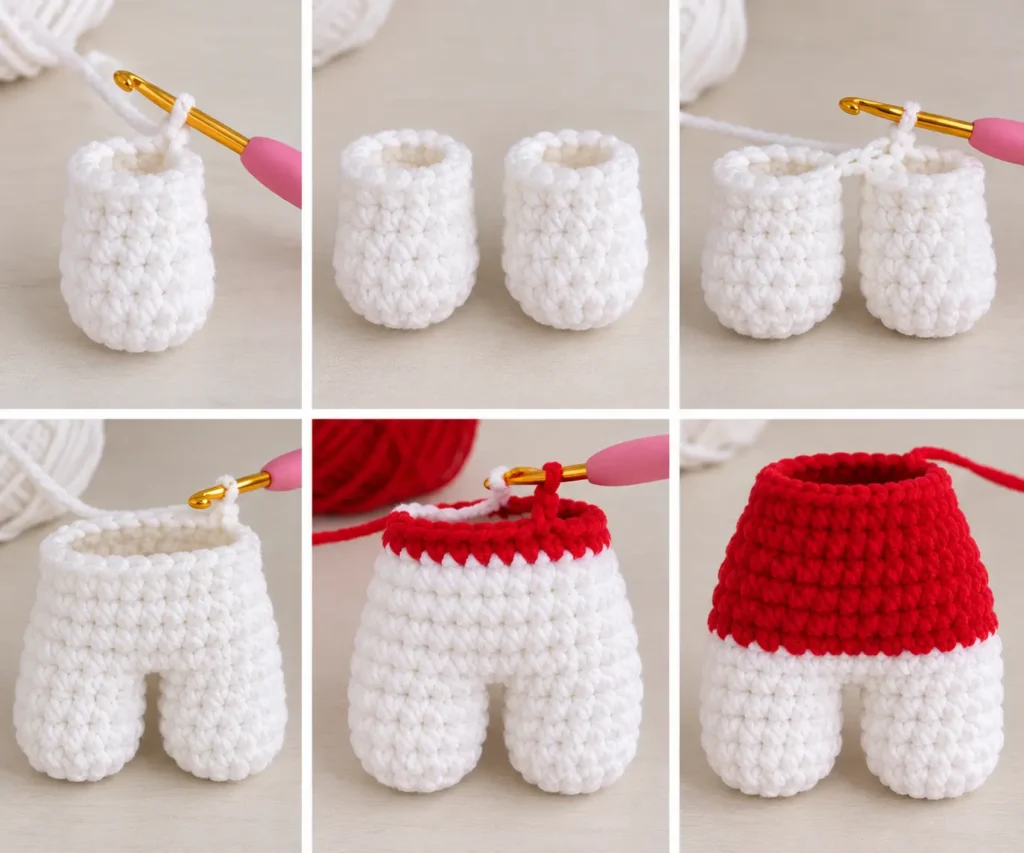
After completing the first leg, make the second and join the two together. From that point, the crochet continues around both legs to form a single body rather than sewing two finished legs onto the torso later.
This technique gives the lower body a neat, continuous finish.
The design then changes to the outfit color and uses back-loop-only crochet, leaving front loops available for later decorative trim.
4. Make Two Small Arms
The arms are another quick section.
They begin in white, then change to the outfit color. The original construction again uses BLO stitches so exposed loops can later receive fluffy edging. The arms may be stuffed lightly before closing.
Avoid overstuffing them. Slightly flatter arms usually sit more naturally against an amigurumi body.
5. Crochet the Ears
Make two matching white ears.
They start small and gradually widen through increases, creating the little triangular shapes that sit at the top of the head. Leave generous yarn tails so you can sew them securely.
6. Add the Bow and Optional Accessories
The bow is made from a small crocheted rectangle that is cinched in the center.
This tiny detail makes a surprisingly big visual difference.
You can keep the classic red-and-white palette or personalize your amigurumi with pink, lavender, pastel blue or another favorite color.
7. Assemble Your Hello Kitty Crochet Doll
Now the separate pieces finally become a character.
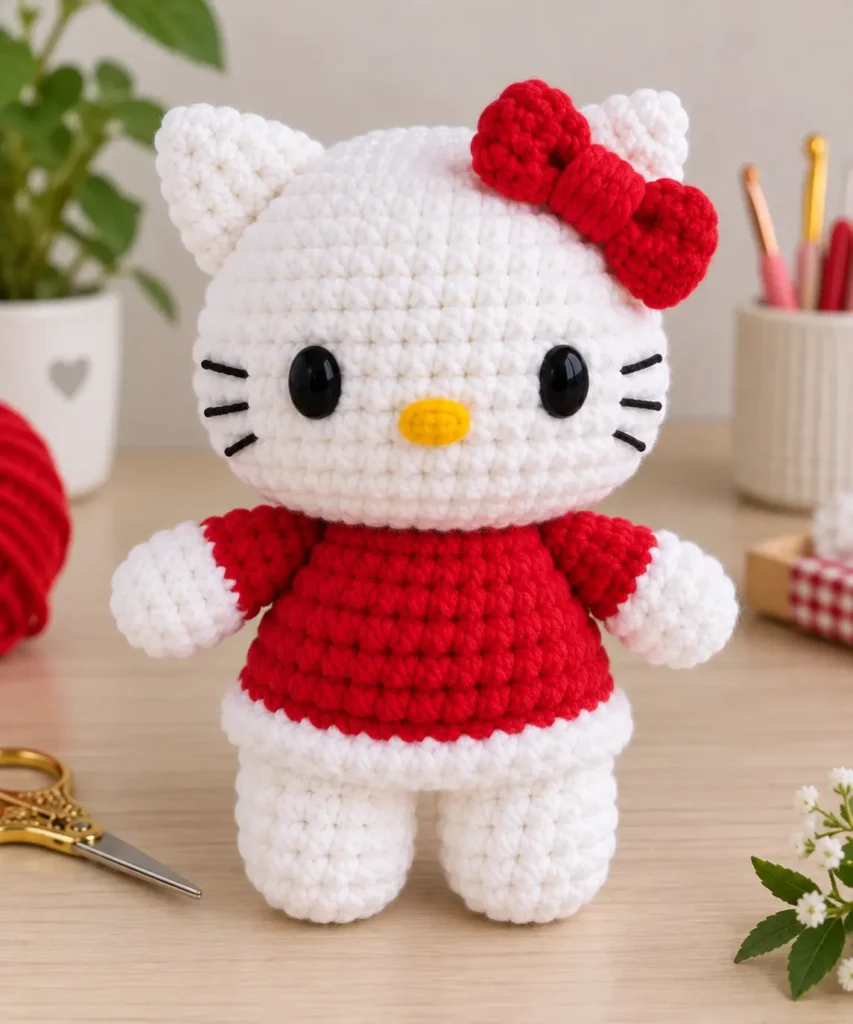
Attach the head securely to the body, position the arms near the upper body and pin both ears before sewing. The source places the ears around rounds 3–4 of the head.
Add the eyes and nose if you haven’t already, then embroider the whiskers on each side of the face.
Tips for a Cleaner Amigurumi Finish
Keep your tension consistent, count every round and move your stitch marker each time you begin a new round. Stuff gradually rather than pushing one large piece of fiberfill inside.
Most importantly, pin every sewn piece first. Look at your doll from the front, sides and top before committing to the placement.
If the face looks slightly wrong, moving an eye or ear by even one stitch can make a noticeable difference.
More Cute Amigurumi to Make
Finished your kitty? Your next project is waiting.
Try our Panda Crochet Pattern for another cuddly amigurumi, or read Amigurumi for Beginners if you want to improve your shaping, stuffing and assembly skills.
And don’t forget to save our Pinterest pin so you can find this project again when your yarn and hook are ready.