Easy Crochet Bandana Pattern: Granny Stitch Triangle for Beginners
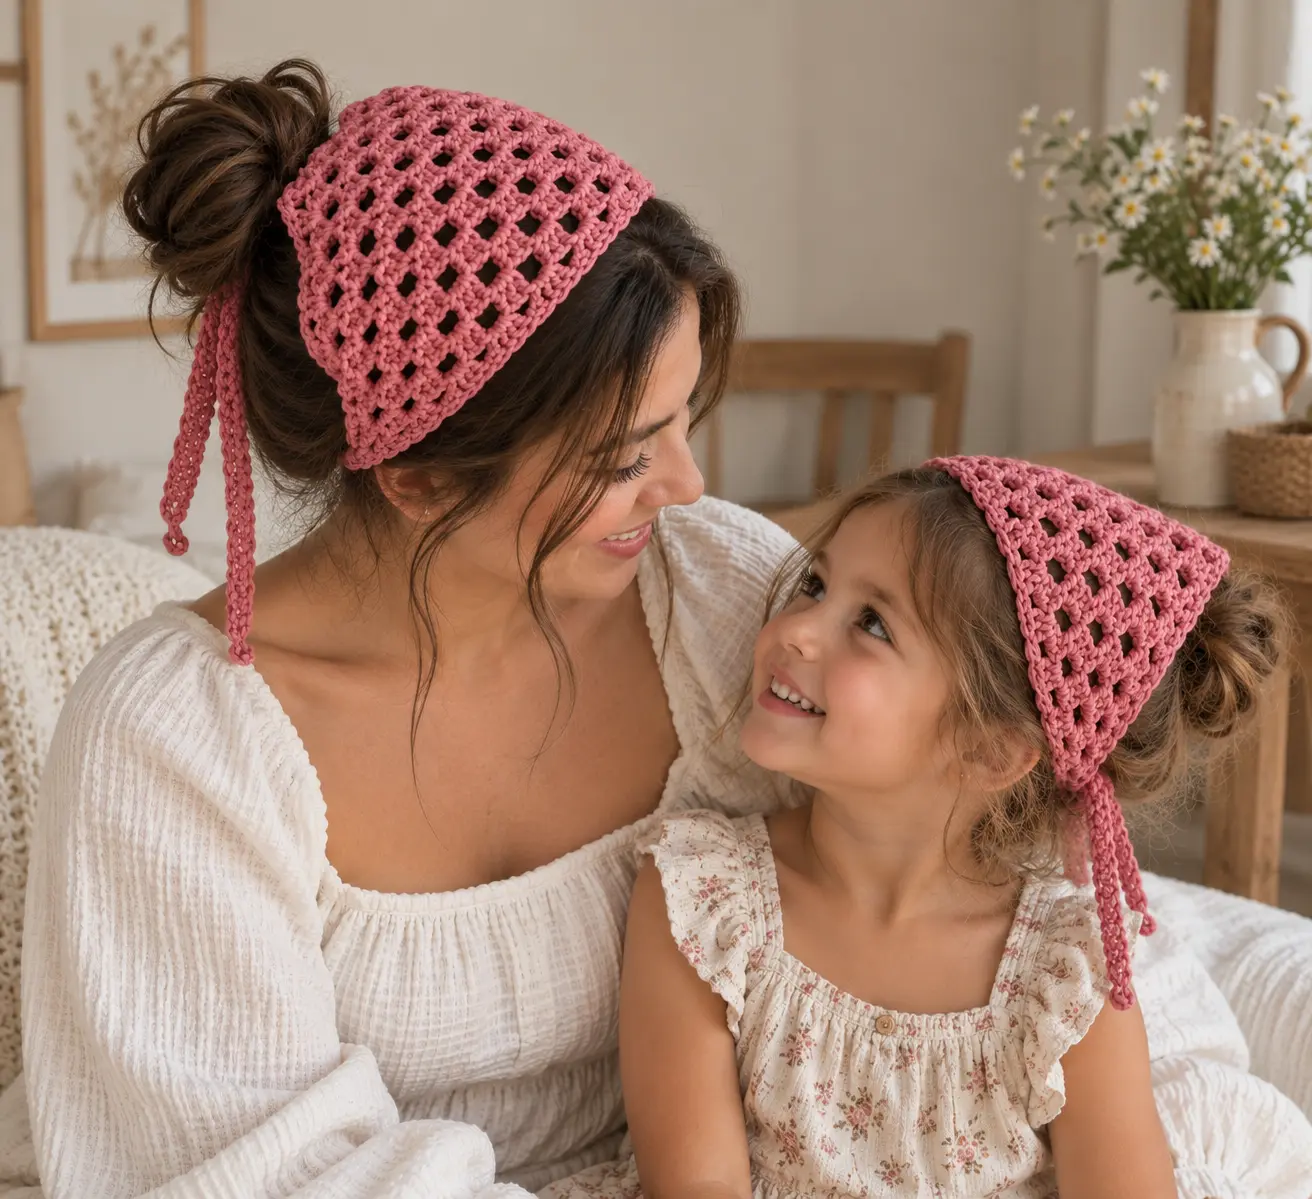
There’s something so satisfying about a crochet project that looks beautiful but is much easier to make than you expect.
This crochet bandana pattern is exactly that kind of project. ♡
It starts with one tiny granny-style triangle, then grows row by row using the same simple rhythm. Once you understand where the granny clusters go, you can relax, crochet, and watch your little triangle slowly turn into a wearable bandana.
I especially love this project for beginners because there’s no complicated shaping to memorize. You simply keep increasing around the center point until the bandana feels right for you.
Choose a soft cotton yarn for a light everyday look, make it in a warm earthy shade for fall, or use your favorite color and make it completely yours.
Ready? Grab your hook and let’s make one together. 🧶
Why You’ll Love This Crochet Bandana ♡
If you already know how to make a chain and a double crochet, you’re well on your way.
This granny stitch bandana uses repeating groups of double crochet stitches, with a simple increase at the center that creates the triangle shape naturally.
It’s also wonderfully customizable.
You can make it smaller for a delicate hair scarf, keep adding rows for more coverage, change the length of the ties, or finish the edges differently once you’re comfortable with the basic pattern.
And because the project grows quickly, it’s a lovely choice when you want something satisfying without committing to a huge crochet project.
Crochet Bandana Materials
You don’t need much for this project:
- DK (#3) or light Worsted (#4) cotton yarn
- 4 mm crochet hook
- Scissors
- Tapestry needle
- Measuring tape
Cotton is one of my favorite choices for a crochet hair scarf because it gives the granny stitches nice definition while keeping the finished bandana comfortable.
Your exact finished size can vary depending on your yarn, hook, and crochet tension, so think of the measurements below as a guide rather than a strict rule.
Finished width: approximately 18–22 inches / 46–56 cm across the top before the ties.
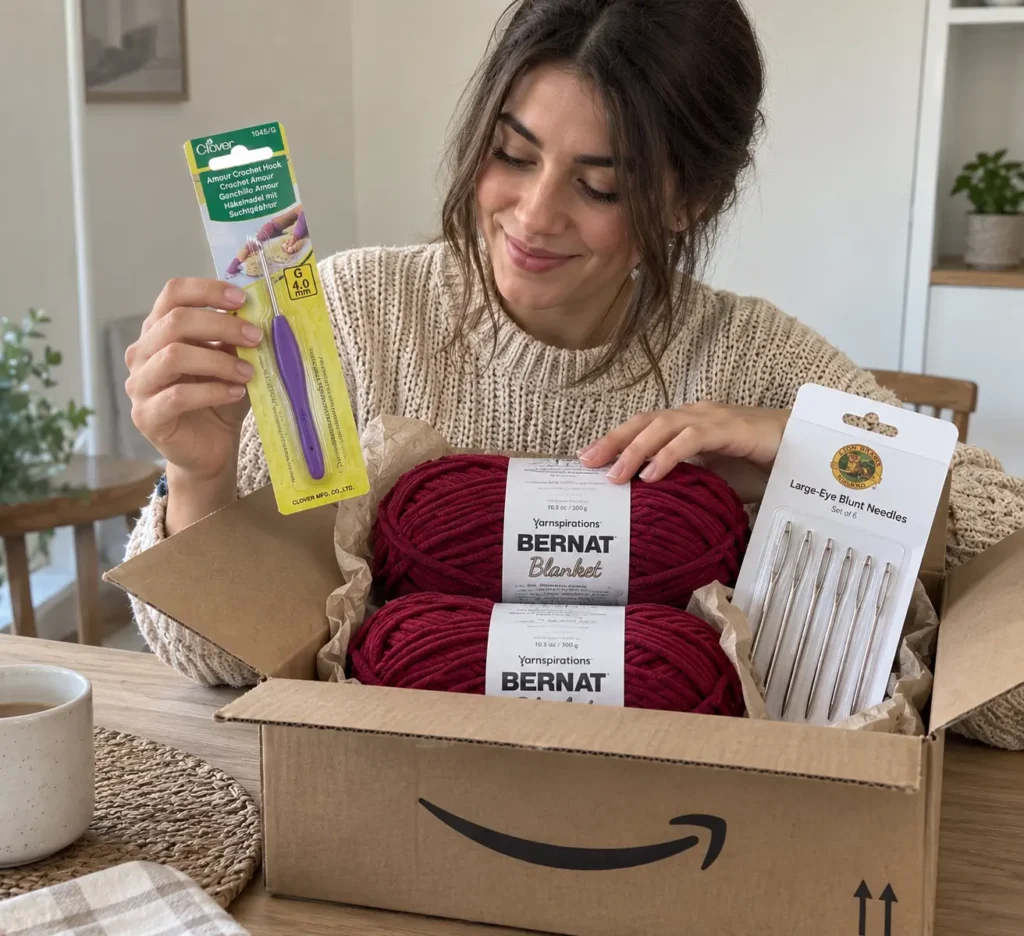
My Crochet Bandana Supplies ♡
Clover Amour 4.0 mm Crochet Hook
A comfortable ergonomic 4 mm crochet hook that’s a lovely choice for this granny stitch crochet bandana.
Caron All Day Cotton Yarn
A soft 100% mercerized cotton #4 worsted yarn that’s a great choice for making this comfortable crochet bandana.
Lion Brand Large-Eye Blunt Needles
A handy set of large-eye tapestry needles for weaving in yarn ends and finishing your crochet projects neatly.
Abbreviations
This pattern uses US crochet terminology.
ch – chain
dc – double crochet
sc – single crochet
sl st – slip stitch
sp – space
ch-1 sp – chain-1 space
ch-2 sp – chain-2 space
Pattern Notes
The turning ch 3 counts as the first double crochet.
You’ll turn your work at the end of each row.
The ch-2 space in the middle is especially important. That is your center point, and working an increase there on every row is what keeps the bandana growing into a triangle.
How to Crochet the Granny Stitch Bandana
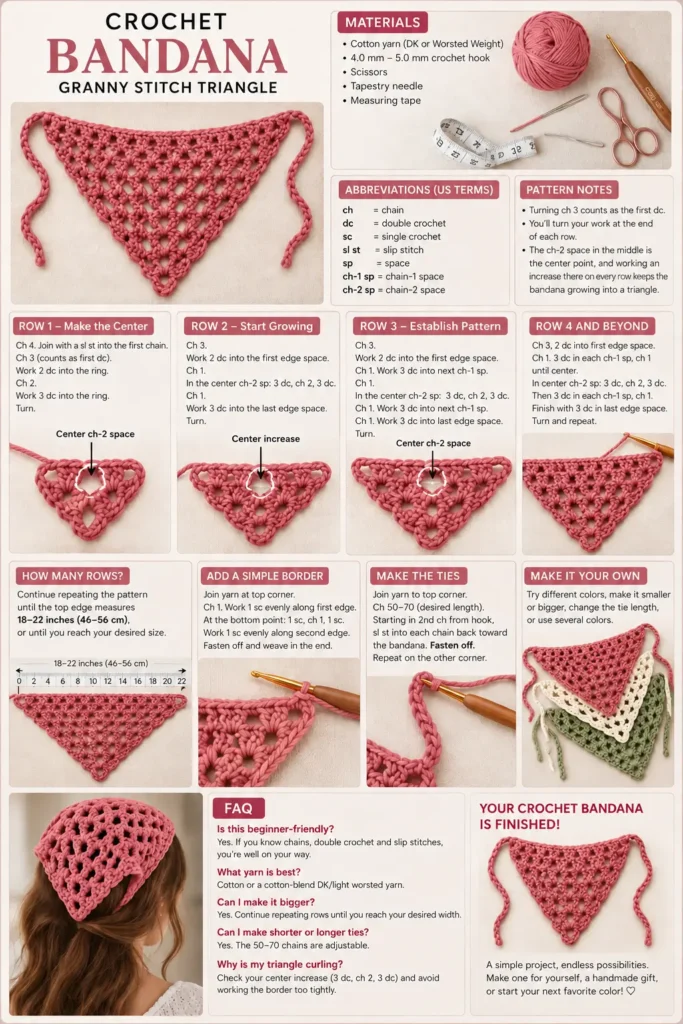
Row 1 – Make the Center
Ch 4.
Join with a sl st into the first chain to create a small ring.
Ch 3 — this counts as your first dc.
Work 2 dc into the ring.
Ch 2.
Work 3 dc into the same ring.
Turn.
You should now have two little granny clusters separated by one ch-2 center space.
That tiny center space is going to guide the shape of the entire bandana, so it helps to recognize it from the beginning.
Row 2 – Start Growing the Triangle
Ch 3.
Work 2 dc into the first edge space.
Ch 1.
Into the center ch-2 sp, work:
3 dc, ch 2, 3 dc
Ch 1.
Work 3 dc into the last edge space.
Turn.
You should already see the beginning of a wider triangle.
The 3 dc, ch 2, 3 dc in the middle is your center increase. You’ll continue using this same idea as the bandana grows.
Row 3 – Establish the Granny Stitch Pattern
Ch 3.
Work 2 dc into the first edge space.
Ch 1.
Work 3 dc into the next ch-1 sp.
Ch 1.
When you reach the center ch-2 sp, work:
3 dc, ch 2, 3 dc
Ch 1.
Work 3 dc into the next ch-1 sp.
Ch 1.
Work 3 dc into the final edge space.
Turn.
Now the familiar granny-style pattern should be much easier to see.
Row 4 and Beyond – Repeat the Granny Pattern
From here, the crochet bandana pattern becomes wonderfully repetitive.
At the beginning of each row:
Ch 3, then work 2 dc into the first edge space.
Ch 1.
Across the first half of the bandana, work:
3 dc into each ch-1 space, ch 1
until you reach the center.
Into the center ch-2 sp, always work:
3 dc, ch 2, 3 dc
Then continue across the second half:
Ch 1, work 3 dc into each ch-1 space, placing ch 1 between the granny clusters.
Finish with 3 dc in the final edge space.
Turn.
Then repeat.
That’s the rhythm:
granny clusters → center increase → granny clusters.
Once your hands get used to it, this is the part where the project becomes really relaxing. ♡
How Many Rows Should You Crochet?
Instead of relying on one exact number of rows, I recommend measuring your bandana as you go.
Continue repeating the established granny row until the straight top edge measures approximately:
18–22 inches / 46–56 cm
or until it gives you the coverage you want.
This makes the pattern easier to adapt because two crocheters can use the same hook and yarn weight and still end up with slightly different measurements.
Want a smaller crochet hair scarf? Stop earlier.
Want more coverage? Add a few more rows.
That flexibility is one of the best parts of this pattern.
Add a Simple Crochet Border
Once you’re happy with the size, you can leave the granny edges as they are, or add a simple border for a cleaner finish.
With the right side facing you, join your yarn at one upper corner.
Ch 1.
Work 1 sc evenly along the first diagonal edge.
At the bottom point, work:
1 sc, ch 1, 1 sc
Continue working 1 sc evenly along the second diagonal edge.
Fasten off and weave in the end.
Try not to squeeze too many stitches into the edges. If the border starts to ripple, you may be adding too many stitches.
Make the Bandana Ties
Now we need a way to secure the bandana.
Join your yarn to one of the upper corners.
Ch 50–70, depending on how long you want your tie.
Starting in the second chain from your hook, sl st into each chain all the way back toward the bandana.
Fasten off.
Repeat on the opposite upper corner.
Before weaving in everything permanently, try the bandana on and check the tie length.
If you prefer a bow with longer tails, simply add more chains.
Make It Your Own ♡
This is where a simple beginner crochet bandana can become completely different from everyone else’s.
Try cream for a soft minimalist look, burgundy for fall, dusty pink for something sweet, sage green for an earthy style, or use several colors and change yarn every few rows.
You could even make the final row in a contrasting shade.
Once you understand the triangle construction, you’re not really limited to making just one bandana.
And yes… this is exactly the kind of project where you finish the first one and immediately start thinking about what color the second one should be. 😄
Crochet Bandana FAQ
Is this crochet bandana beginner-friendly?
Yes. If you’re comfortable with chains, double crochet stitches, and slip stitches, the repeating granny construction is relatively simple to learn.
The most important thing is recognizing the center ch-2 space, because that’s where you make the increase on every row.
What yarn is best for a crochet bandana?
Cotton or a cotton-blend DK/light worsted yarn is a practical choice because it can provide good stitch definition without making the bandana overly bulky.
Can I make the bandana bigger?
Absolutely.
Simply continue repeating the granny rows until the top edge reaches the width and coverage you prefer.
Can I make shorter or longer ties?
Yes. The suggested 50–70 chains are adjustable. Add fewer chains for shorter ties or more if you want a larger bow.
Why is my crochet triangle curling?
Check your center increase first.
Each row needs the full:
3 dc, ch 2, 3 dc
inside the center ch-2 space.
Also avoid working your border too tightly.
Your Crochet Bandana Is Finished! ♡
And there it is — your very own handmade crochet bandana. 🧶
I love projects like this because they remind you that crochet doesn’t need to be complicated to create something beautiful and wearable.
A few granny clusters, one repeating center increase, two simple ties… and that tiny starting ring has turned into something completely handmade by you. ♡
If your triangle isn’t perfectly symmetrical the first time, keep going. Check your spaces, count your clusters, find that center ch-2 space, and enjoy the process. Sometimes the projects that teach us the most become our favorites.
Want to keep crocheting?
If you’re still learning the basics, my How to Crochet for Beginners guide walks you through the essential stitches and techniques step by step.
And if you’re looking for another fun project to add to your crochet list, take a peek at these Halloween Crochet Ideas for more cute inspiration.
Love this crochet bandana? ♡ Save this pattern to Pinterest so you can easily find it when you’re ready to make yours — and share it with a crochet friend who might love it too! 📌
Happy crocheting! 🧶♡