Easy Crochet Baby Booties Pattern: 10 Simple Steps for Little Feet
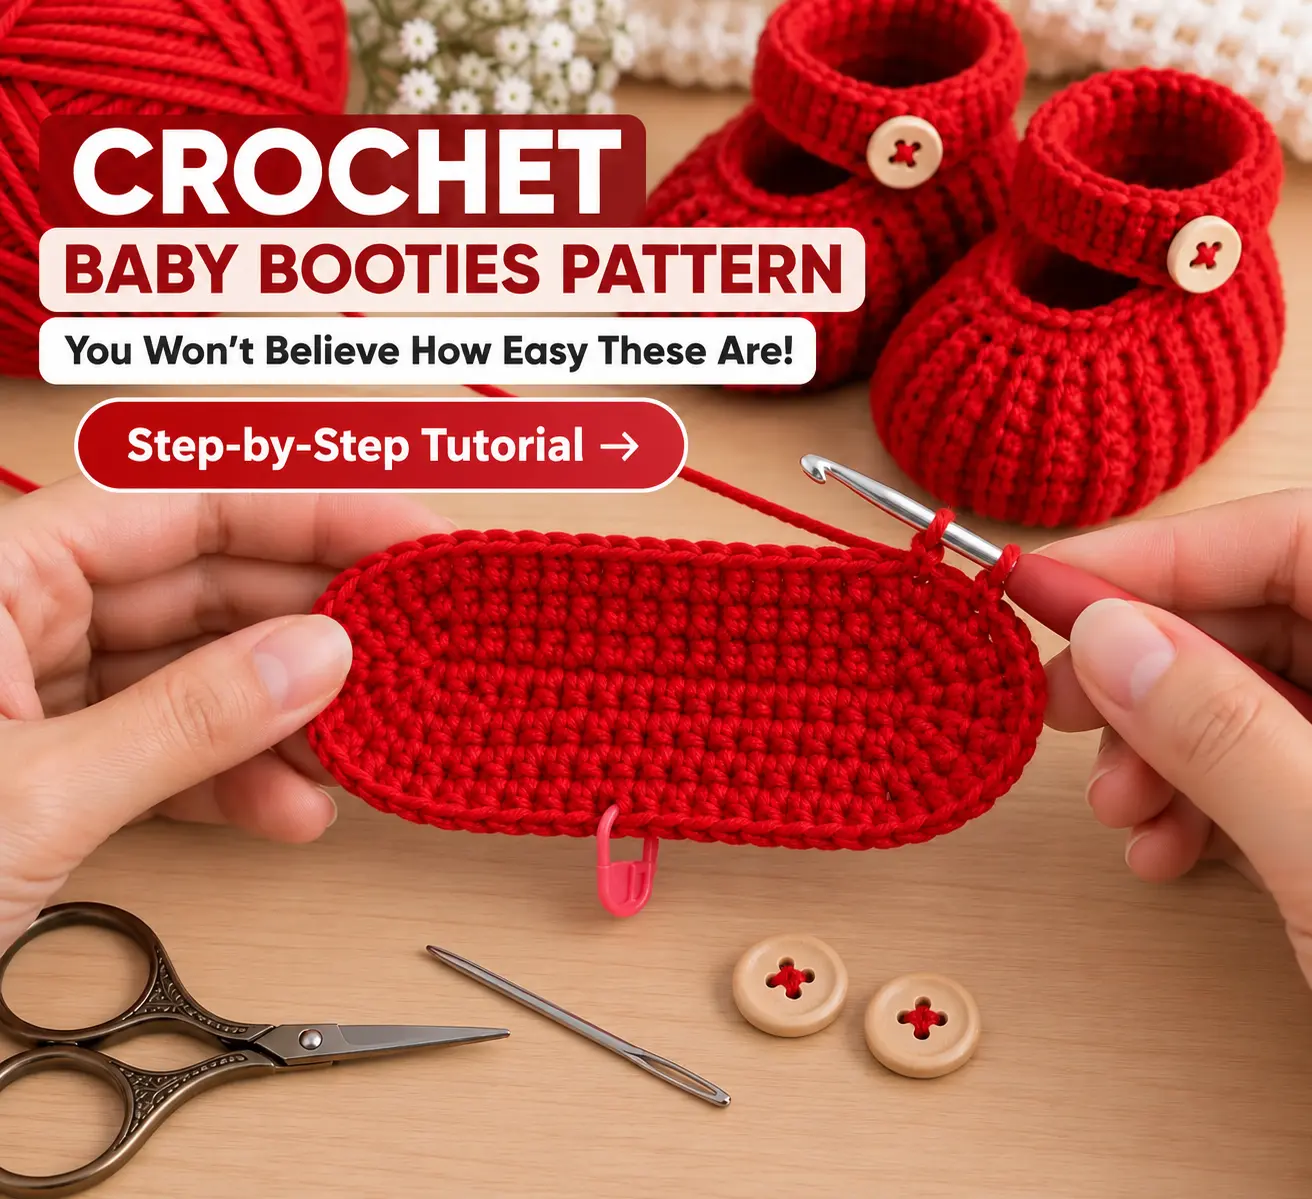
There is something almost impossible to resist about a tiny pair of handmade baby booties.
The first time I placed a finished pair in the palm of my hand, I had the same thought I always have with baby crochet projects: How can something this small feel so special?
Maybe it is because baby booties are more than just another quick crochet project. Every little stitch feels intentional. You can imagine the tiny toes that will eventually slip inside them, the first family photos, or the moment someone opens a handmade baby-shower gift and realizes you made it especially for their little one.
And these booties have one detail I especially love: texture.
Instead of looking flat and ordinary, the front develops beautiful raised ribs that make the shoes look much more intricate than you might expect.
But don’t let that texture fool you.
Once we break the construction into small sections, you’ll see that you’re essentially building the bootie one stage at a time: shaping the base, creating the textured upper, narrowing the toe, making the strap, and finally turning everything into a tiny finished shoe.
So grab your yarn and crochet hook. By the end of this guide, those first few stitches will look completely different.
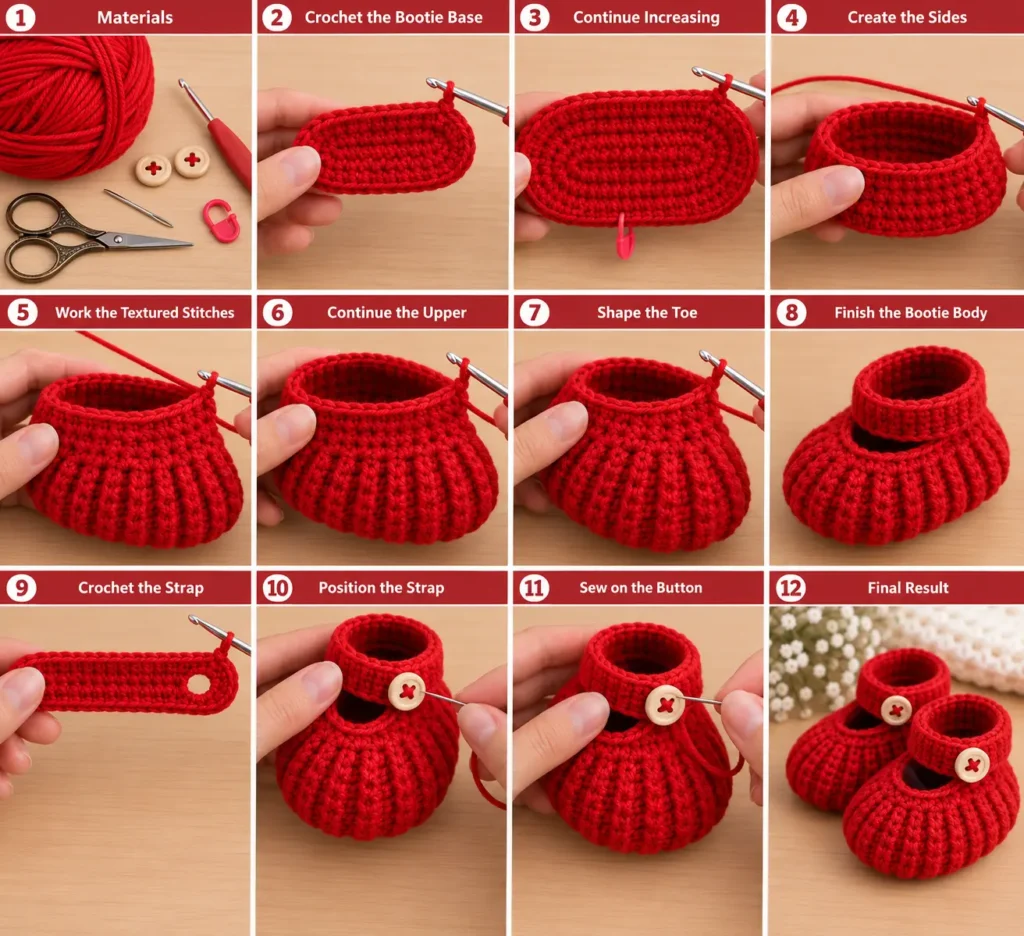
Crochet Baby Booties Pattern at a Glance
Before we put a loop on the hook, it helps to know exactly where we’re going.
This pattern is designed for two baby sizes:
3–6 months and 6–12 months.
Throughout the source pattern, the smaller-size number appears first and the larger-size adjustment appears in parentheses.
That means you should choose your size before beginning and keep following the corresponding numbers all the way through.
The bootie itself is worked flat rather than continuously in the round. You’ll shape the fabric with increases, introduce textured post stitches, reduce the center to form the toe, and then seam the piece during finishing.
The strap is made separately and attached afterward.
Knowing that construction now will make the individual rows much easier to understand later.
Materials You’ll Need
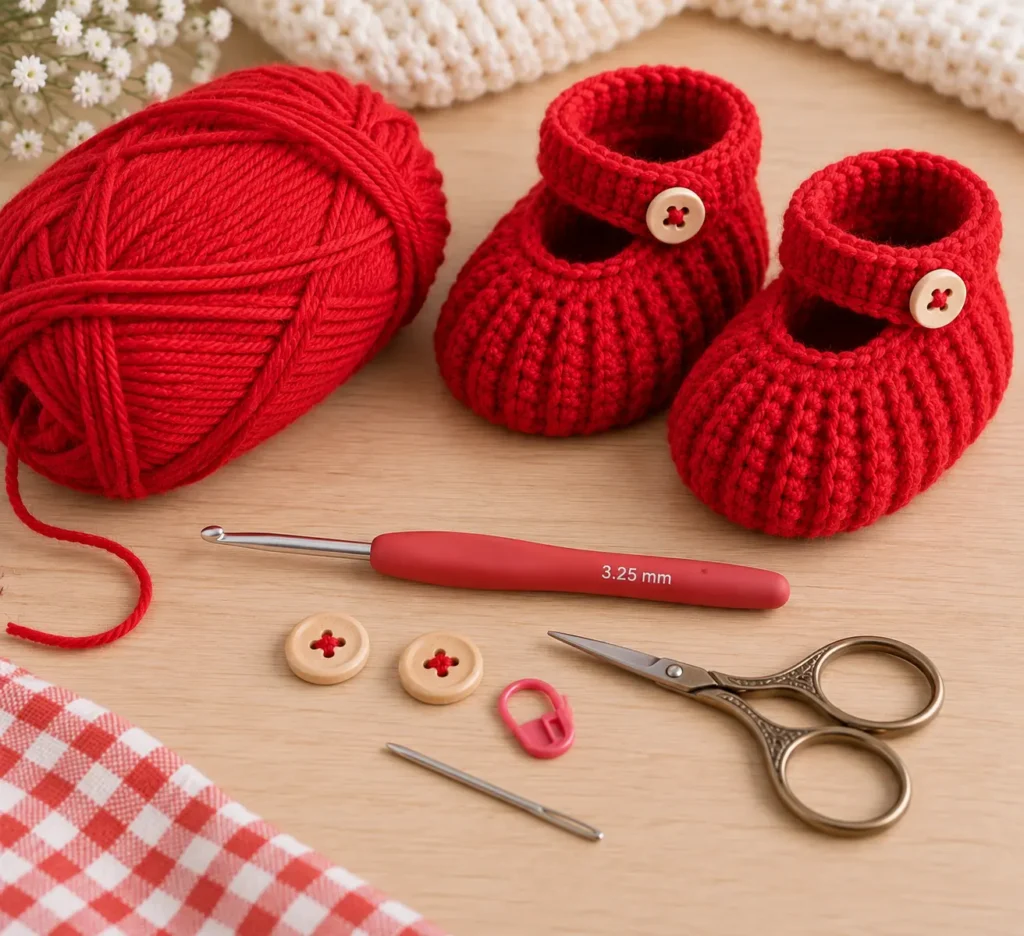
One reason I love small baby projects is that you don’t need a giant pile of supplies before you can start.
For the original construction, you’ll need:
- Baby-weight yarn; the source specifies Bernat Baby, 50 g / 1.75 oz, 175 m / 191 yd
- 3.25 mm crochet hook (US D/3), or the hook size needed to achieve gauge
- 2 buttons
- Stitch marker
- Yarn needle
- Scissors
Those first three specifications come directly from the pattern sheet.
I’m using red for our version because it makes those raised stitches pop beautifully, but this design would also be lovely in cream, dusty pink, sage, pale blue, lavender, or a warm mustard.
Before choosing the prettiest yarn in your basket, though, there’s one tiny detail worth checking first.
Don’t Skip the Gauge
Baby booties are small.
That also means a small difference in stitch size can make a surprisingly large difference in the finished fit.
The specified gauge is:
22 single crochet stitches and 24 rows = 4 inches (10 cm).
Make a small swatch before beginning and measure it without stretching the fabric.
If your swatch is larger than 4 inches, your stitches are probably too loose. Try a smaller hook.
If it is smaller, your tension may be tighter than required, so move up a hook size.
And once your gauge is close, we’re ready for the fun part: turning an ordinary foundation chain into the beginning of a tiny shoe.
Crochet Abbreviations Used in This Tutorial
Before starting, let’s make the shorthand less intimidating.
ch — chain
sc — single crochet
hdc — half double crochet
dc — double crochet
st / sts — stitch / stitches
RS — right side
Yoh — yarn over hook
dcfp — double crochet around the front post
dcbp — double crochet around the back post
dcbptog — back-post double crochet stitches worked together
rep — repeat
sp — space
If front-post and back-post stitches are new to you, don’t worry. They sound much more complicated than they actually are.
The important difference is where your hook goes.
A normal crochet stitch is worked into the top loops. A post stitch wraps around the vertical body—or “post”—of the stitch below.
That little change is exactly what gives our red booties their gorgeous ribbed texture.
But first, we need something to build those ribs on.
Step 1: Start the Foundation and Shape the Base
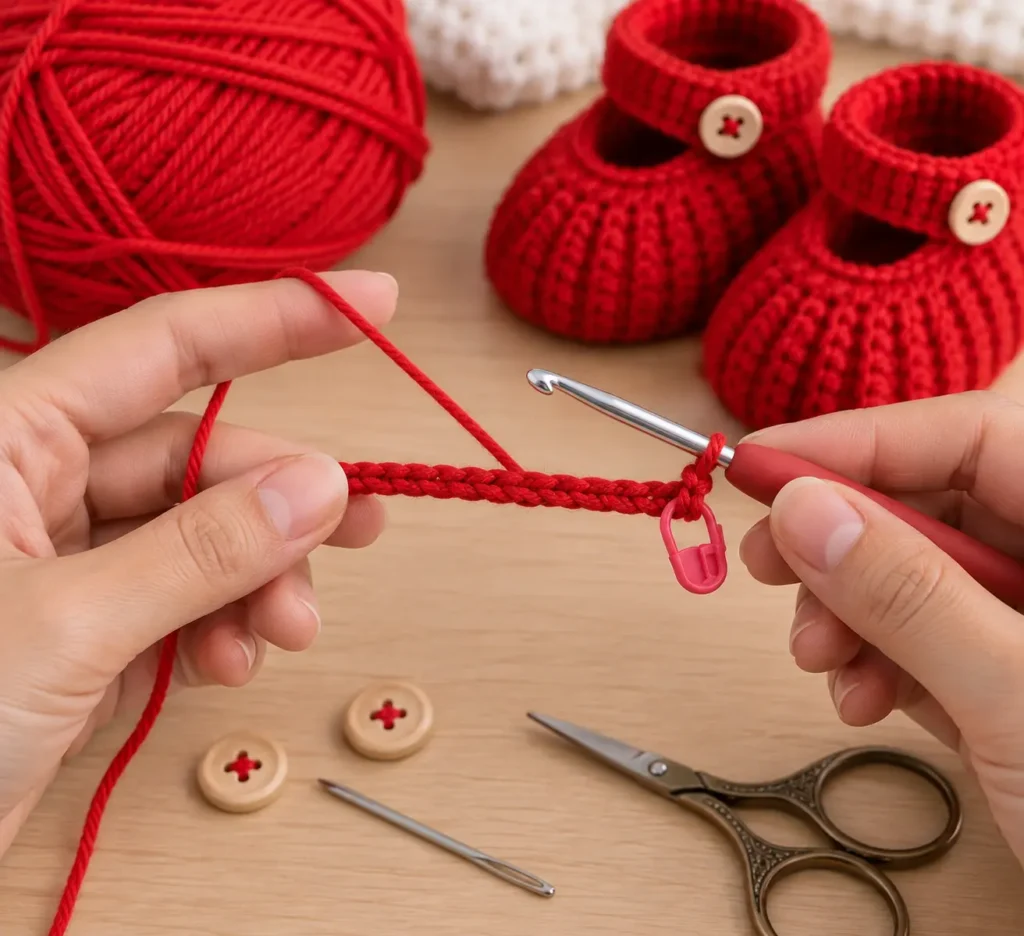
The source begins with:
Chain 14 for 3–6 months or chain 22 for 6–12 months.
Don’t make this chain too tight.
You want the chain stitches to remain flexible enough for your hook to enter comfortably, because the first shaping row contains several increases.
First shaping row
Starting in the second chain from your hook, the row combines ordinary single crochets with places where two single crochets are worked into the same chain.
Those increases are deliberate.
You’re not trying to make a perfectly straight strip. You’re beginning to create the width and curvature the bootie needs.
A stitch marker is also placed at the designated center stitch during this row. In the original instructions, the completed first row contains 19 stitches for the smaller size or 27 for the larger size.
That marker matters more than it might seem right now.
Keep it in place, because it gives you a visual reference for the shaping that comes next.
Step 2: Continue Increasing the Bootie
Turn your work.
The second row begins with chain 1, followed by another carefully placed set of single-crochet increases.
The shaping is balanced around the marked center stitch: increases are worked before and after that marker, with another increase at each outer edge.
By the end of this row, you should have:
25 stitches — 3–6 months
33 stitches — 6–12 months
The source then repeats this shaping row three more times, bringing the fabric to 43 stitches for the smaller size or 51 stitches for the larger size.
This is a perfect moment to stop and look at your work.
It shouldn’t look like a finished bootie yet.
Instead, you should see a wider shaped piece developing from that relatively short starting chain.
If your stitch count is wrong here, correct it now rather than hoping it disappears later. The next section relies on those stitches to create an even texture.
And this is where our little red shoe finally starts getting interesting.
Step 3: Create the Foundation for the Textured Upper
For the next row, chain 2.
One detail is very important:
The beginning chain 2 does not count as a half double crochet.
Work one half double crochet across the row.
This row might feel almost too simple after all those carefully placed increases, but it’s setting up the stitches we need for the raised texture.
Turn your work when you reach the end.
Now look at the stitches.
Instead of focusing only on the little “V” shapes along the top, notice the vertical bodies underneath them.
Those are the posts we’re about to crochet around.
Step 4: Make the Raised Front-Post Texture
Chain 2 and work a half double crochet in the first stitch.
Now you’ll alternate the half double crochet with a front-post double crochet.
For a front-post double crochet:
- Yarn over.
- Instead of inserting the hook through the top loops, guide it around the post of the next stitch from the front.
- Draw up a loop.
- Yarn over and pull through two loops.
- Yarn over again and pull through the remaining two loops.
You’ve just made a front-post double crochet.
The source alternates this post stitch with half double crochet across the row.
Run your fingers over the fabric.
You should already be able to feel the difference.
The post stitches sit forward from the surrounding fabric, and that subtle ridge is the beginning of the pronounced texture you see across the toe of the finished booties.
But one textured row isn’t enough.
We’re going to approach those posts from the opposite side next.
Step 5: Work the Back-Post Row
Chain 2 and begin with one half double crochet.
This time, when you reach the post stitch, you’ll work around it from the back of the fabric.
Yarn over and position your hook around the post from the back, draw up a loop, and complete the double crochet.
Continue alternating the required back-post stitches and half double crochets across the row.
The original construction repeats the front-post/back-post sequence once more after this row.
Now compare the fabric with the plain half-double-crochet row you made earlier.
That’s the transformation we wanted.
The alternating post work pushes sections of the fabric forward and backward, creating dimensional ridges rather than a flat surface.
And those ridges aren’t only decorative.
They’re about to help us create the rounded toe.
Step 6: Begin Shaping the Toe
This is the section where I recommend putting distractions aside for a few minutes.
The pattern now changes rhythm.
Instead of simply repeating texture across the entire row, you’ll work ordinary stitches and front-post stitches around the sides while strategically skipping stitches through the center section.
Those skipped stitches reduce the stitch count and begin pulling the front of the bootie inward.
After this shaping row, the stitch count drops to:
31 stitches for 3–6 months
39 stitches for 6–12 months.
If you’re wondering why the piece suddenly starts looking much more like footwear, this is why.
Until now we were creating enough fabric for the foot.
Now we’re removing width from the center so that fabric can curve around the toes instead of remaining flat.
Count before moving on.
Because the next row makes that shaping even more dramatic.
Step 7: Close and Define the Front of the Bootie
The following shaping section uses back-post stitches worked together.
Think of this as a decrease with texture built into it.
Instead of completing each back-post double crochet separately, portions of multiple stitches are worked and then joined together at the top.
The source works these decreases through the center while keeping single crochet stitches along the sides.
Take this row slowly.
After every decrease, gently spread the fabric with your fingers and check that you haven’t accidentally caught an unrelated stitch.
When you reach the end, fasten off.
Now pick up your piece.
The flat fabric from the beginning should have a much clearer toe shape, and those raised ribs should naturally draw your eye toward the front.
We’re almost at the moment when it becomes an actual shoe.
But before we seam anything, our bootie needs its sweetest little detail.
Step 8: Crochet the Button Strap
You’ll need two straps in total, one for each bootie.
For the smaller size, the source starts each strap with 33 chains; for the larger size, it uses 40 chains.
Work single crochet back along the foundation chain.
On the following row, a small chain-2 opening is created by chaining two and skipping two stitches.
That’s your buttonhole.
The final strap row works single crochet across again, including stitches into that chain-2 space, before fastening off.
Before cutting your yarn tail too short, hold the strap against the bootie.
You can already see the Mary-Jane shape appearing.
That one narrow strip completely changes the personality of the project.
And now we get to my favorite stage—the one where several loose crochet pieces suddenly become something you could actually slip onto tiny feet.
Step 9: Seam the Baby Bootie
Thread a yarn needle with a generous tail of matching yarn.
The source instructs you to sew the back and sole seam.
Take your time here.
A neat seam matters on baby booties because you don’t want an unnecessarily bulky ridge on the inside.
Align the corresponding edges before sewing and make your stitches consistently spaced.
As the seam closes, you’ll see the three-dimensional shoe shape emerge.
This is usually the point where I stop thinking, I’m crocheting a piece of fabric, and start thinking, Oh—that’s actually a tiny shoe.
But don’t weave in every end quite yet.
We still have to position the strap correctly.
Step 10: Attach the Strap and Button
Place the strap across the opening of the bootie and check its orientation before sewing.
The buttonhole should reach naturally across to the opposite side without pulling the shoe out of shape.
Once you’re happy with the placement, sew the strap securely to the bootie.
Then position your button so that it lines up with the buttonhole and stitch it firmly into place. The original finishing instructions likewise call for sewing the straps to the booties and positioning the buttons to correspond with the buttonholes.
Repeat the same process for the second bootie.
Then place them side by side.
That’s the moment you’ve been working toward.
Two tiny textured shoes, two little straps, two buttons—and suddenly that first foundation chain feels very far away.
Make the Second Bootie Match the First
The hardest thing about making a pair isn’t usually the crochet.
It’s making the second one look like the first.
Keep the same hook, yarn, tension, and size instructions for both booties.
I also recommend placing the finished first bootie beside you while working the second. Compare them after each major section rather than waiting until the end.
Check the toe width.
Check the height.
Check where your textured ribs begin and end.
And especially check your strap placement before sewing.
Tiny differences are normal in handmade crochet, but catching a tension change early makes it much easier to produce a balanced pair.
Once both match, there’s just one last detail that can take them from “homemade” to beautifully handmade.
Finishing Touches That Make a Big Difference
Weave every yarn end securely into the wrong side of the fabric.
Trim only after you’re confident the ends won’t work themselves loose.
Gently shape each bootie with your hands, smoothing the toe and arranging the strap so it sits naturally.
If your yarn can safely be blocked, light blocking can help even out the stitches—but avoid stretching the shoes, because you don’t want to change the carefully established size.
For our red pair, I love the contrast of a simple natural wooden button against the rich yarn.
Cream yarn with wooden buttons would feel timeless.
Dusty pink with pearl-look buttons could be beautiful for a baby-shower gift.
And pale blue or sage with neutral buttons would create an understated nursery look.
Just remember: if the booties are intended for a baby, buttons and other small components must be attached extremely securely and the finished item should be used with appropriate supervision, since loose small parts can present a hazard.
And with that final check, they’re ready.
Why This Crochet Baby Booties Pattern Is So Satisfying
What I like most about these booties is that they don’t depend on complicated decoration to look special.
The texture does the work.
You begin with basic chains and single crochet, build the shape gradually, and then use front- and back-post stitches to create something that looks much more elaborate.
The separate strap gives them that classic Mary-Jane silhouette, while the little button adds just enough charm.
They’re tiny enough to feel achievable, but detailed enough to teach you something along the way.
And that’s exactly the kind of crochet project I love most.
Because when you finish, you don’t just have a new pair of booties.
You have a few new techniques in your hands too.
Crochet Baby Booties FAQ
What sizes does this pattern cover?
The supplied pattern gives instructions for 3–6 months and 6–12 months.
Because babies’ feet can vary considerably, age should be treated as a general sizing guide rather than a guaranteed fit.
What crochet hook do I need?
The source specifies a 3.25 mm (US D/3) crochet hook, or whatever hook size allows you to achieve the required gauge.
Is this crochet baby booties pattern beginner-friendly?
A confident beginner who already knows chain, single crochet, half double crochet, and double crochet can work toward it, but the front-post, back-post, and post-stitch decrease sections make it more interesting than a very first crochet project.
If those techniques are new, practice them on a small swatch first.
Can I use another color?
Absolutely.
Our version is bright red, but the construction isn’t color-dependent. Cream, pink, blue, sage, lavender and mustard can all give the same bootie a completely different personality.
Why does gauge matter for such a small project?
Because the bootie itself is small, even a modest tension difference can noticeably change the finished dimensions. The specified gauge is 22 sc and 24 rows per 4 inches (10 cm).
One Last Stitch ♡
Sometimes the smallest crochet projects are the ones we remember most.
These tiny baby booties may use little yarn, but they carry so much handmade love. 🧶❤️
Take a moment to enjoy your finished pair before reaching for your next project.
Looking for another sweet idea? Explore my crochet gifts for kids.
Want to keep learning? Practice with my crochet stitches for beginners guide.
Ready to make something for yourself? Try this easy crochet bandana pattern next.
There’s always another beautiful project waiting for your hook.
And before you go, save this crochet baby booties pattern to Pinterest 📌.
That way, you’ll have it ready whenever you want to crochet another adorable pair. ♡
Want to keep this pattern handy?
Download the printable Crochet Baby Booties Pattern PDF and save it for your next crochet session.
A ball of yarn doesn’t look like much at first. Then, stitch by stitch, it becomes something worth keeping. 🧶❤️