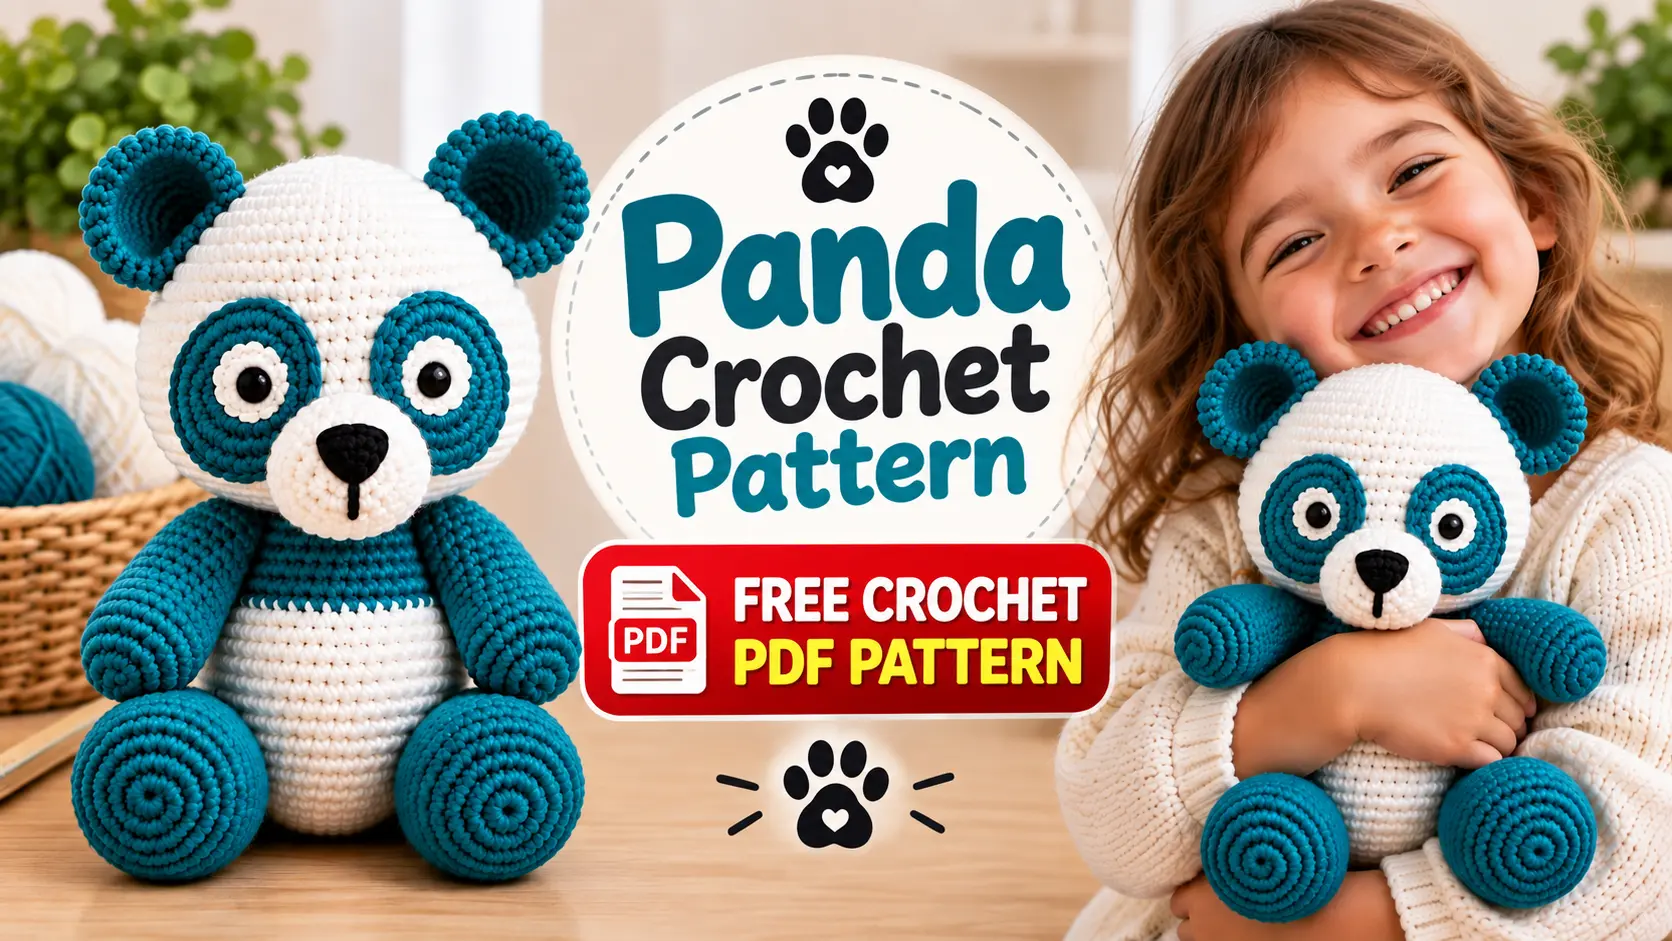
Panda Crochet Pattern: 5 Easy Tips + Free PDF
There is a funny moment in almost every amigurumi project when your table is covered with strange crocheted shapes and you wonder, How are these ever going to become an animal? That is exactly what I love about this panda crochet pattern.
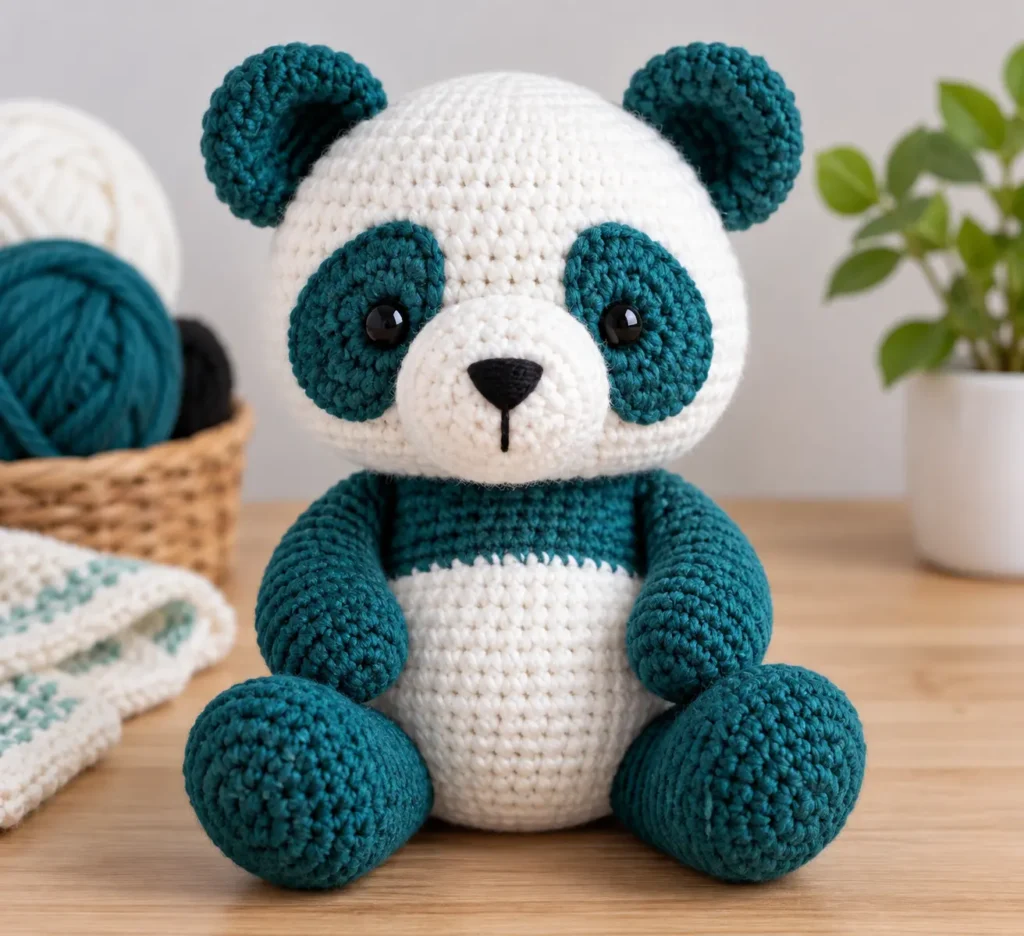
You begin with white and teal yarn, a hook, some stuffing, and a collection of simple rounds. Then the ears appear. The eye patches change the expression. The little muzzle goes into place. Suddenly, the pile of crochet pieces staring back at you has personality.
And this panda has another surprise: instead of limiting yourself to traditional black and white, you can use the beautiful teal-and-white combination shown in the original pattern. It still unmistakably looks like a panda, but it feels cheerful and different.
If you enjoy watching simple stitches turn into tiny characters, you can also browse my other amigurumi crochet patterns after finishing this one.
But first, gather your yarn. Our panda is waiting.
What You’ll Need for This Panda Crochet Pattern
One reason I like this project is that the materials are wonderfully simple. You do not need an overflowing craft cart before you can begin.
The original panda crochet pattern calls for 8-ply acrylic yarn, including approximately 50 grams of white and 50 grams of a dark color—teal in the sample—plus a small amount of black for the facial details. You will also need a 3.00 mm crochet hook, polyester hobbyfill, C-Lon cord and a sewing needle. A squeaker insert is optional.
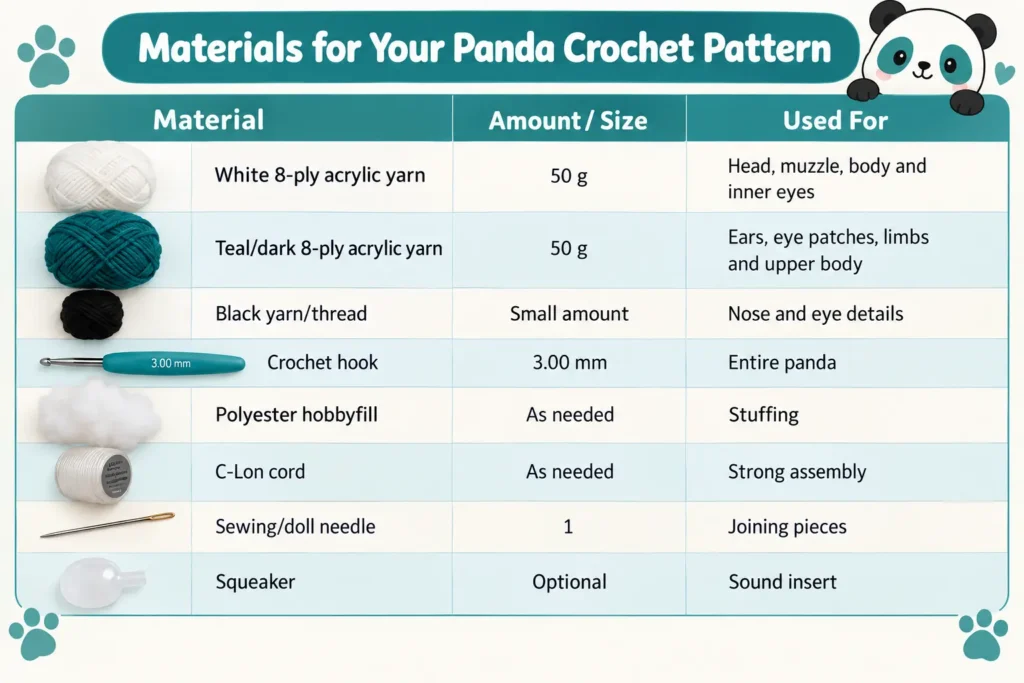
For US readers, remember that yarn labels do not always use Australian/UK “8-ply” terminology. Try to match the original yarn’s weight and fabric rather than automatically substituting a thick worsted yarn.
My Favorite Supplies for This Panda
You don’t need fancy tools for this panda crochet pattern, but these are two supplies I personally recommend for a smooth, frustration-free project.
Clover Amour Crochet Hook 3.00 mm
Comfortable 3.00 mm crochet hook with an ergonomic grip, perfect for amigurumi projects like this panda crochet pattern.
Check Today’s Price on Amazon →Poly-Fil Fairfield Fiber Fill Stuffing
Soft polyester fiber fill designed for stuffed toys, dolls, pillows, and amigurumi. Ideal for giving your panda a soft but well-shaped finish.
Check Today’s Price on Amazon →As an Amazon Associate, I earn from qualifying purchases.
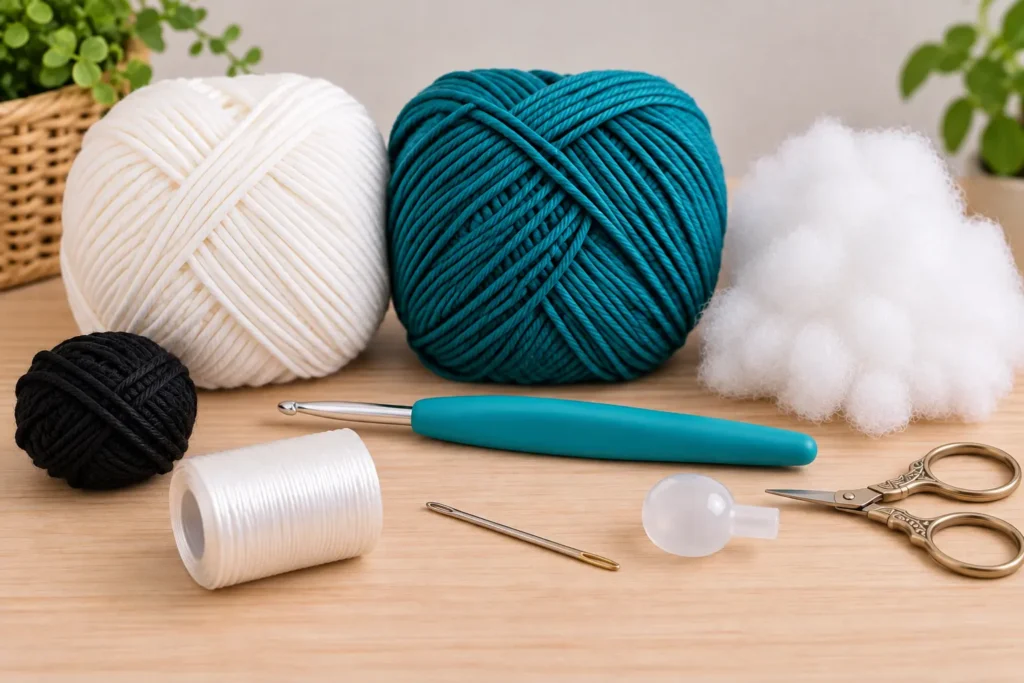
With the supplies beside you, the fun part begins—and it starts with a magic ring.
Before You Start Crocheting
Most pieces in this panda crochet pattern are worked in continuous rounds. That means you do not join or turn after each round unless the instructions specifically tell you to.
Keep a stitch marker in the first stitch. It is a tiny habit that can save you from the classic amigurumi mystery: Where did this round actually begin?
The abbreviations are straightforward: sc means single crochet in US terminology, inc means two single crochets in one stitch, and dec means an invisible decrease worked through the front loops. Parentheses indicate a repeated sequence, while the number inside square brackets gives your final stitch count.
If magic rings still make you nervous, this is a perfect place for an internal link:
Once that first circle closes neatly, you are ready for the biggest—and most satisfying—piece.
Crochet the Panda Head
The head begins in white with 8 single crochets in a magic ring. Round 2 increases every stitch to 16, and the following rounds gradually expand the shape until you reach 60 stitches.
You then work seven rounds at 60 stitches before beginning the decreases that bring the head back inward. The pattern tells you to partially stuff the head after Round 26, continue decreasing, then finish stuffing it so the shape stays round and well filled.
There is an apparent numbering typo in the PDF: after Round 11 it prints “Round 121”, followed by Round 13. I would preserve the stitch instruction but label this as an apparent source typo rather than silently pretending it was never there.
Do not pack the stuffing so tightly that it begins showing between stitches. I would rather add several small portions of fiberfill than force one large clump inside; that gives you much more control over the curve.
And when the white head is finished, don’t worry if it looks strangely anonymous. The next pieces are what turn it into a panda.
Make the Muzzle, Ears and Panda Eye Patches
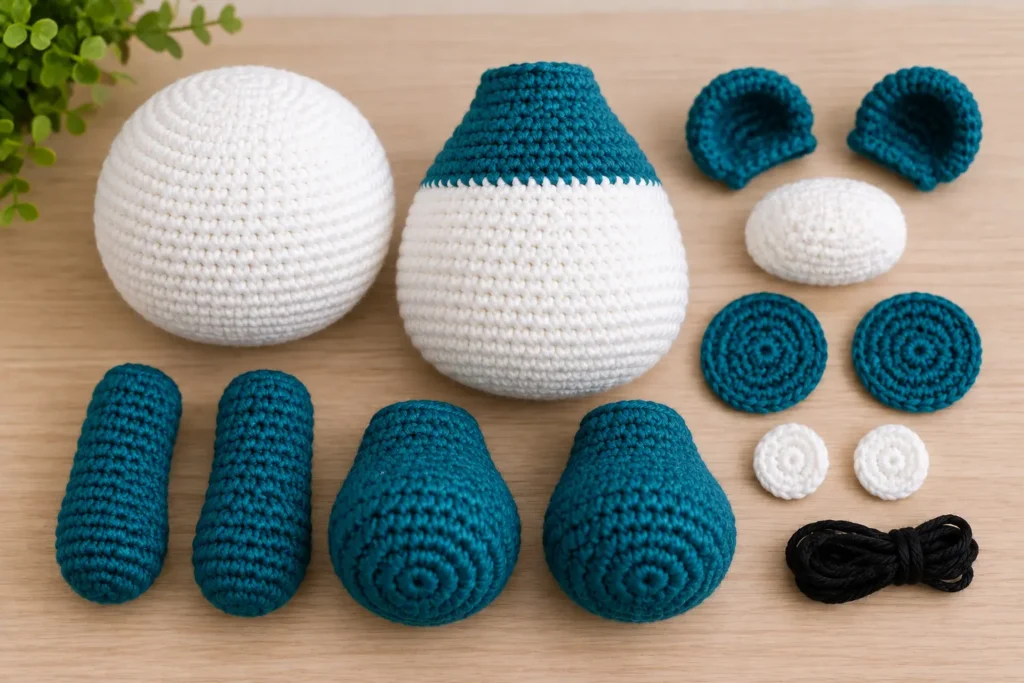
The muzzle begins with 6 single crochets in white and grows into a softly shaped 24-stitch piece. Two rounds of 24 stitches give it enough depth to sit forward from the face instead of looking like a flat patch.
Next come my favorite pieces: the ears and eye patches.
Each dark-colored ear grows from 6 to 30 stitches and continues at 30 stitches through Round 12. The edges are then placed together and crocheted through both layers with 15 single crochets. The outer eye patches are also crocheted separately in the dark color and shaped to 30 stitches.
The two tiny inner eyes are wonderfully quick: each is simply 6 single crochets in a magic ring before closing.
Spread all those pieces beside the head before sewing anything. This is the moment when your crochet panda pattern stops looking like geometry and starts looking like a face.
But don’t pick up the sewing needle yet. We still need somewhere for that head to sit.
Crochet the Body, Arms and Legs
The body begins in white and expands steadily to 54 stitches. Rounds 10 through 20 stay at 54 stitches, creating the panda’s soft belly.
Then the shaping begins. After Round 23, change to your dark color for Round 24 and continue decreasing toward the neck until 18 stitches remain at Round 30. Stuff the body fully before finishing.
The two arms are crocheted separately in the dark color. They begin wider, with the early rounds increasing to 24 stitches, then gradually narrow through carefully positioned decreases. Stuff as you work so you can shape them evenly.
The legs are larger and rounder, expanding as far as 36 stitches before narrowing toward the attachment point. That difference in proportion is what gives the finished panda amigurumi its charming seated pose.
If invisible decreases leave visible bumps in your amigurumi, add your second educational internal link here:
Now you should have a table full of panda parts. This is where patience becomes more important than speed.
How to Assemble Your Panda Amigurumi
I would never rush the face of an amigurumi. A difference of only a few stitches can completely change its expression.
According to the pattern, pin the outer eye pieces approximately between Rounds 13 and 21. Leave about four stitches between them near the top and approximately seven near the bottom, creating an inverted-V arrangement.
Then position the muzzle approximately between Rounds 16 and 24. Pin it before sewing, and stuff it gradually as you attach it. Its sides should slightly overlap the outer eye patches.
That overlap is a small detail, but visually it brings the entire face together.
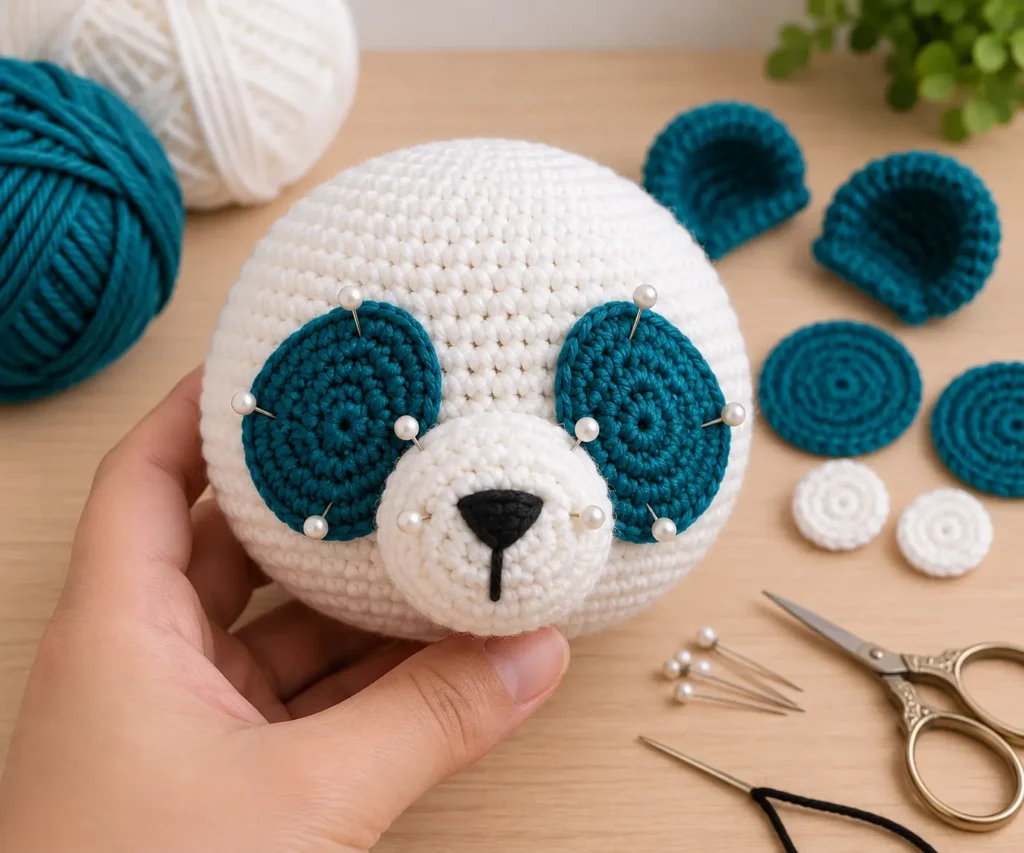
The ears need the same attention. Fold and shape them as directed, then position the top near head Round 6 and the lower edge around Round 11. Pin both before sewing so you can compare their angle.
Finally, embroider an upside-down black triangle for the nose with a line descending from its point. Black French knots complete the crocheted inner eyes.
And now comes my favorite moment: put the head on the body.
Attach the Head, Arms and Legs Securely
Position the head over the body’s neck, pin it, and sew around the join while matching the stitches. The source pattern specifically recommends reinforcing the neck seam so the head does not wobble.
The arms sit roughly five rounds below the neck. The pattern joins them through the body using a long strand, passing from one arm through the body to the other and repeating the connection for strength.
The legs use a similar method. Before attaching them, pin both in place and put the panda into its sitting position. The bottoms of the legs and body should sit level, with the legs leaning slightly forward.
This little test is worth the extra minute. Once everything is tightened and secured, your pile of circles, tubes and ovals finally becomes the panda you imagined at the beginning.
5 Finishing Tips That Make a Big Difference
Before you weave in that final yarn tail, remember five things from the original pattern: use pins before committing to placement; don’t overstuff until filling shows through the fabric; reinforce the neck seam; mark every continuous round; and secure loose ends before pulling them into the stuffing and trimming them.
Those details may sound smaller than crocheting an entire head or body, but they are often what separate a homemade-looking toy from a beautifully handmade one.
Your panda crochet pattern is finished—and this is the part I love most. You began with yarn and a hook. Now a tiny panda is sitting in front of you with its own expression.
And if one panda has already made you want to crochet another animal, that’s exactly how an amigurumi collection begins. Explore more amigurumi patterns on Tiny Crochet Nest and choose who joins your panda next.
🐼 Love this panda? Follow Amigurumi Studio on Facebook for more adorable amigurumi ideas, crochet inspiration, and creative videos! 🧶💚