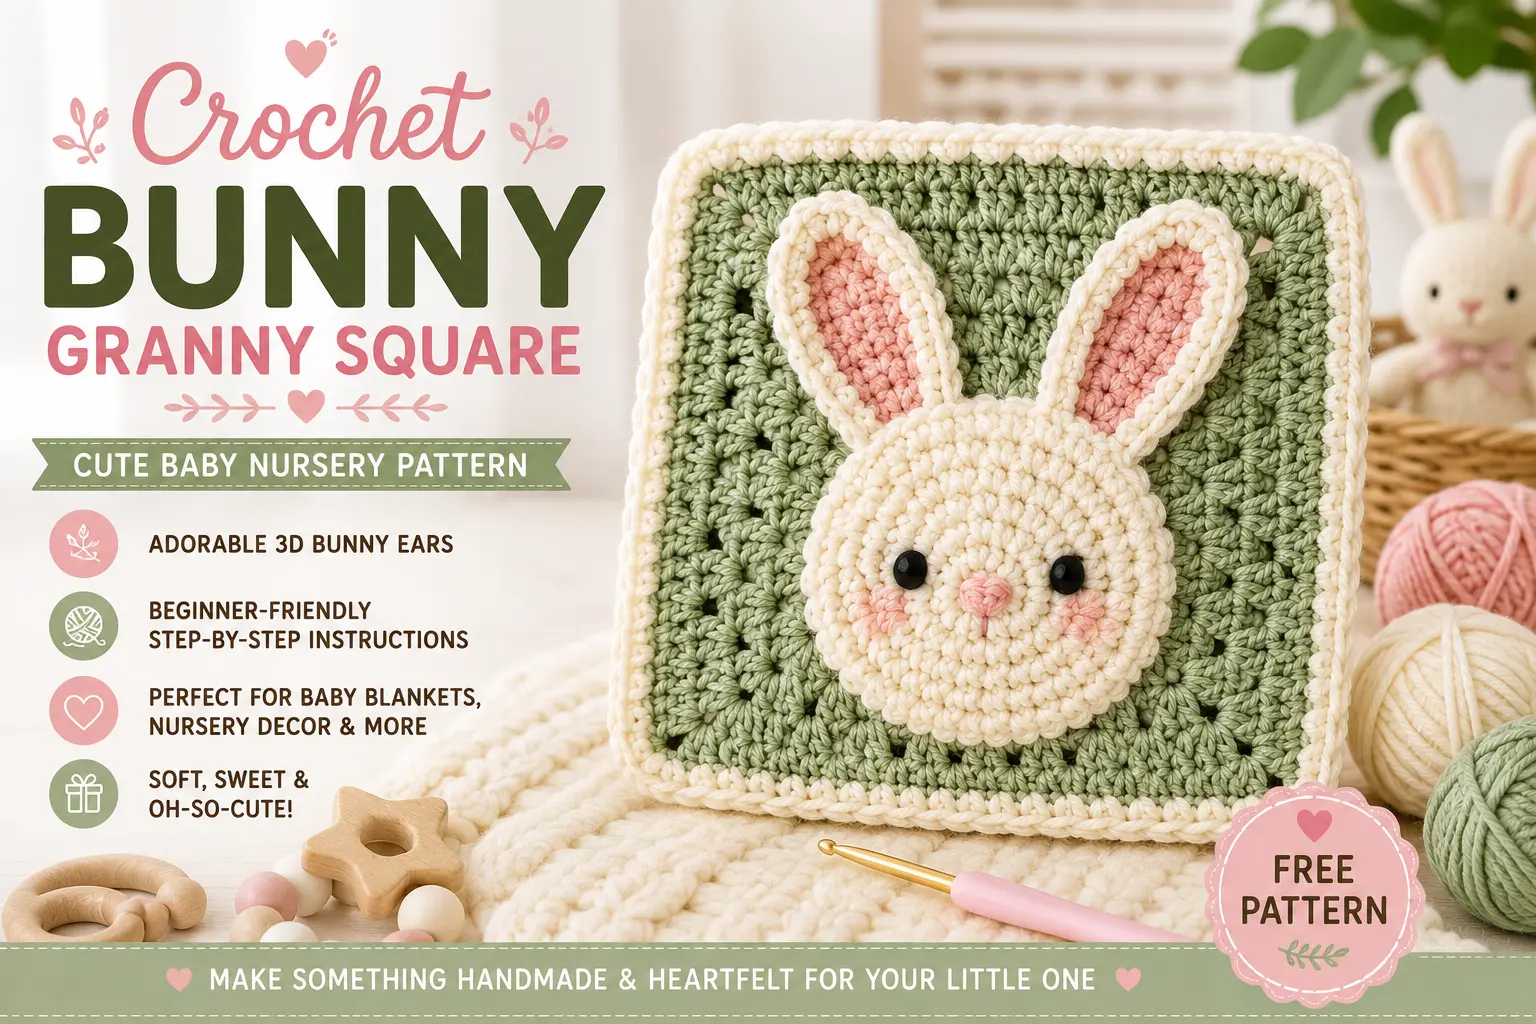
Crochet Bunny Granny Square: Cute Baby Nursery Pattern
Looking for a sweet crochet project for a baby room or nursery?
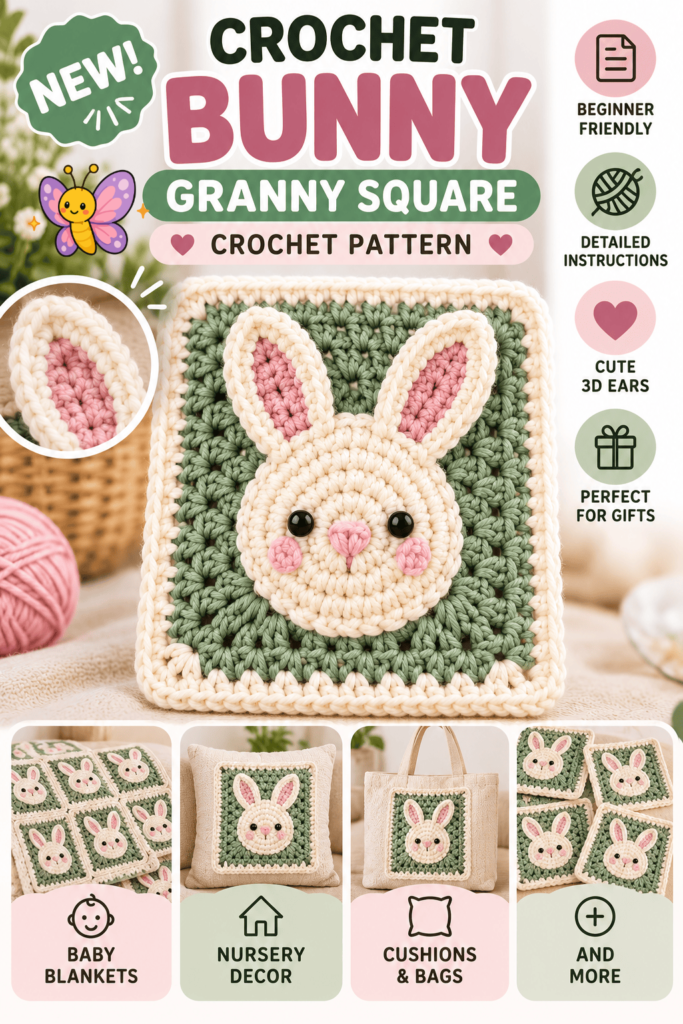
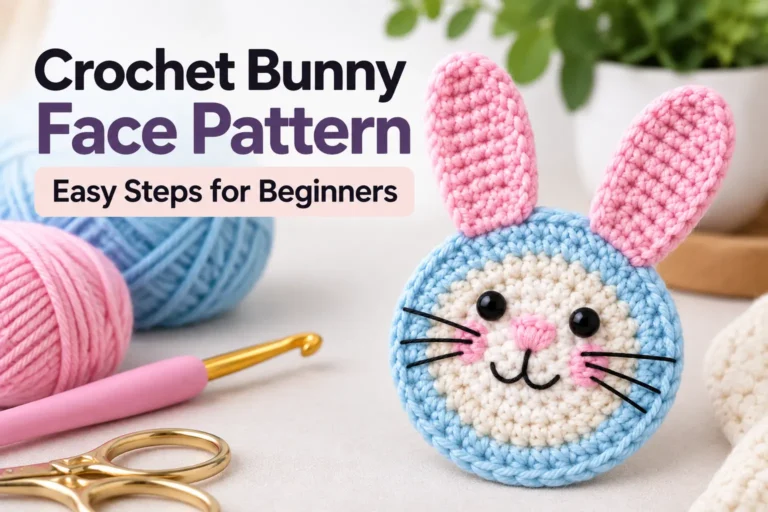
This crochet bunny granny square is a lovely little project featuring a soft round bunny face, long 3D ears, and adorable embroidered details.
For our Tiny Crochet Nest version, we’re giving the bunny a gentle nursery-inspired color palette with cream, dusty pink, sage green, and soft ivory.
The finished square can be used on its own as cute nursery decor, or you can make several squares and turn them into a baby blanket, cushion cover, wall hanging, or other handmade nursery project.
Best of all, the bunny’s ears have a fun 3D effect that gives the finished square extra personality. ♡
Why You’ll Love This Crochet Bunny Granny Square
This little bunny square is a fun project if you enjoy crochet pieces that are both cute and useful.
You’ll practice working in the round, increases, basic crochet stitches, back and front loops, and simple embroidery details.
Once you’ve made one square, you can repeat it in different soft colors to create a coordinated collection for a baby or nursery project.
Our Baby & Nursery Color Palette
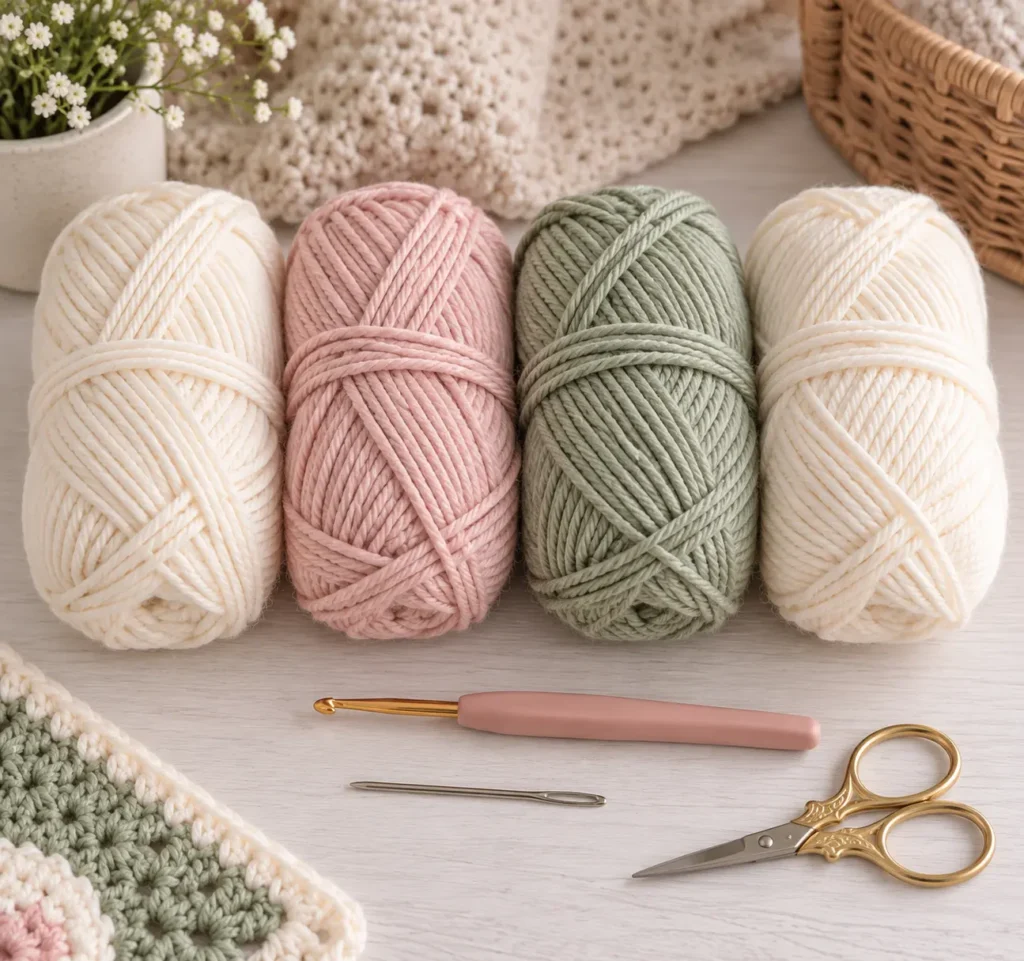
For this version, use:
- Cream — bunny face
- Dusty pink — bunny nose and small face details
- Sage green — granny square background
- Soft ivory — outer border
You can easily swap these colors for beige, baby blue, lavender, peach, or any other nursery palette you love.
Materials You’ll Need
For this project, you’ll need:
- DK or sport weight yarn in 4 colors
- 3.00 mm crochet hook
- Darning or tapestry needle
- Scissors
With the yarn and hook size used in the reference pattern, the finished square is approximately 2.95 × 2.95 inches.
My Crochet Supply Picks ♡
If you’re gathering supplies for this bunny granny square, here are a few crochet tools and yarn options you can check out on Amazon.
Bernat Blanket Yarn – Bright Sage
A super soft chenille yarn in a beautiful sage shade for cozy crochet projects and plush handmade…
3 mm Ergonomic Crochet Hook
A lightweight 3 mm crochet hook with an ergonomic grip, matching the hook size used for this bunny granny square.
Bent Tip Tapestry Needle Set
Colorful blunt yarn needles with bent tips, handy for weaving in ends and finishing your crochet projects neatly.
As an Amazon Associate I earn from qualifying purchases.
Beginner Tip: Try to use yarns of the same weight for all four colors. This will help your bunny square stay even and keep its shape.
Crochet Abbreviations Used
This pattern uses US crochet terminology:
- ch — chain
- sc — single crochet
- hdc — half double crochet
- dc — double crochet
- sl st — slip stitch
- ch-sp — chain space
- st — stitch
- yo — yarn over
- sk — skip
- inc — increase
- BLO — back loop only
- FLO / FL — front loop only
These are the abbreviations used by the source pattern.
Crochet Bunny Granny Square Step by Step
We’ll begin by crocheting the bunny’s round face.
Then we’ll transform the circle into a granny square, add the border, crochet the two long bunny ears, and finish everything with a tiny nose and embroidered facial details.
Round 1 – Start the Bunny Face
Using your cream yarn, make a magic loop.
Round 1:ch 1 + 16 sc in the magic loop, sl st to the first sc.
This creates the foundation of your bunny face.
Tiny Crochet Nest Tip: Keep the center of your magic loop nice and tight so you don’t end up with a visible hole in the middle of the bunny’s face.
Round 2 – Make the Bunny Face Larger
Continue with your cream yarn.
Round 2:ch 1 as a standing st, [5 hdc + 3 dc in the original loop to encase sts from Round 1] repeat 2 times, sl st to the first hdc.
Your bunny face should now begin to look larger and fuller.
Round 3 – Finish the Round Bunny Face
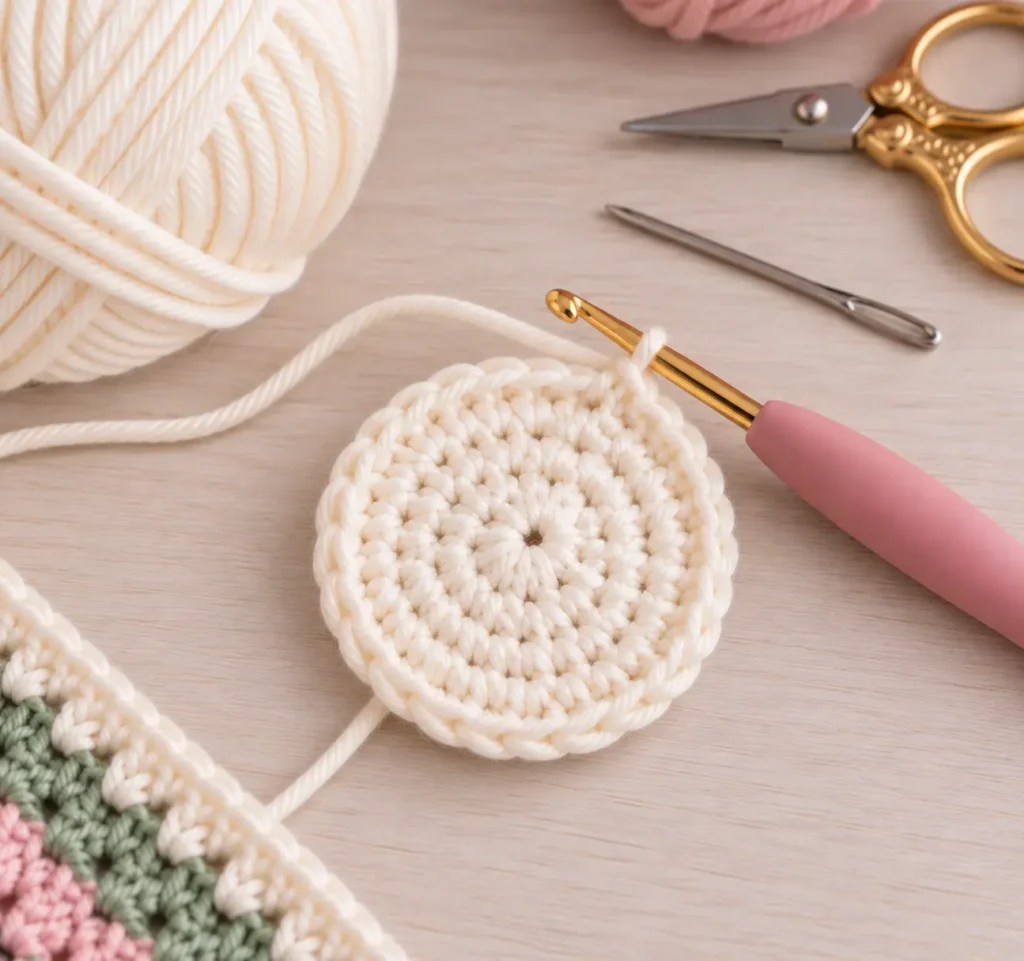
Continue working around the face.
Round 3:ch 2 as a standing st (counts as 1 hdc), 2 hdc in the same st, hdc inc, 1 hdc, hdc inc; [3 hdc in the next st, hdc inc, 1 hdc, hdc inc] repeat 3 times, sl st to the top of the first ch 2. Fasten off.
Now the main bunny face is complete.
Don’t worry about the ears yet — we’ll add them later using the unused front loops from this round.
Round 4 – Turn the Bunny Face Into a Square
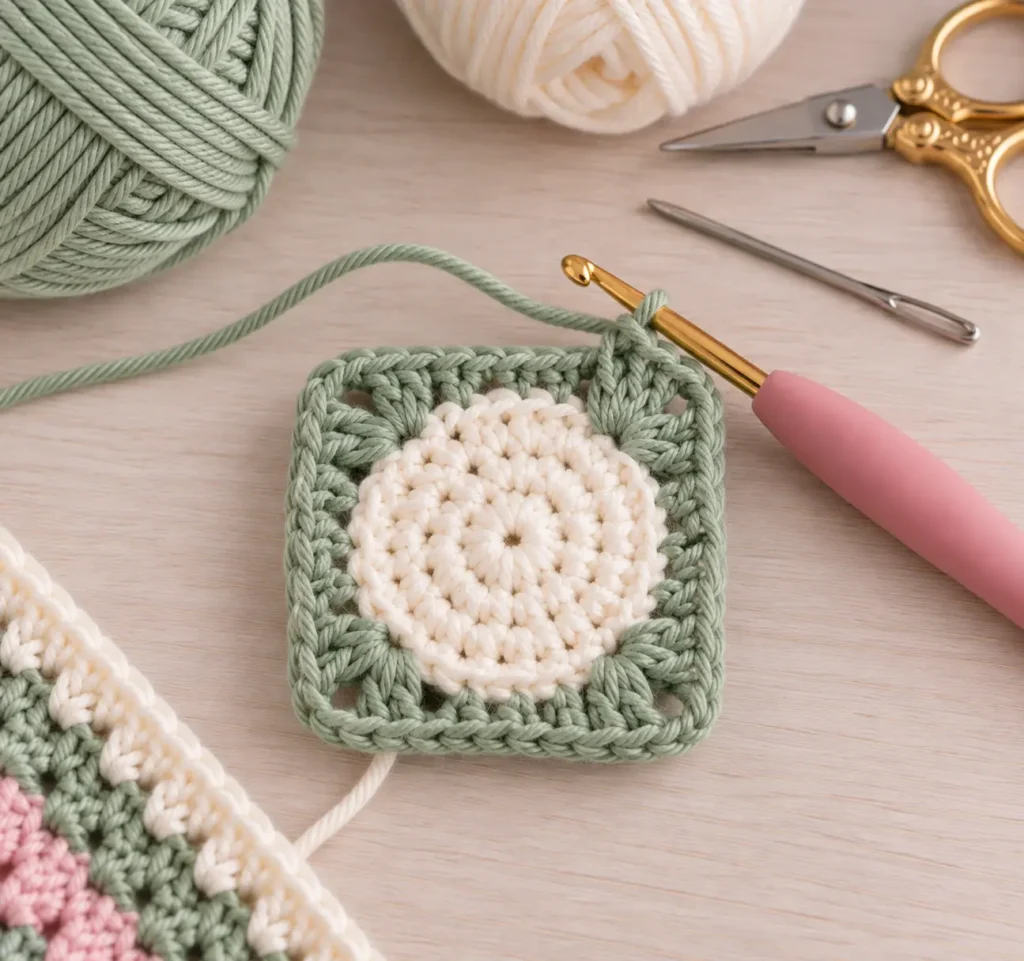
Now switch to your sage green yarn.
This is where the circular bunny face starts becoming a granny square.
Work this round in the back loops only (BLO).
Round 4:
Add new yarn in the 2nd hdc of the 3-hdc group.
ch 3 (counts as 1 dc), 1 dc in the same st, 6 hdc, dc inc, ch 3, dc inc, 2 hdc, 2 sc, 2 hdc, dc inc, ch 3;
Then:
[dc inc in the same st, 6 hdc, dc inc, ch 3, dc inc, 2 hdc, 2 sc, 2 hdc, dc inc, ch 3] repeat 1 time.
For the final corner, replace the last ch 3 with:
ch 1 + 1 hdc
Then join to the top of the first ch 3 so your hook remains positioned in the corner.
Why Are We Using BLO?
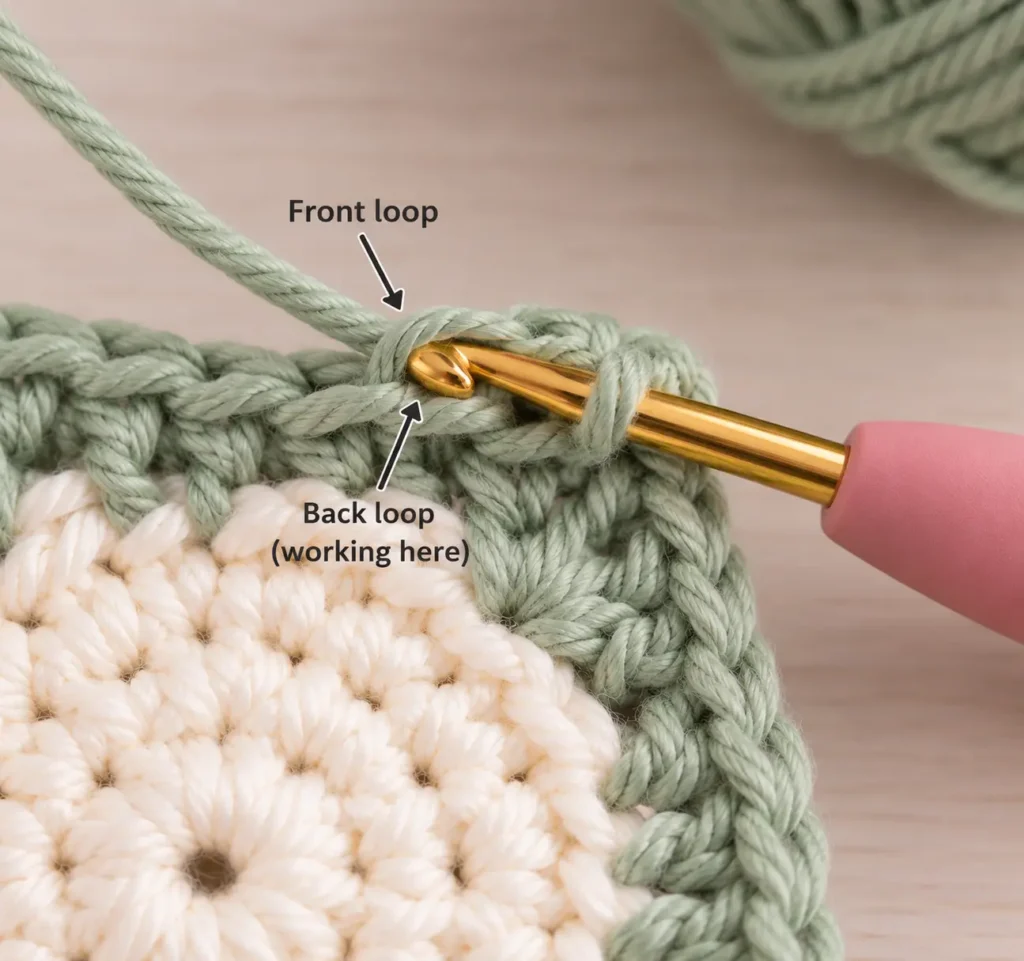
Working into the back loops leaves the front loops available.
We’ll use those loops later when adding the bunny’s ears, which helps create that cute raised 3D effect.
Round 5 – Add the Outer Border
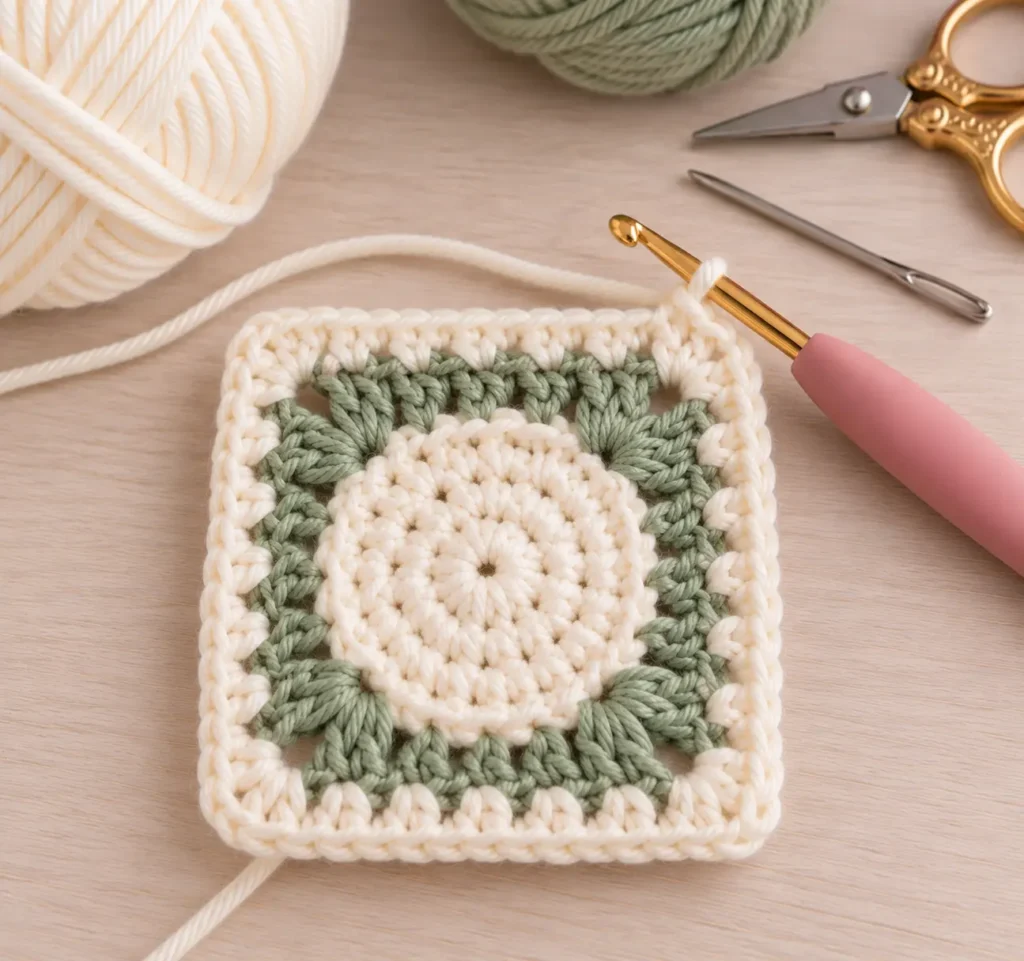
Switch to your soft ivory yarn for a gentle nursery-style border.
Round 5:
1 dc in each st.
In every corner:
2 dc + ch 3 + 2 dc
Begin the round with:
ch 3 (counts as the first dc)
At the end, slip stitch into the top of the beginning ch 3, then fasten off.
Your granny square base is now finished. ♡
Crochet the Bunny Ears
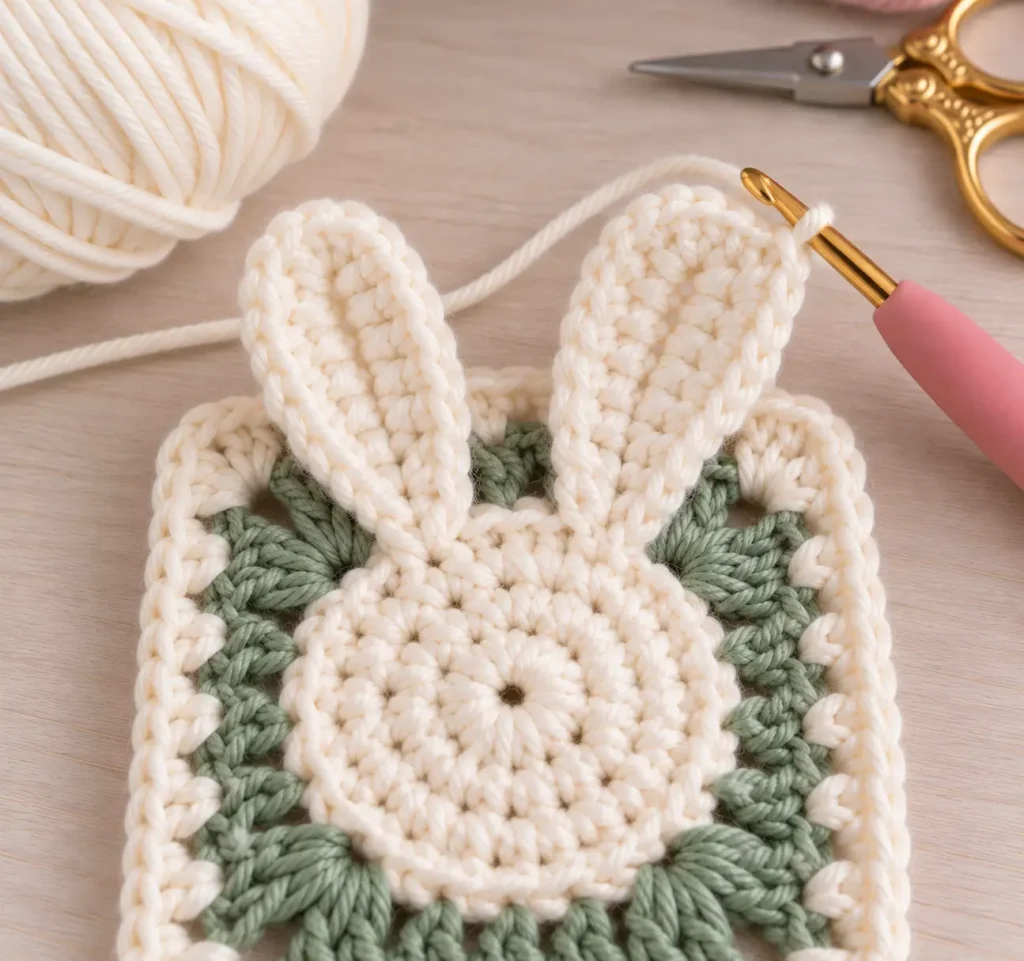
Now for the cutest part — those long bunny ears!
The ears are worked into the unused front loops of Round 3.
Using your cream yarn:
Join new yarn in an unused FL of Round 3 and ch 8.
Skip the first chain.
Working through the BLO of the next 7 chains, from the 7th chain back toward the first:
1 sl st, 1 sc, 4 hdc, 1 sc
Slip stitch into the joining loop.
ch 1
Make another slip stitch into that loop so you can work along the opposite side of the chain.
Now work through the FLO along those same 7 chains:
1 sc, 4 hdc, 1 sc, 1 sl st
Join to the initial slip stitch and fasten off.
Repeat the same process to make the second ear.
Make the Ears Extra Cute
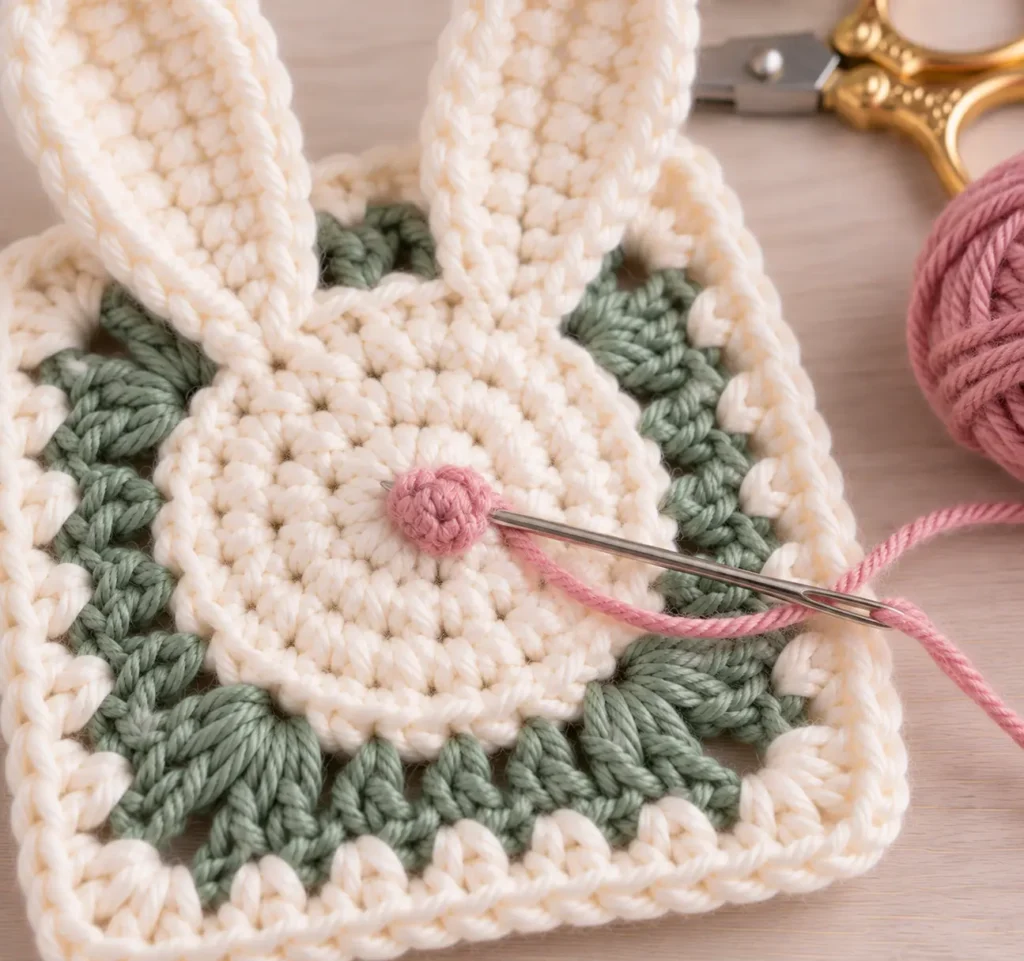
Because the ears aren’t completely flattened into the background, they have a slightly raised, movable appearance.
You can gently position them after finishing the square — leave them upright, tilt them outward, or give one ear a playful little bend.
Crochet the Dusty Pink Bunny Nose
Time for our dusty pink yarn.
Make a magic loop.
Then work:
ch 1 (counts as 1 incomplete hdc)
Make:
2 incomplete hdc
Yarn over and pull through all the loops on your hook to complete a 3-hdc puff.
Pull the yarn tail tightly and fasten off.
Leave long yarn tails because you’ll use them to attach the nose to the bunny’s face.
Add the Bunny’s Face
Once the nose is attached, add the final facial details.
The source pattern finishes the bunny with:
- The crocheted nose
- Two French knots for the eyes
- Stitched blush details
Keep the embroidery simple.
A tiny expression often looks much sweeter than adding too many details, especially when you’re going for a soft baby nursery aesthetic.
How to Keep Your Granny Square Neat
If your square looks slightly uneven while you’re crocheting, don’t worry. Small granny squares often benefit from a little shaping after they’re finished.
Try to keep your tension consistent throughout the project and avoid pulling your stitches too tightly.
Pay particular attention to the corners. Consistent corner chains help create a more balanced square.
You can also gently block the finished piece according to the care instructions for your chosen yarn.
Cute Baby & Nursery Ideas for Your Bunny Squares
Once you’ve made your first bunny granny square, you don’t have to stop at one.
Make several squares using coordinating nursery colors and combine them into a larger handmade project.
You could use your bunny squares as inspiration for:
- A bunny-themed baby blanket
- Nursery wall decor
- A decorative cushion cover
- A crochet bunting or garland
- A small decorative panel
- A keepsake crochet project
For a baby blanket, you could alternate bunny squares with simple solid granny squares so the finished design doesn’t feel too busy.
Imagine cream bunny faces surrounded by sage, dusty pink, beige, and ivory squares — super cozy for a neutral nursery. ♡
Baby & Nursery Safety Note
If you’re making this project for a nursery, remember that decorative crochet pieces and baby toys have different safety considerations.
For items intended to be accessible to a baby, avoid loose decorations, long unsecured yarn ends, buttons, beads, or other small detachable pieces.
The embroidered French-knot eyes used in this design avoid adding separate plastic eyes, but all stitching should still be secured carefully.
For wall decor, garlands, cushions, or blankets, keep the finished item’s intended use in mind and follow appropriate baby-safety guidance.
Frequently Asked Questions
Is this crochet bunny granny square beginner-friendly?
It uses basic stitches such as single crochet, half double crochet, double crochet, chains, and slip stitches, but you’ll also work with BLO/FLO and shape the square around a circular bunny face.
If you already know the basic crochet stitches, it’s a fun project for practicing a few new techniques.
What yarn should I use?
The reference pattern uses DK/sport wool yarn with a 3.00 mm crochet hook.
For our nursery color palette, choose soft cream, dusty pink, sage green, and ivory shades.
How big is the finished bunny granny square?
The reference sample is approximately 2.95 × 2.95 inches when made with DK/sport wool yarn and a 3.00 mm hook.
Your finished size may vary depending on your yarn, hook, and tension.
Can I change the bunny colors?
Absolutely. That’s one of the easiest ways to personalize this project.
Try baby blue and cream, lavender and ivory, peach and beige, or create several different bunny colors for a full blanket.
Can I use these squares for a baby blanket?
You can join multiple finished squares to create a larger crochet project such as a blanket.
Just remember to secure all yarn ends carefully and consider the yarn, construction, durability, and intended use when making something for a baby.
Your Bunny Granny Square Is Finished! ♡
And there you have it — a sweet crochet bunny granny square ready to bring a little handmade charm to your next Baby & Nursery project.
The round bunny face, raised ears, tiny embroidered details, and soft nursery colors make this square especially lovely for baby blankets, cushions, nursery decor, or even a thoughtful handmade gift.
You can make just one as a cute decorative piece, or crochet a whole collection and turn your little bunnies into something bigger. And don’t be afraid to play with the colors — sometimes a simple yarn change is all it takes to give each bunny its own personality. ♡
Looking for your next crochet idea? 🎃
If you loved making this little bunny, you might also enjoy my 7 Adorable Halloween Crochet Ideas You’ll Want to Make — a collection of spooky-cute projects filled with pumpkins, ghosts, cozy decorations, and handmade Halloween magic.
And if you’d like to come back to this bunny later, save the Crochet Bunny Granny Square Pin to your Pinterest board so the pattern is easy to find when you’re ready to crochet. 🐰🧶