12 Basic Crochet Stitches for Beginners (With Easy Instructions)
Learning to crochet can feel a little confusing at first.
You pick up a hook, look at a pattern, and suddenly you’re surrounded by little abbreviations like sc, hdc, dc, and sl st.
But here’s the lovely part: you don’t need to learn everything at once. ♡
Most crochet projects are built from a surprisingly small collection of stitches. Learn a few of them, and suddenly patterns that looked impossible start making sense.
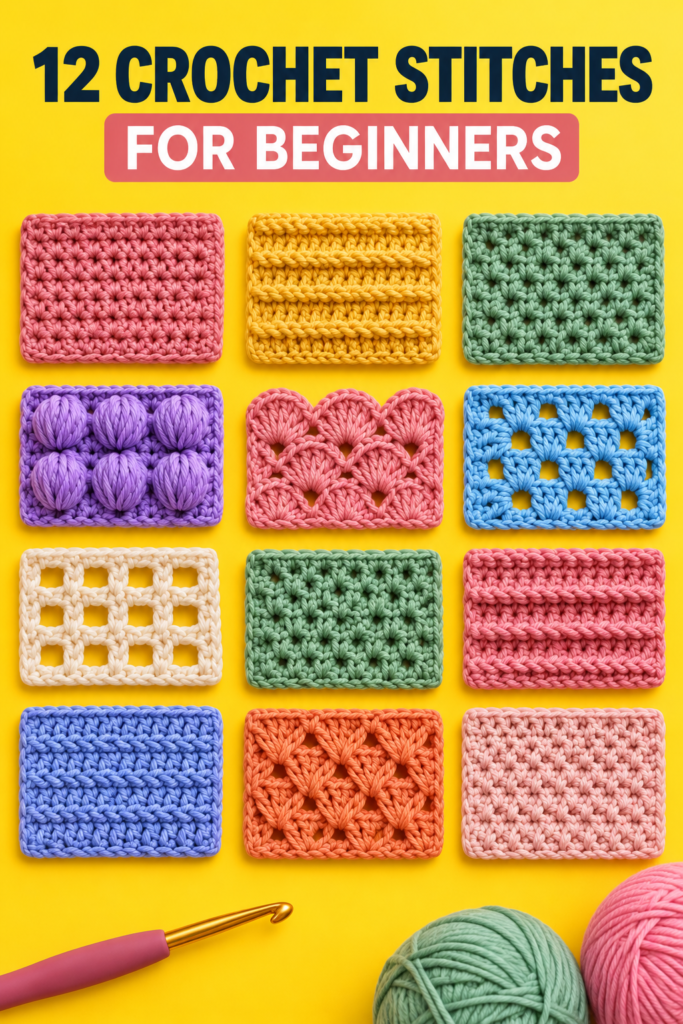
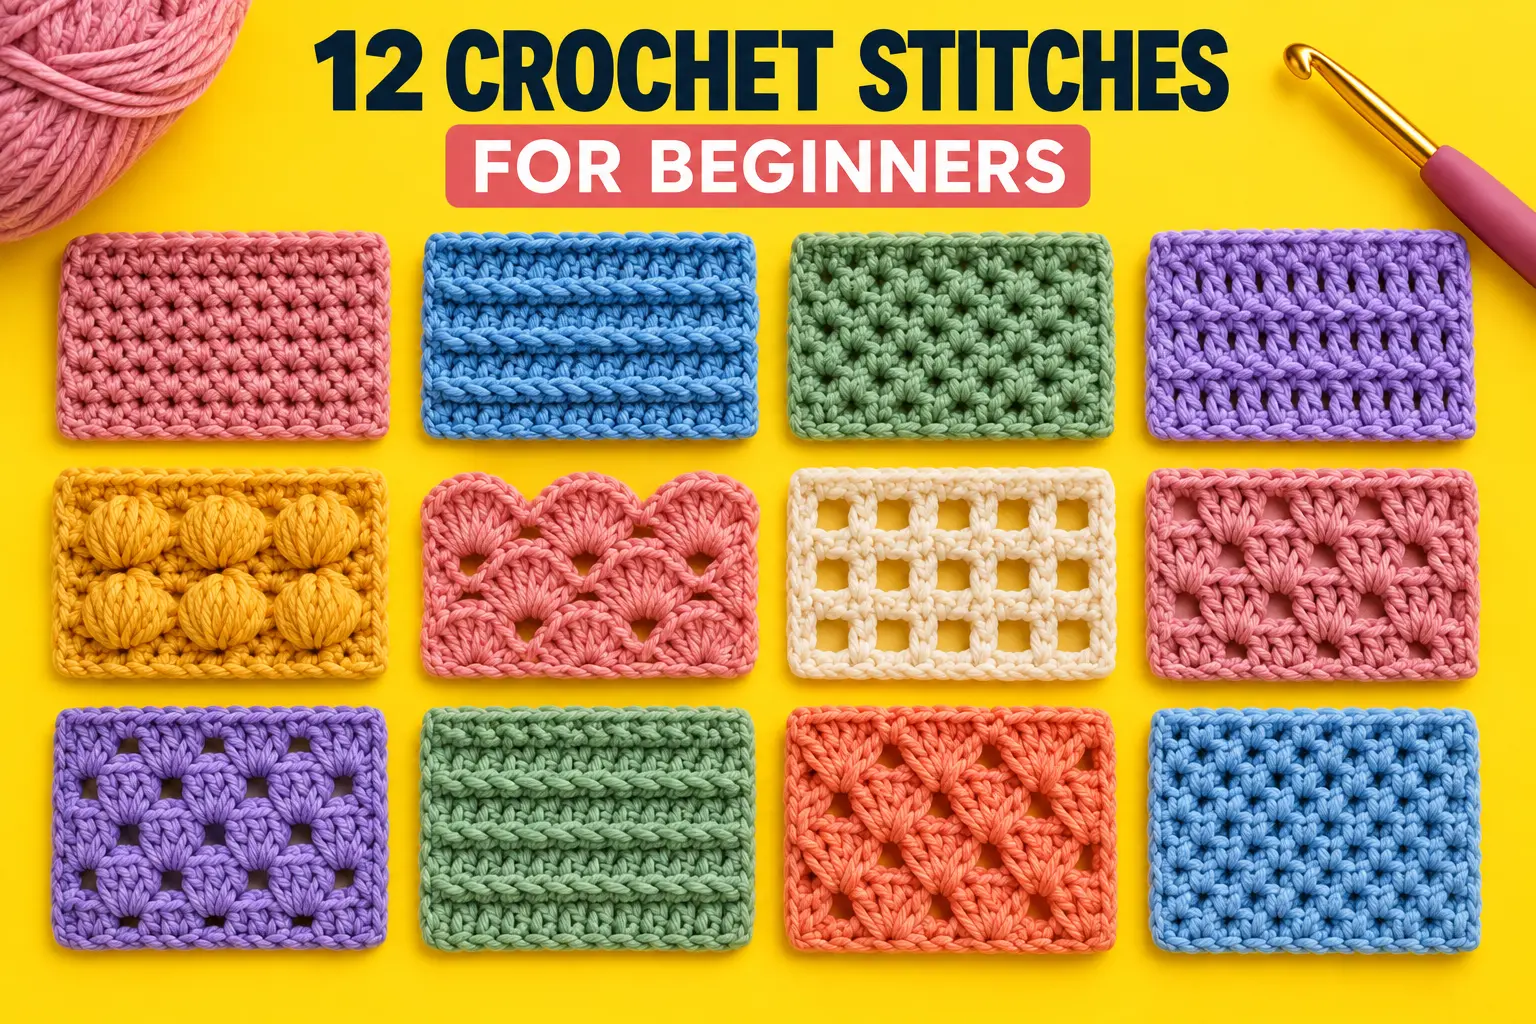
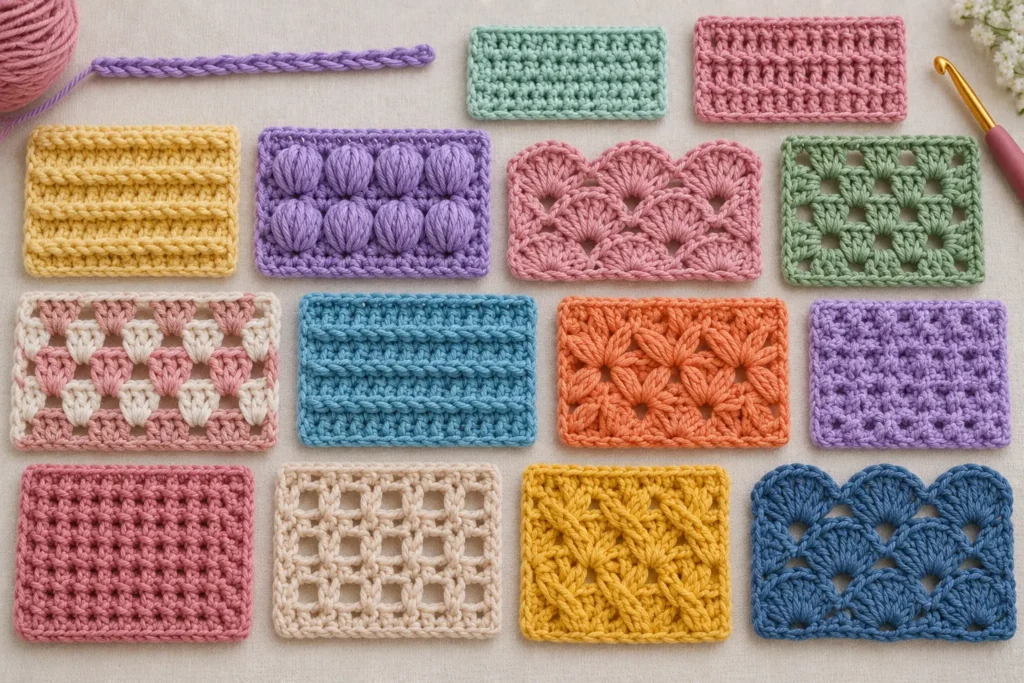
In this guide, we’re going to explore 12 crochet stitches for beginners, starting with the simplest foundation stitch and gradually moving toward prettier textured stitches like shells, puffs, and granny stitches.
You can practice them one at a time, make little swatches, and come back whenever you need a refresher.
Grab some yarn and your favorite hook — we’ll start with the stitch that almost every crochet journey begins with. 🧶
Before You Start ♡
You don’t need a huge collection of supplies to practice these stitches.
A medium-weight yarn in a light color is especially helpful when you’re learning because it makes each loop easier to see.
For your practice swatches, you’ll only need:
- Medium-weight yarn
- Crochet hook suitable for your yarn
- Scissors
- Tapestry needle
Try to avoid very fuzzy or very dark yarn for your first attempts. Beautiful as they can be, they make it much harder to see exactly where your hook should go.
And don’t worry about making perfect little squares.
These swatches are for learning, not perfection.
Once your yarn and hook are ready, there’s only one place to begin: the chain stitch.
Which Crochet Stitches for Beginners Should You Learn First?
1. Chain Stitch (ch)
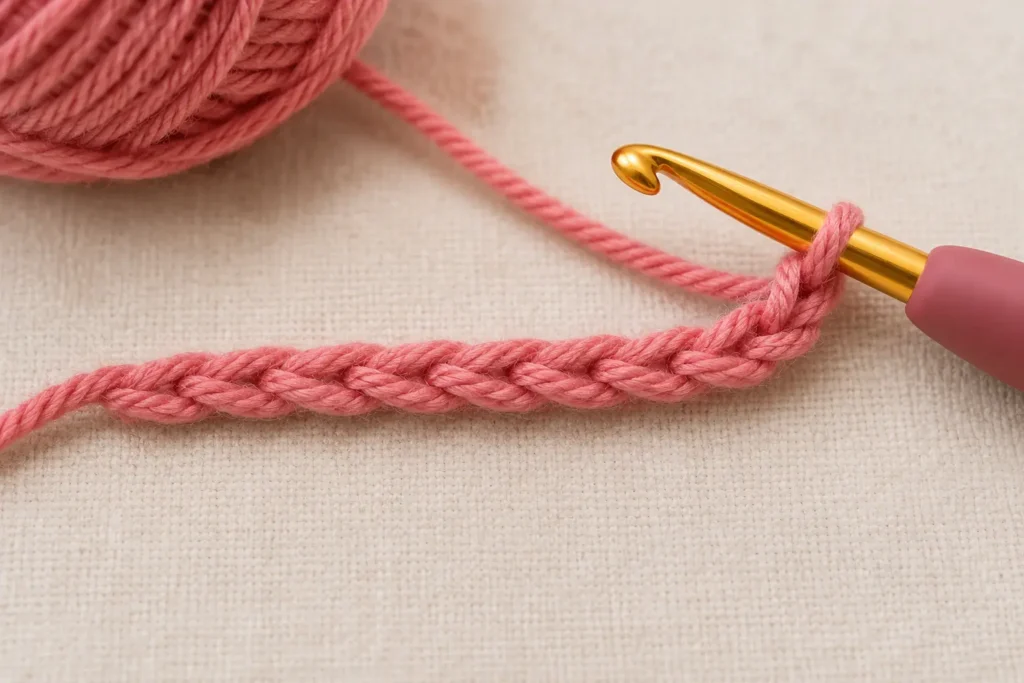
The chain stitch is the foundation of crochet.
If you look closely at a crochet chain, you’ll see a neat row of little V shapes. Those tiny loops often become the starting edge for everything from scarves and blankets to granny squares.
To make a chain, start with a slip knot on your hook.
Yarn over, then pull the yarn through the loop already on your hook.
That’s one chain.
Repeat the same movement:
yarn over → pull through the loop.
After a few stitches, you’ll have a little crochet chain growing underneath your hook.
Try not to pull your chains too tightly. Your hook should be able to move comfortably through each loop.
Once you can make a chain comfortably, you’re ready to turn that simple strand of loops into actual fabric.
And the easiest stitch for doing exactly that is the single crochet.
2. Single Crochet (sc)
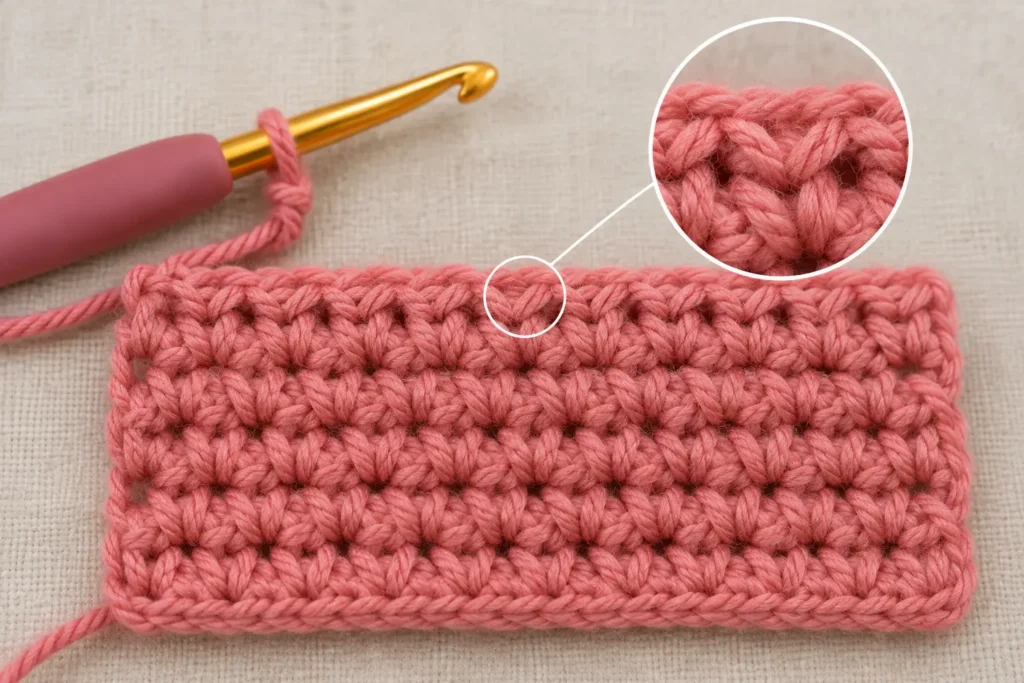
The single crochet is small, sturdy, and one of the best stitches to learn after chaining.
It creates a fairly dense fabric, which makes it useful for everything from washcloths and bags to amigurumi.
Insert your hook into the next stitch.
Yarn over and pull up a loop.
You should now have 2 loops on your hook.
Yarn over again and pull through both loops.
That’s one single crochet. ♡
The rhythm is:
insert → yarn over → pull up a loop → yarn over → pull through 2.
Practice several rows and you’ll begin noticing the little V shapes along the top of your work.
Those V shapes are important — because very soon, we’re going to use different parts of them to create texture.
But first, let’s make our stitches a little taller.
3. Half Double Crochet (hdc)
If single crochet feels compact and sturdy, half double crochet gives you a little more height without adding much complexity.
It’s one of those wonderfully useful stitches that sits right between single crochet and double crochet.
Start by yarning over.
Insert your hook into the next stitch.
Yarn over and pull up a loop.
You should have 3 loops on your hook.
Now yarn over once more and pull through all 3 loops.
Done.
The movement feels slightly different from single crochet, but after a row or two it becomes beautifully repetitive.
Half double crochet creates a soft fabric with a little more texture and drape than single crochet.
And once those three loops stop feeling intimidating, the next stitch becomes surprisingly easy.
Because instead of pulling through everything at once, we’re going to do it in two little steps.
4. Double Crochet (dc)
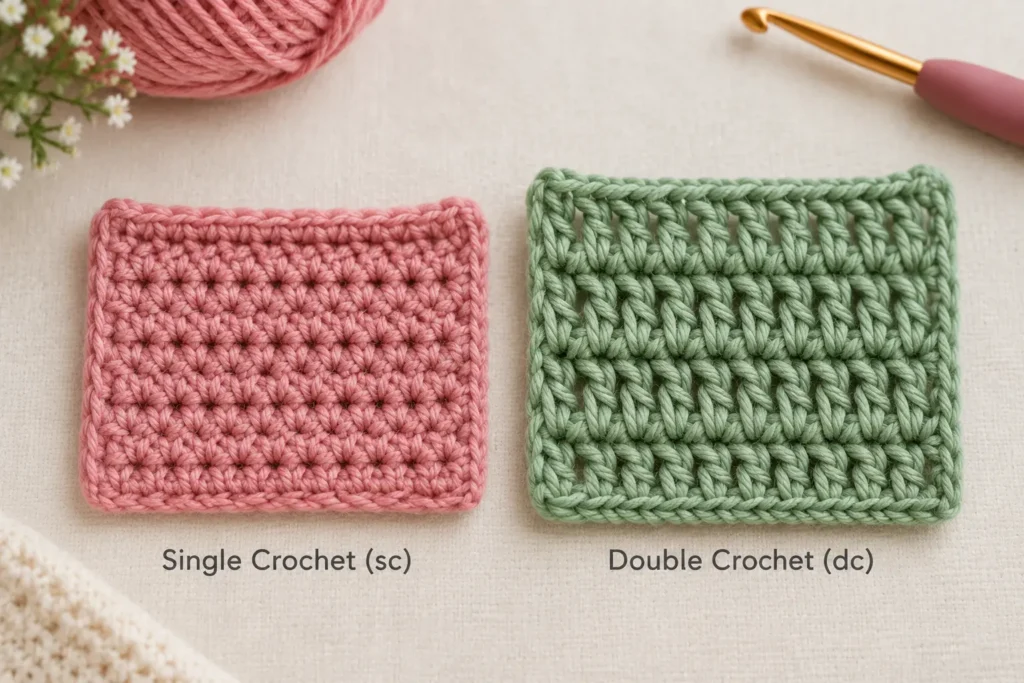
Meet one of the most useful stitches in crochet: the double crochet.
It’s taller than single and half double crochet, which means your project grows more quickly and the finished fabric usually feels lighter and more open.
Yarn over.
Insert your hook into the next stitch.
Yarn over and pull up a loop.
You’ll have 3 loops on your hook.
Yarn over and pull through the first 2 loops.
You’ll have 2 loops remaining.
Yarn over once more and pull through those final 2 loops.
That’s your double crochet.
Think:
3 loops → pull through 2 → pull through 2.
This is an especially important stitch to practice because you’ll meet it again and again.
In fact, later in this guide we’ll take groups of double crochet stitches and turn them into something much more decorative.
Before that, though, let’s go one step taller.
5. Treble Crochet (tr)
The treble crochet creates a tall, airy stitch with lots of drape.
And despite looking more advanced, it follows almost the same logic as double crochet.
The main difference happens before your hook ever enters the stitch.
Yarn over twice.
Insert your hook into the next stitch.
Yarn over and pull up a loop.
You should now have 4 loops on your hook.
Then:
Yarn over, pull through 2.
Yarn over, pull through 2.
Yarn over, pull through the final 2.
That extra yarn-over creates the additional height.
Once you understand this, taller crochet stitches become much less mysterious — they’re often simply variations of movements you already know.
But not every useful crochet stitch is designed to add height.
The next one is tiny, almost invisible, and incredibly useful.
6. Slip Stitch (sl st)
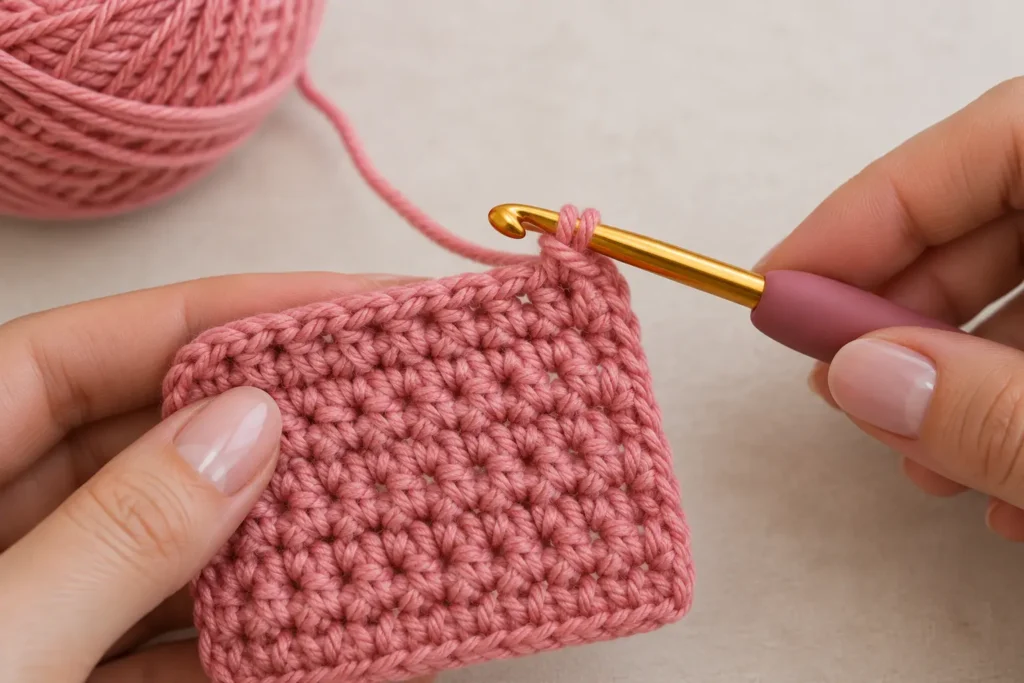
The humble slip stitch might be one of the smallest stitches in this entire guide.
But you’ll use it everywhere.
Slip stitches can join rounds, move your yarn across a section of crochet, finish edges, or connect one part of a project to another.
Insert your hook into the stitch.
Yarn over.
Pull the yarn through the stitch and through the loop already on your hook.
That’s it.
One smooth movement.
Because slip stitches are so short, avoid pulling them too tightly. Otherwise, inserting your hook into them later can become frustrating.
Now you know the core stitches.
So this is where things start getting really fun.
We’re going to take stitches you already know and change where we place the hook.
The result? A completely different texture.
7. Half Double Crochet in the Back Loop Only (hdc BLO)
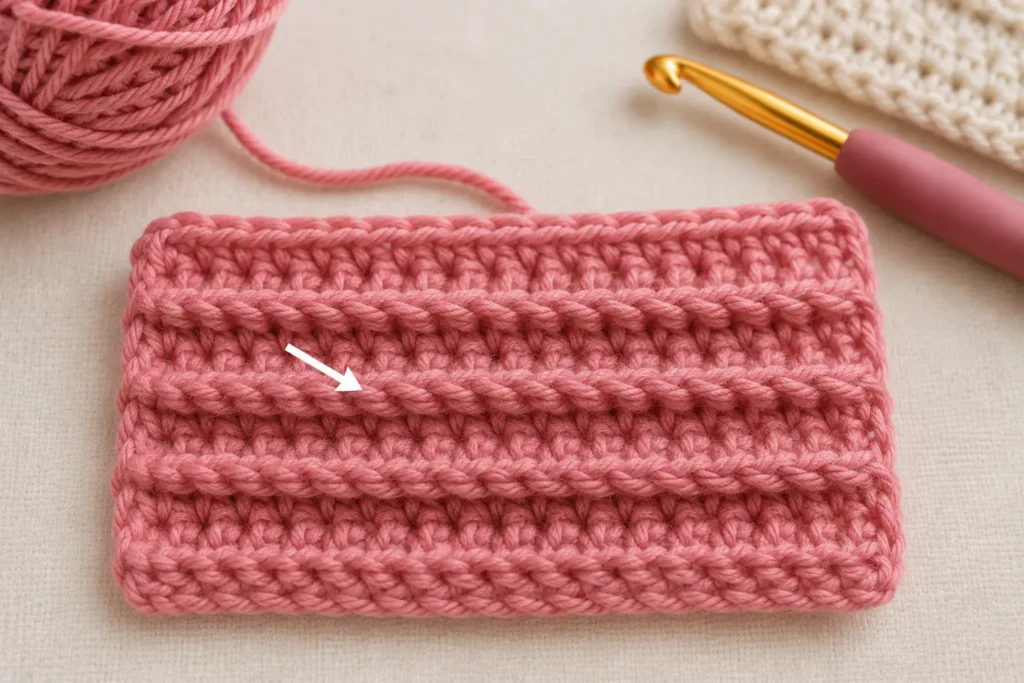
Remember those little V shapes along the top of your stitches?
Each V has two loops: a front loop and a back loop.
Normally, your hook goes underneath both.
For back loop only crochet, you insert the hook through only the loop furthest away from you.
Then simply make your half double crochet as usual.
That tiny change creates visible ridges across the fabric.
And this is one of my favorite crochet lessons:
sometimes you don’t need a completely new stitch to create a completely new look.
Once you see those ridges forming, try the exact same idea with double crochet.
The texture changes again.
8. Double Crochet in the Back Loop Only (dc BLO)
For double crochet BLO, yarn over and insert your hook into the back loop only of the next stitch.
Then complete your double crochet normally.
Because double crochet is taller than half double crochet, those back-loop ridges can become even more noticeable.
This technique is useful when you want fabric with movement and texture without learning an entirely new stitch combination.
And now you’ve reached an exciting point.
You know how to chain.
You know the basic crochet stitches.
You know how changing the placement of your hook changes the fabric.
So we can finally start combining stitches into decorative patterns. ♡
First up: one of the prettiest.
9. Shell Stitch
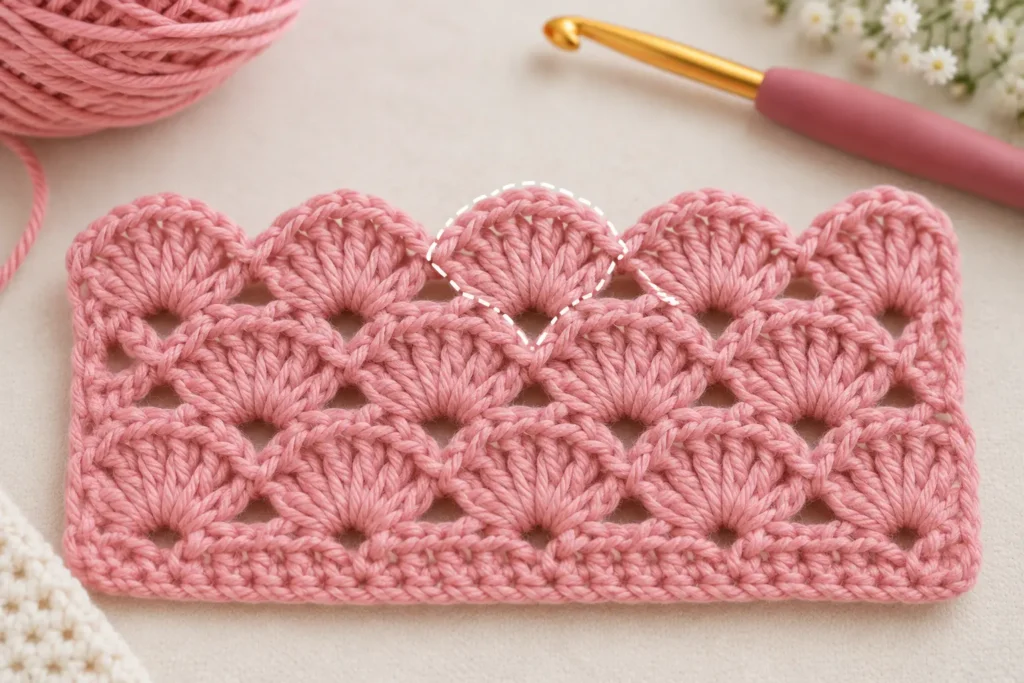
The shell stitch looks decorative and intricate, but its secret is wonderfully simple.
Instead of spreading your stitches across several spaces, you work several stitches into the same stitch or space.
They fan outward and create that beautiful shell shape.
A common shell might use:
5 dc into the same stitch.
Patterns can use different numbers of stitches, so always follow the instructions for the specific shell pattern you’re making.
Shell stitch is beautiful for blanket borders, scarves, baby projects, and decorative edges.
And once you understand the idea of putting multiple stitches into one place, another popular stitch pattern becomes much easier to understand.
This time, though, we’re going to create little V shapes.
10. V-Stitch
The V-stitch gets its name from exactly what it looks like.
Two taller stitches sit on either side of a chain space, creating a tiny V.
A common version is:
dc, ch 1, dc
worked into the same stitch or space.
That little chain in the middle creates breathing room, giving the fabric a lighter, more open appearance.
Repeat those V shapes across your work and you get a lovely lace-like texture without an overly complicated stitch sequence.
It’s a great reminder that crochet patterns are often just simple stitches arranged in clever ways.
And the next stitch takes that idea in another direction.
Instead of creating open space, we’re going to build texture.
11. Puff Stitch
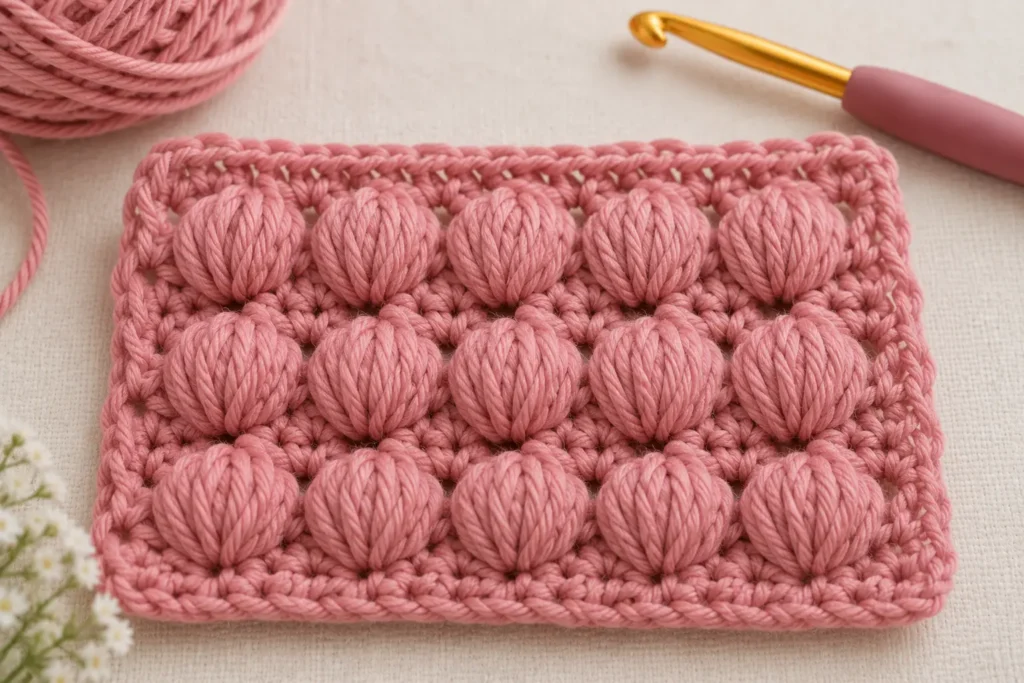
If you love soft, squishy crochet texture, you’ll probably love the puff stitch. ♡
Puff stitches are made by partially working several yarn overs into the same place before closing them together.
This gathers the yarn into a raised little puff that sits on top of your fabric.
Exact puff stitch instructions can vary from pattern to pattern, so check how many yarn overs your chosen pattern requires.
The important thing to understand is the idea:
you’re building several loops in the same stitch and then closing them together to create volume.
At this point, look at how far you’ve come.
You started with a simple chain.
Now you can make dense stitches, tall stitches, textured ridges, shells, V shapes, and puffs.
There’s just one more stitch pattern I really want beginners to know.
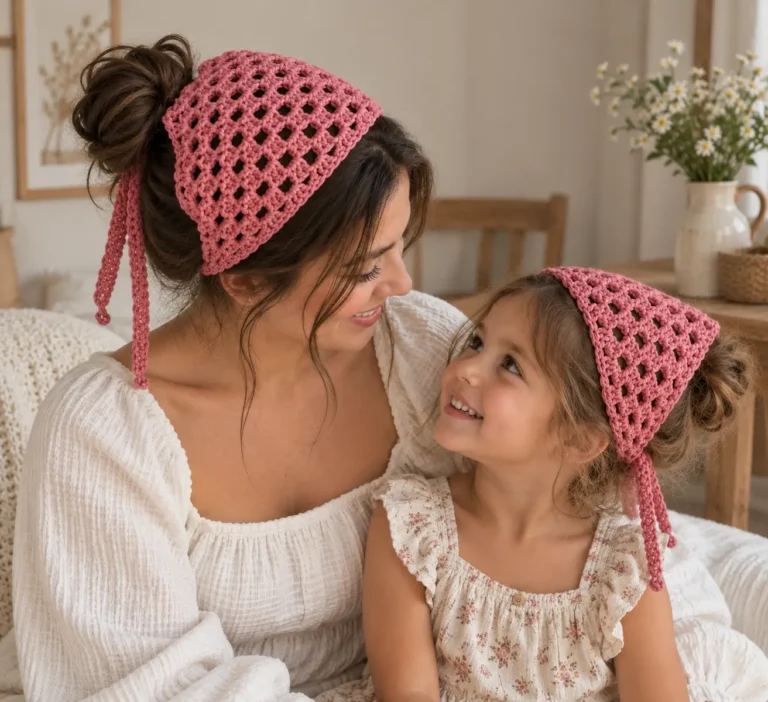
And if you love granny squares, blankets, or our crochet bandana, you’re going to recognize it immediately.
12. Granny Stitch
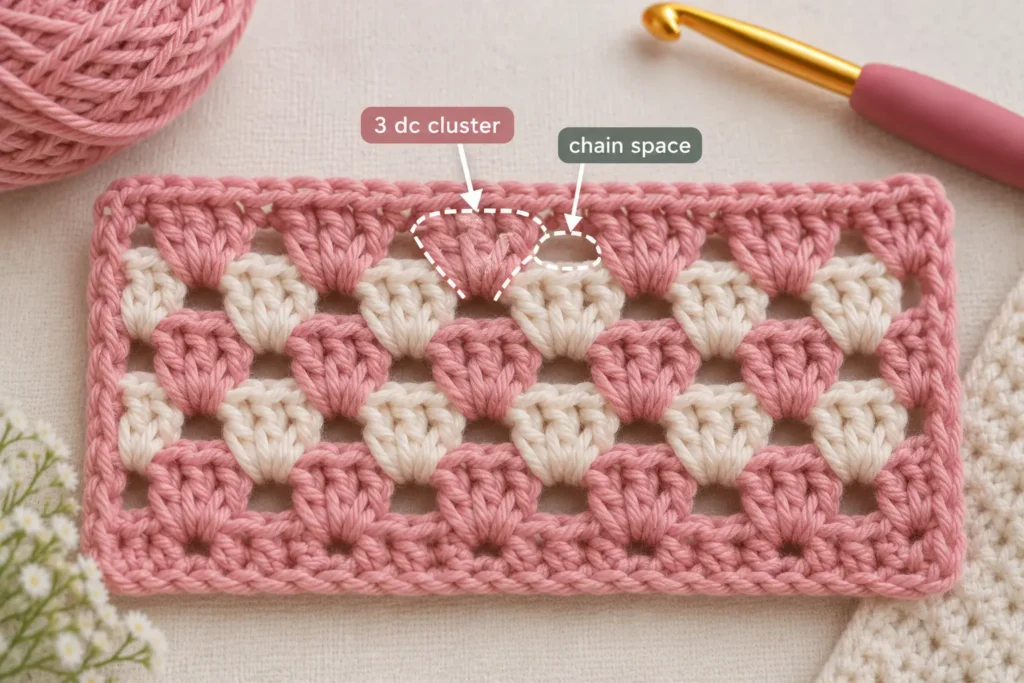
The granny stitch is one of those crochet patterns that instantly feels cozy and familiar.
Traditionally, it uses groups — or clusters — of 3 double crochet stitches, with chain spaces separating the groups.
A basic granny cluster is simply:
3 dc in the same space.
Then you chain and work another cluster into the next appropriate space.
Those repeated clusters create the classic open granny-style fabric.
And once you understand this rhythm, an entire world of projects opens up:
granny squares, scarves, blankets, shawls — and even bandanas. ♡
In fact, if you want to turn the stitch you just learned into something you can actually wear, our crochet bandana pattern is a lovely next project.
Which Crochet Stitches Should a Beginner Learn First?
Seeing 12 stitches together might make you feel like you need to memorize all of them.
You absolutely don’t.
Start with these four:
chain → single crochet → half double crochet → double crochet
Those stitches will teach you the basic movements your hands need to become comfortable with crochet.
Then learn the slip stitch.
After that, experiment.
Try BLO stitches when you want texture. Make a shell when you want something decorative. Practice a V-stitch when you want something airy.
And when those feel comfortable, make your first granny stitch project.
The goal isn’t to collect stitches as quickly as possible.
It’s to reach that lovely moment when you stop thinking about every movement and your hands simply know what to do. ♡
Beginner Crochet Stitch Tips
If your first swatches look a little uneven, keep them.
Seriously.
A few weeks from now, comparing your newest swatch with your very first one can show you just how much your tension and stitch consistency have improved.
Count your stitches at the end of each row, especially while you’re learning.
Use stitch markers if you keep losing your first or last stitch.
And most importantly, slow down enough to understand where your hook is going.
Speed comes naturally later.
If you’re still figuring out things like how to hold your hook, make a slip knot, chain, or read basic crochet instructions, start with my complete beginner guide:
How to Crochet for Beginners →
Once those basics click, come back here and these stitches will feel much easier.
What Can You Make With These Crochet Stitches?
This is the best part.
These little practice swatches aren’t just exercises.
They’re building blocks.
Single crochet can become a bag.
Double crochet can become a scarf.
Shell stitch can turn into a beautiful border.
Granny stitches can become blankets, squares, shawls, and wearable accessories.
If the granny stitch was your favorite from this list, you already have a perfect first project waiting for you: use those simple clusters to make a granny stitch crochet bandana.
Suddenly, you’re not just practicing stitches anymore.
You’re making something. 🧶
Keep Practicing — You’re Learning Crochet ♡
If you made it through even a few stitches on this page, you’ve already learned something important:
Crochet isn’t one giant skill you have to master.
It’s lots of tiny movements learned one at a time.
One chain becomes a row.
One row becomes a swatch.
A few swatches become confidence.
And eventually, those same little stitches become something you can wear, gift, decorate your home with, or proudly say, “I made this.” ♡
So choose one stitch from this guide and practice it today.
Tomorrow, try another.
And save this crochet stitch guide to Pinterest so the next time you forget whether it’s yarn over once or twice, all 12 stitches are waiting for you in one place. 📌