How to Make a Crochet Bunny Wall Clock Step by Step
There’s something extra special about a crochet project that makes you smile and earns a place in your home.
This crochet bunny wall clock does exactly that.
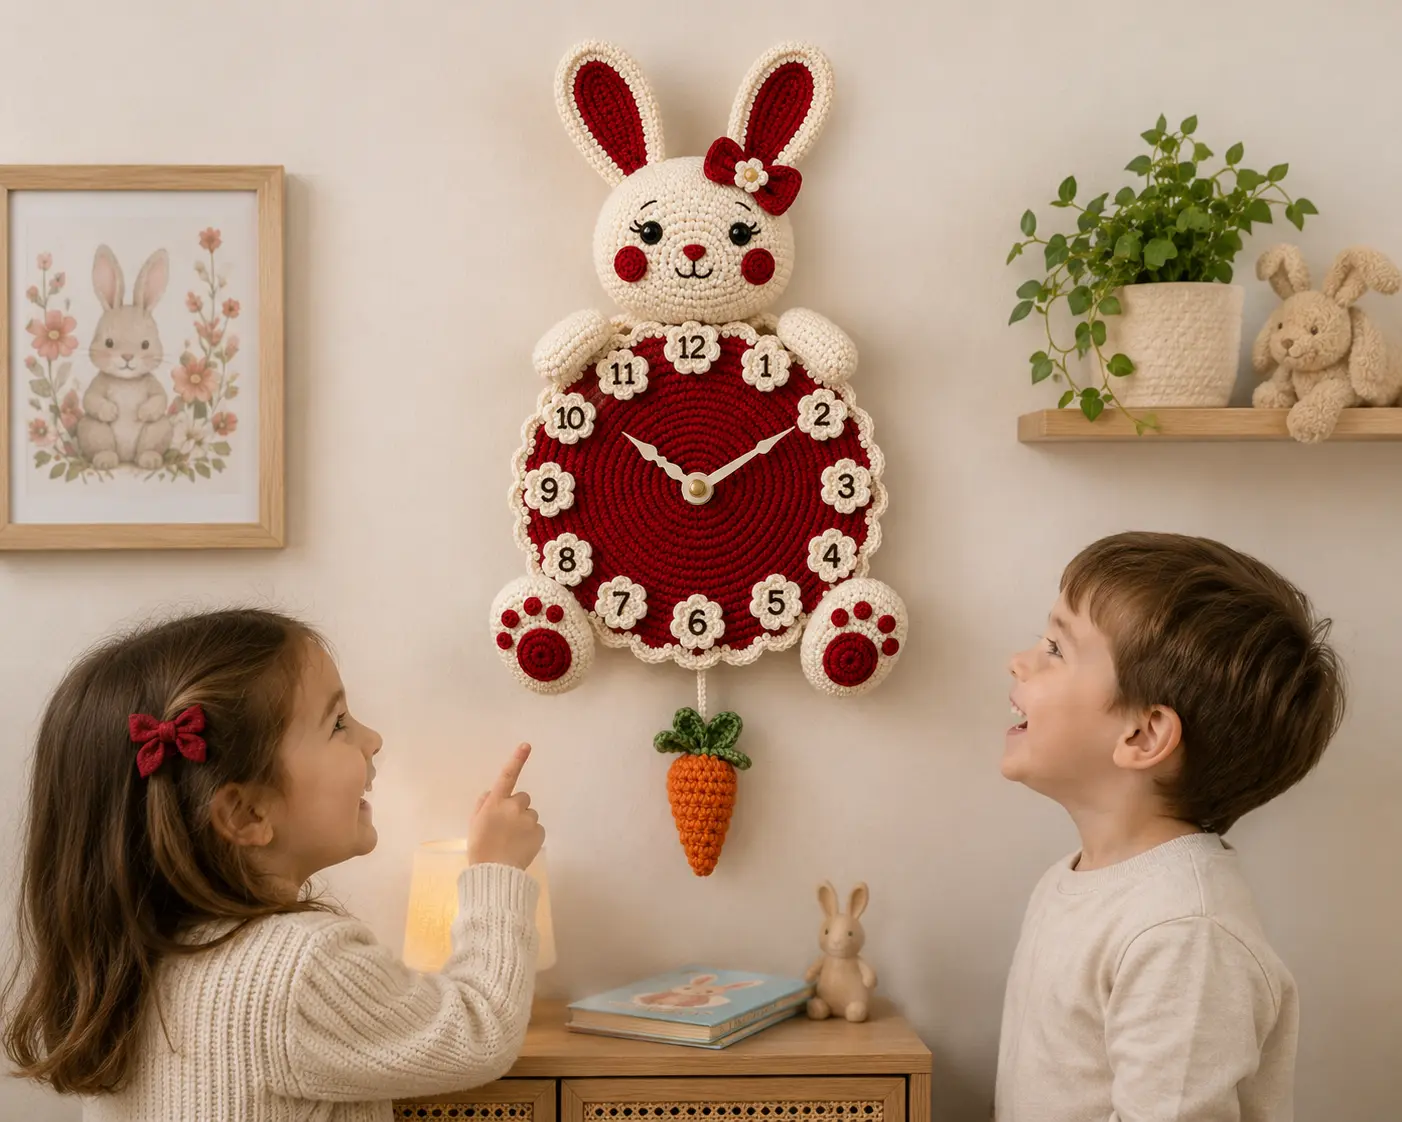
With her floppy ears, little flower bow, soft paws, and tiny carrot hanging underneath, she looks almost more like a cuddly nursery friend than a clock. For this Tiny Crochet Nest version, I’m swapping the usual pink for a warm cherry red and cream palette — cozy, playful, and just a little unexpected.
And although the finished clock looks detailed, don’t let that fool you.
You don’t have to make the whole bunny at once.
We’ll build her slowly: one circle, one ear, one paw, and one tiny detail at a time.
So put on something cozy, grab your hook, and let’s turn a few balls of yarn into a bunny that can actually tell the time. ♡
Tiny Crochet Nest Tip: Don’t chase perfection with this project. A slightly tilted ear or a flower that isn’t perfectly centered can make your bunny feel even more handmade and full of personality.
Crochet Bunny Wall Clock at a Glance
Skill Level: Confident Beginner to Intermediate
Style: Crochet wall decor / nursery decor
Main Colors: Warm cream + cherry red
Construction: Separate crochet pieces assembled around a working clock mechanism
Optional Detail: Crochet carrot pendulum
This project uses mostly familiar crochet shapes — circles, ovals, small stuffed pieces, and simple decorative details.
The part that needs the most patience isn’t actually the crochet.
It’s the assembly.
Take your time when positioning the face, paws, numbers, and clock hands. A few extra minutes spent arranging everything before sewing can make a big difference in the finished piece.
What You’ll Need
For a clock similar in style to this project, gather:
- Cream yarn
- Cherry red yarn
- A small amount of orange yarn
- A small amount of green yarn
- Dark brown or black embroidery yarn
- Crochet hook appropriate for your yarn
- Yarn needle
- Stitch markers
- Scissors
- Fiberfill for lightly stuffed pieces
- Working quartz clock mechanism
- Hour and minute hands
- Optional second hand
- Firm backing for the clock face
- Measuring tape or ruler
- Sewing pins
- Strong thread or yarn for assembly
For a medium-weight yarn, the Craft Yarn Council lists roughly 5.5–6.5 mm as a common crochet-hook range, but that is only a guideline. For this decorative project, choose the hook that gives you a neat, fairly firm fabric with the yarn you select. (craftyarncouncil.com)
A Few Helpful Supplies ♡
To make your crochet bunny wall clock a little easier, here are a few handy supplies you may want to have ready before you begin.
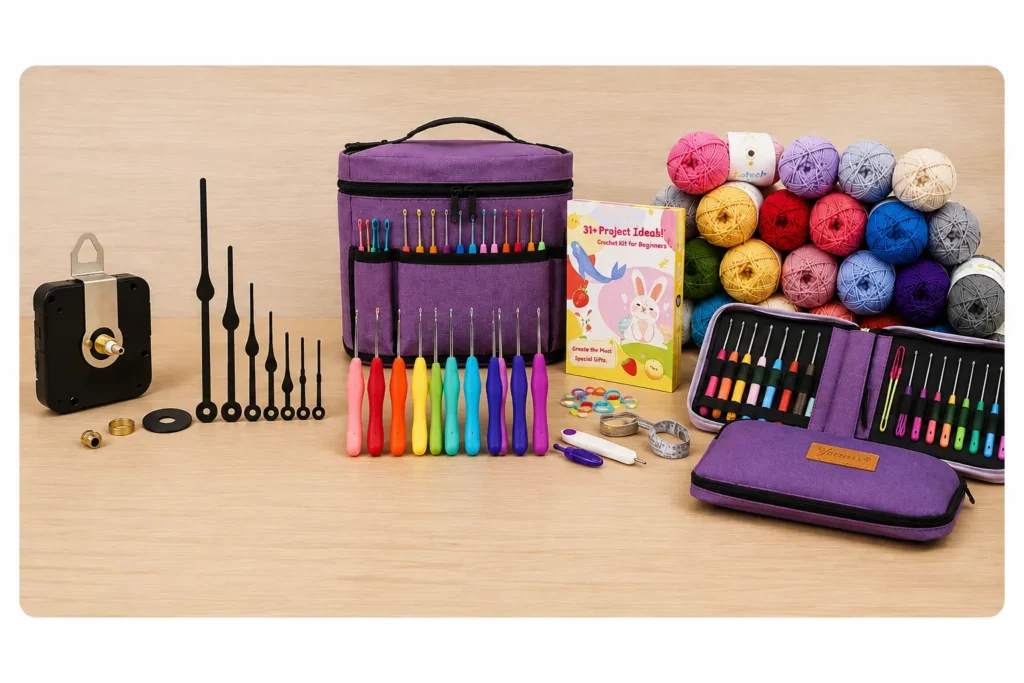
Quartz Clock Movement Kit
A simple battery-operated clock mechanism with multiple hand sizes, ideal for turning your crochet bunny into a real working wall clock.
$9.99
Price at time of publication
Katech Crochet Kit
A complete crochet set with colorful yarn, ergonomic hooks, accessories, and a storage bag — handy for this project and future crochet creations.
$34.99
Price at time of publication
Yarniss Ergonomic Crochet Hook Set
A 20-size ergonomic crochet hook set with soft grips and a portable case, giving you plenty of hook sizes for different yarns and projects.
$22.99
Price at time of publication
As an Amazon Associate, I earn from qualifying purchases.
Before You Buy the Clock Mechanism
This little detail matters.
Your clock mechanism has a shaft that needs to pass through the finished thickness of the clock face/backing. So don’t buy a mechanism based only on the overall clock diameter.
Measure the thickness of the center panel you plan to use and choose a compatible clock movement.
The crochet itself should decorate and cover the structure — it shouldn’t prevent the mechanism from sitting securely.
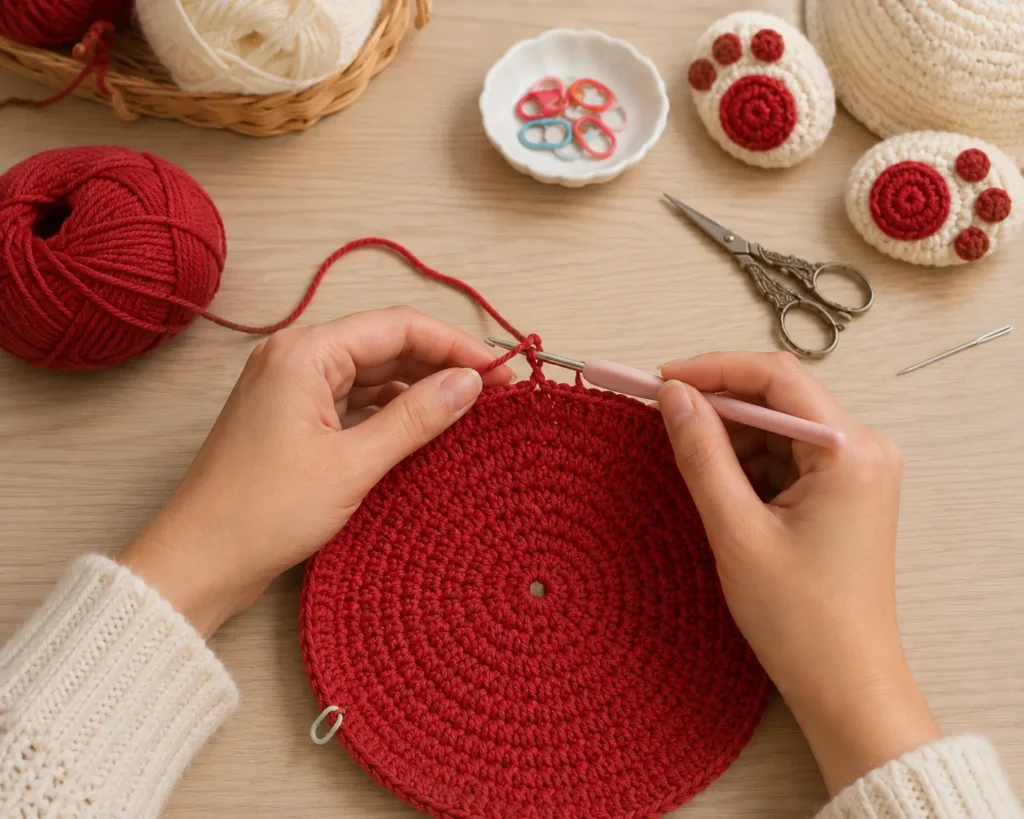
Step 1: Crochet the Cherry Red Clock Face
We’re starting with the biggest piece.
Make a flat crochet circle in cherry red, beginning from the center and increasing evenly as you work outward.
You can use single crochet for a dense, structured look or another simple stitch that creates a flat fabric you like.
Keep laying the circle on a flat surface while you work.
If the edges begin to curl upward, you may need more increases. If the circle starts to ripple, you may have increased too quickly.
Don’t worry if you have to undo a round.
This is the foundation of the entire bunny, so getting a nice flat circle is worth a little patience.
Step 2: Give the Clock a Soft Cream Border
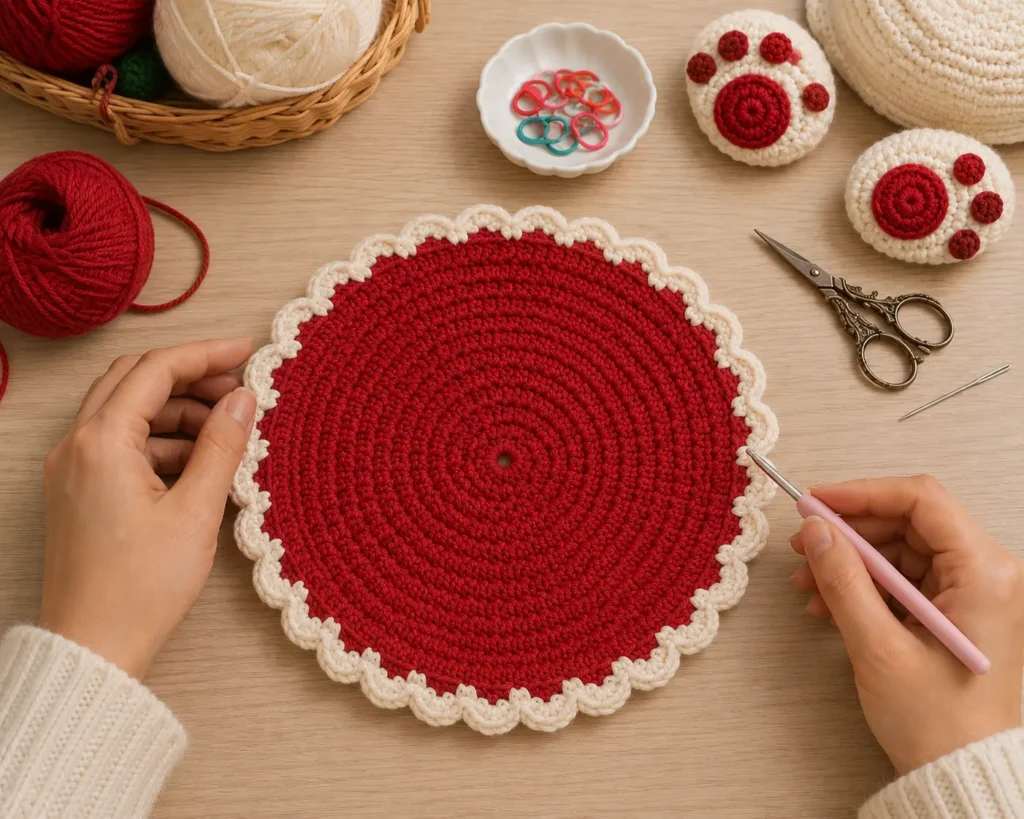
Once your red circle reaches the size you want, change to warm cream yarn.
Work a decorative border around the outside.
A simple scalloped or shell-style edging works beautifully here because it softens the round clock face and gives it that cozy Tiny Crochet Nest look.
Don’t make the edging too elaborate.
The bunny face, paws, numbers, and carrot will already add plenty of detail.
Think of this border as the little frame around your clock.
Step 3: Make the Bunny Head
Now she starts getting a personality. ♡
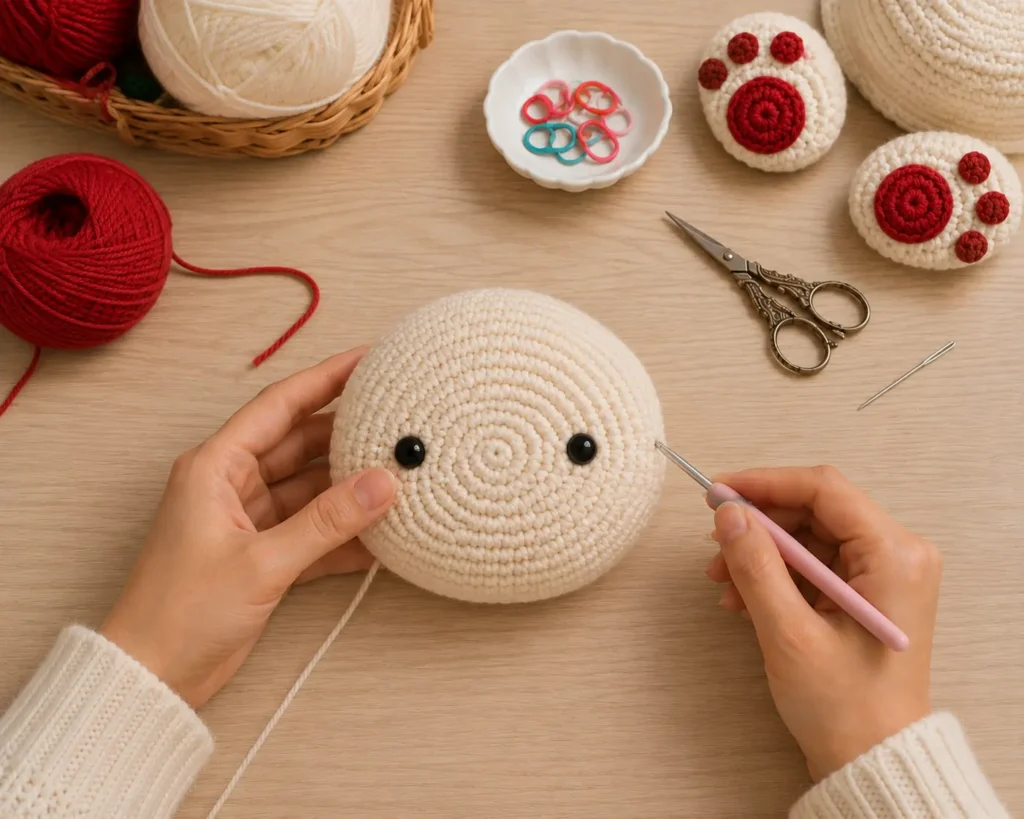
Crochet a large cream circle or slightly oval shape for the bunny’s head.
You want it wide enough to overlap the upper portion of the clock without covering too much of the number area.
If you want the head to have a little dimension, make a front and back piece, lightly stuff them, and join around the edge.
For a flatter wall clock, you can keep the head minimally stuffed.
Before attaching anything, place the head above the clock face and check the proportions.
Don’t sew it on yet.
We’re still playing with placement.
Step 4: Crochet Two Big Bunny Ears
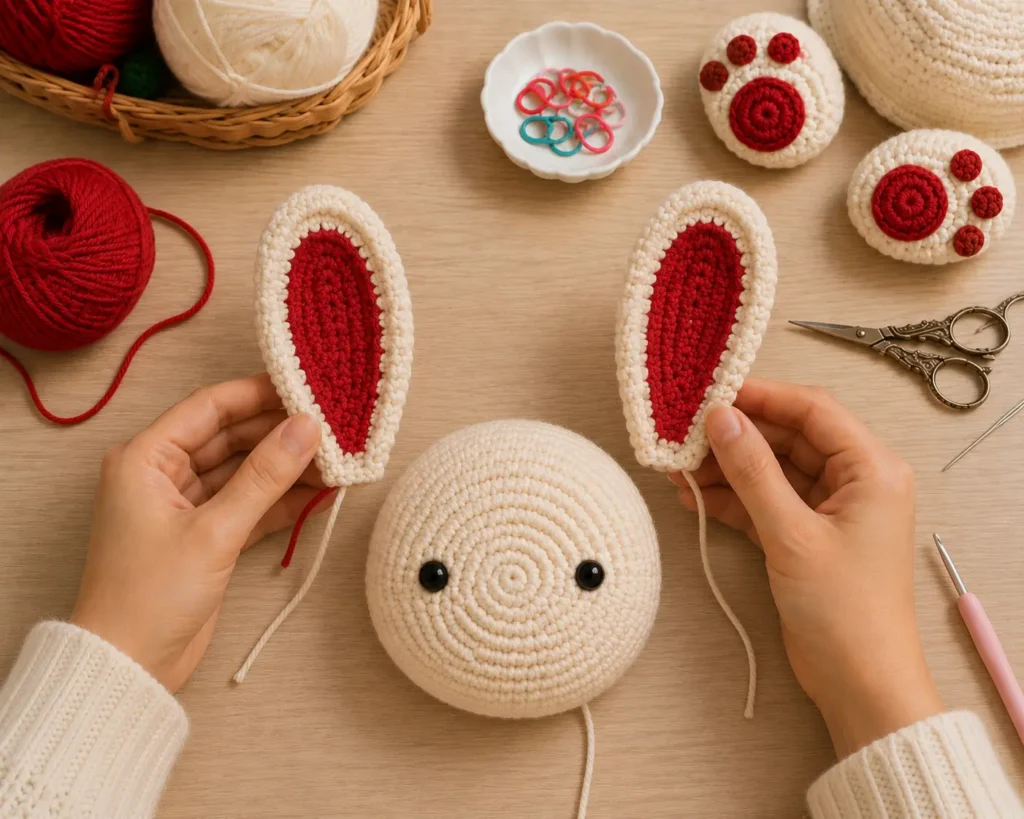
Make two long cream ears.
Then crochet two smaller inner-ear pieces in cherry red.
Sew or crochet the red pieces onto the cream ears before attaching them to the head.
Here’s where you can make your bunny feel different from every other one:
One ear can stand a little straighter while the other leans slightly outward.
Perfect symmetry isn’t necessary.
In fact, a tiny bit of asymmetry can make the bunny look sweeter and more handmade.
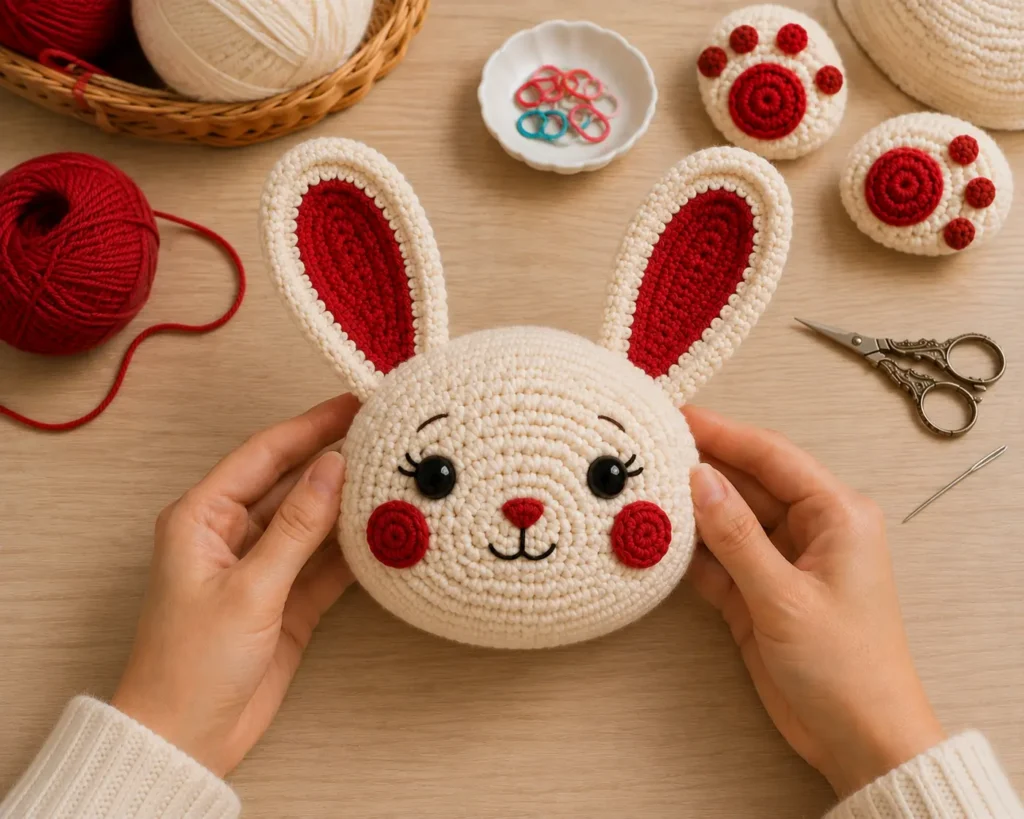
Step 5: Give Your Bunny a Face
This is my favorite part because suddenly all those separate crochet pieces start looking like a little character.
Add:
- Two eyes
- A small embroidered nose
- A simple mouth
- Eyelashes if you want a softer expression
- Two cherry-red crochet cheeks
For decorative wall art, you can use securely attached craft eyes or embroidered eyes.
If you’re making the clock specifically for a baby’s or young child’s space, I prefer the idea of embroidered facial details rather than relying on detachable decorative pieces.
Take a photo of the face before permanently attaching everything.
Sometimes seeing it through your phone makes uneven placement much easier to notice.
Step 6: Add a Cherry Red Bow
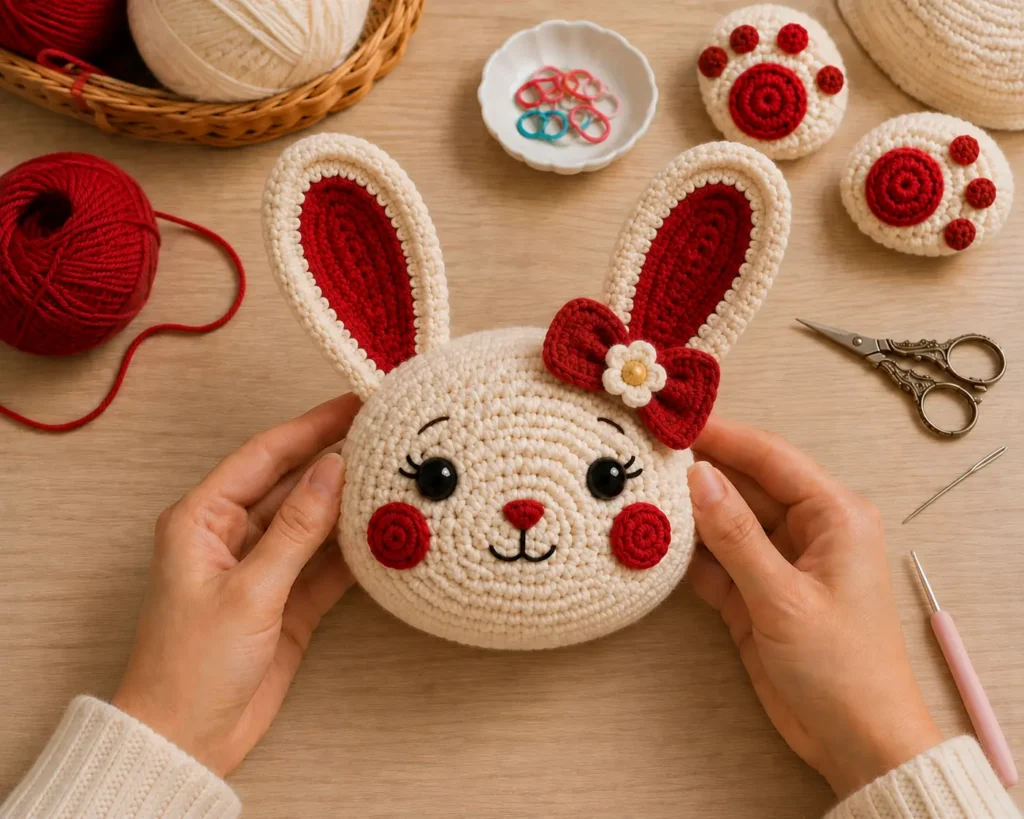
A bow instantly gives this clock another little focal point.
Crochet a simple bow in cherry red and place it near the base of one ear.
For the Tiny Crochet Nest version, I’d add a tiny cream flower in the center.
You don’t need a complicated flower.
Even a small five-petal crochet flower can make the bow feel finished.
Pin the bow in place first.
Move it around until the bunny’s face feels balanced, then sew it securely.
Step 7: Make the Arms and Little Bunny Feet
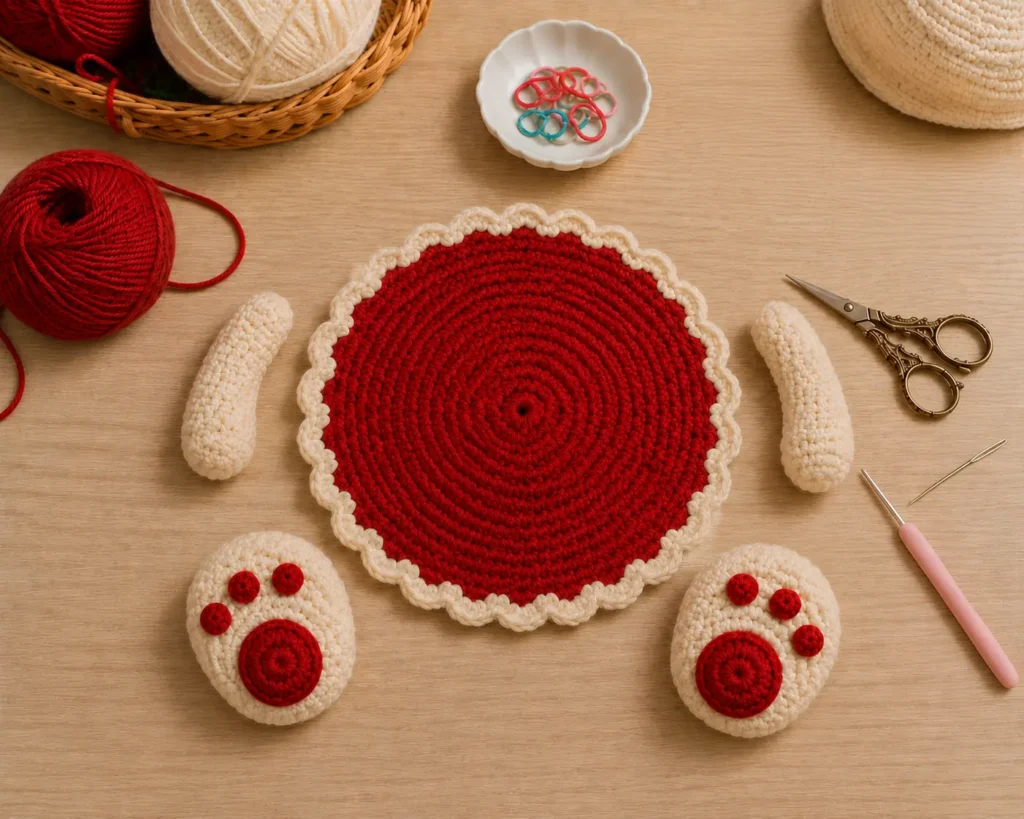
Next, crochet:
- Two small cream arms
- Two larger oval feet
Lightly stuff them so they have some dimension without becoming heavy.
For the paws, add cherry-red crochet pads or embroidered paw details.
Place the arms near the upper sides of the clock face, almost as though the bunny is hugging the clock.
The feet sit toward the lower corners.
And yes — this is the moment when it starts getting ridiculously cute.
Step 8: Create the 12 Number Markers
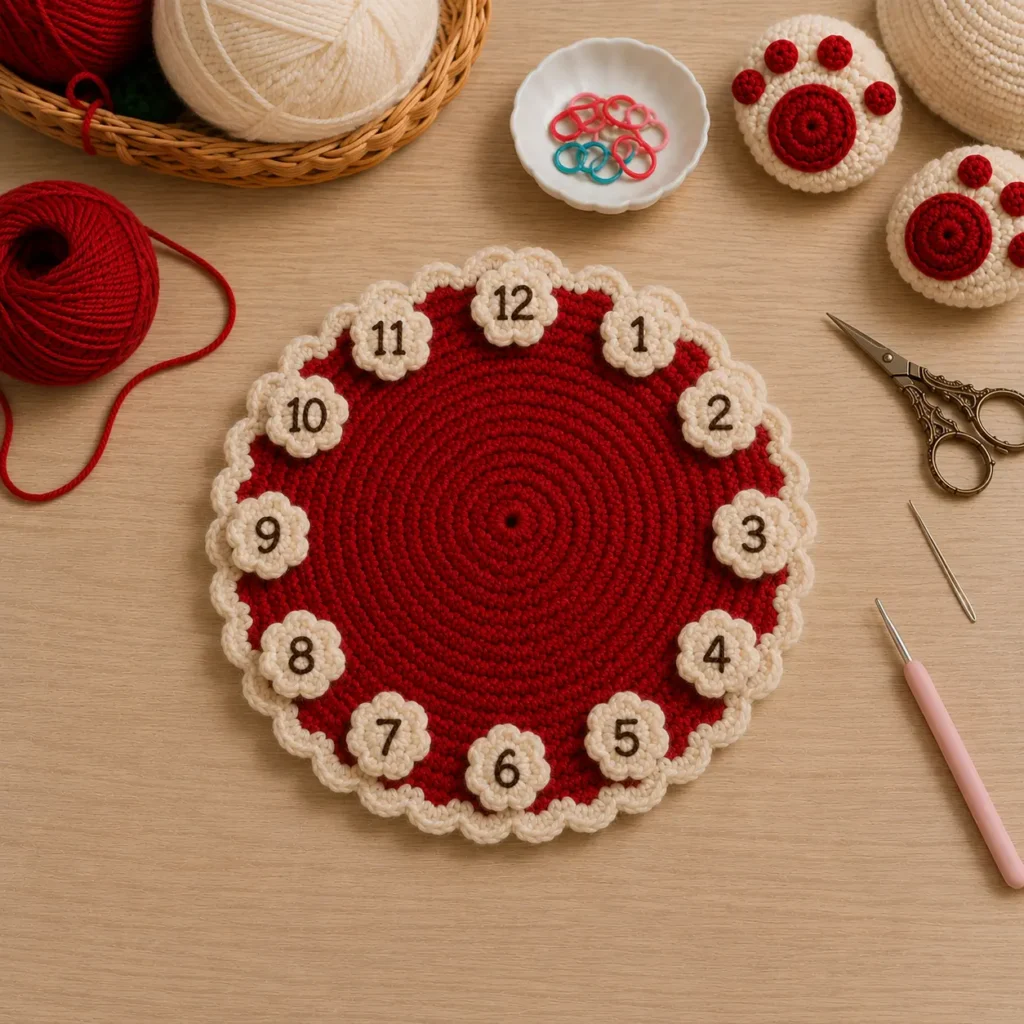
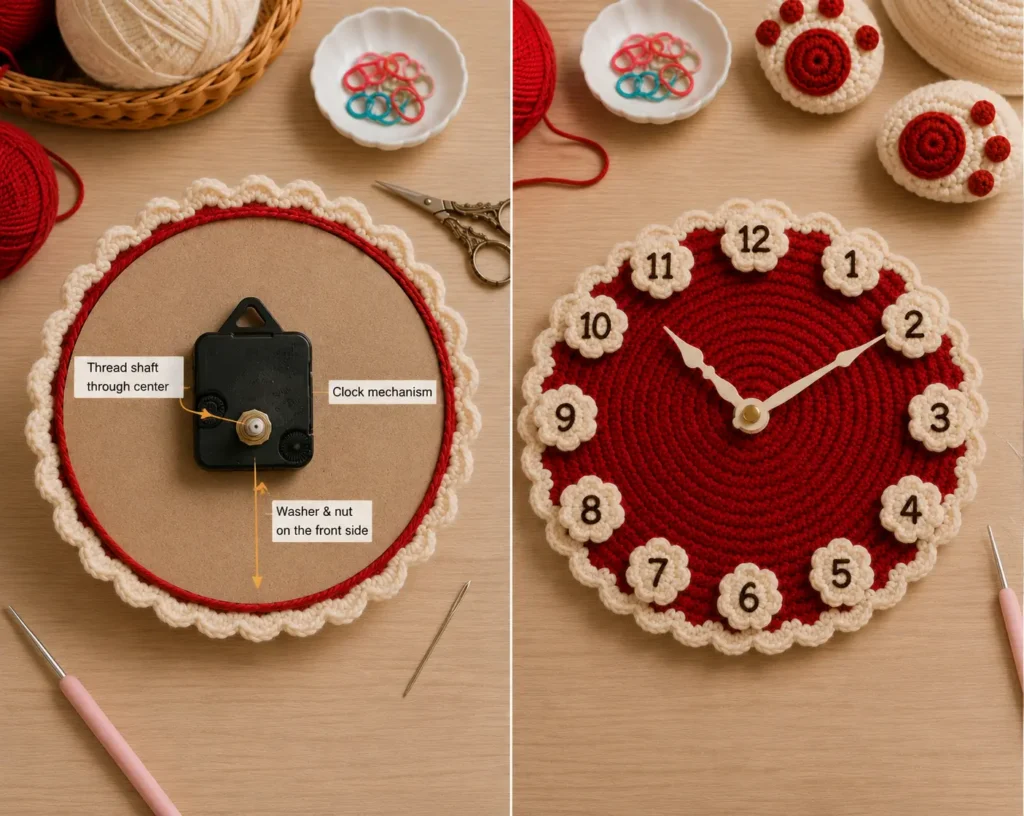
Instead of putting plain numbers directly onto the crochet face, make 12 small cream crochet flowers or round medallions.
These become your hour markers.
Arrange them around the clock first without sewing.
Start with:
12 → 3 → 6 → 9
Those four anchor points will help you position the remaining numbers evenly.
Then fill in the spaces between them.
You can embroider the numbers in dark brown, use lightweight decorative numbers, or add another suitable craft element.
Just keep the markers relatively light so they don’t pull on the crochet face.
Tiny Crochet Nest Trick
Take a photo from directly above before sewing the markers down.
If one number is sitting noticeably higher or lower than the others, you’ll spot it immediately.
Step 9: Prepare and Install the Clock Mechanism
This is the part where our cute crochet bunny becomes an actual clock.
Your clock needs a firm center structure.
Depending on your construction, you can use an appropriately sized lightweight rigid backing behind the crochet face.
Mark the exact center.
Create only the opening needed for the clock mechanism shaft, following the instructions supplied with your particular mechanism.
Pass the shaft through the backing and crochet face, then install the washer, nut, and clock hands according to the manufacturer’s directions.
Before continuing:
Insert the battery and test the clock.
Let it run for a little while.
Make sure:
- The hour hand moves freely.
- The minute hand doesn’t rub against the hour hand.
- Neither hand catches on the crochet surface or decorations.
- The mechanism remains securely mounted.
It’s much easier to fix this now than after the entire bunny is assembled.
Step 10: Assemble Your Bunny
Now lay everything out before picking up your needle.
Position:
- Bunny head
- Ears
- Bow
- Arms
- Feet
- Number markers
Stand back and look at it.
Move things around.
Have a coffee.
Look again. ☕
There’s no prize for sewing everything on quickly.
When you’re happy with the proportions, attach each piece securely while keeping the back of the clock as neat and flat as possible.
Avoid placing bulky stitches or stuffing where they could interfere with the clock mechanism.
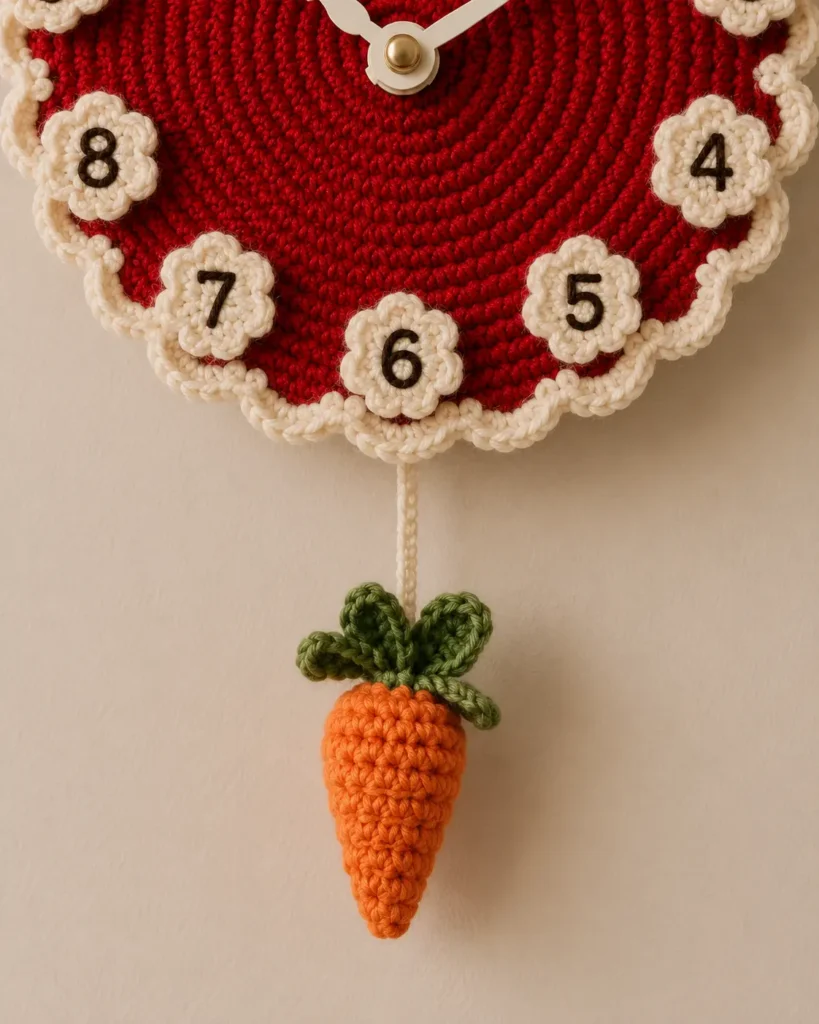
Step 11: Crochet the Tiny Carrot
And now for the detail that makes this bunny clock feel extra special.
Crochet a small tapered carrot using orange yarn.
Add a few tiny green leaves at the top.
Attach it below the clock using a short crocheted cord or other secure decorative attachment.
I would treat this primarily as a decorative faux pendulum unless you are using a clock movement specifically designed to operate a real pendulum.
That way you get the charming look without pretending a standard quartz movement can drive something it wasn’t designed for.
Step 12: Hang Her Up ♡
Before hanging your finished clock, check every attachment one last time.
Make sure the mechanism works, the hands rotate without obstruction, and the wall-hanging method is appropriate for the clock’s finished weight.
Then find her a home.
A nursery wall would be adorable, but I can also picture this bunny in a craft room, playroom, reading corner, or cozy little creative studio.
And when you finally hang it up, don’t immediately start inspecting every stitch you wish you’d done differently.
Stand back.
You started with yarn.
Now there’s a bunny on your wall telling you what time it is.
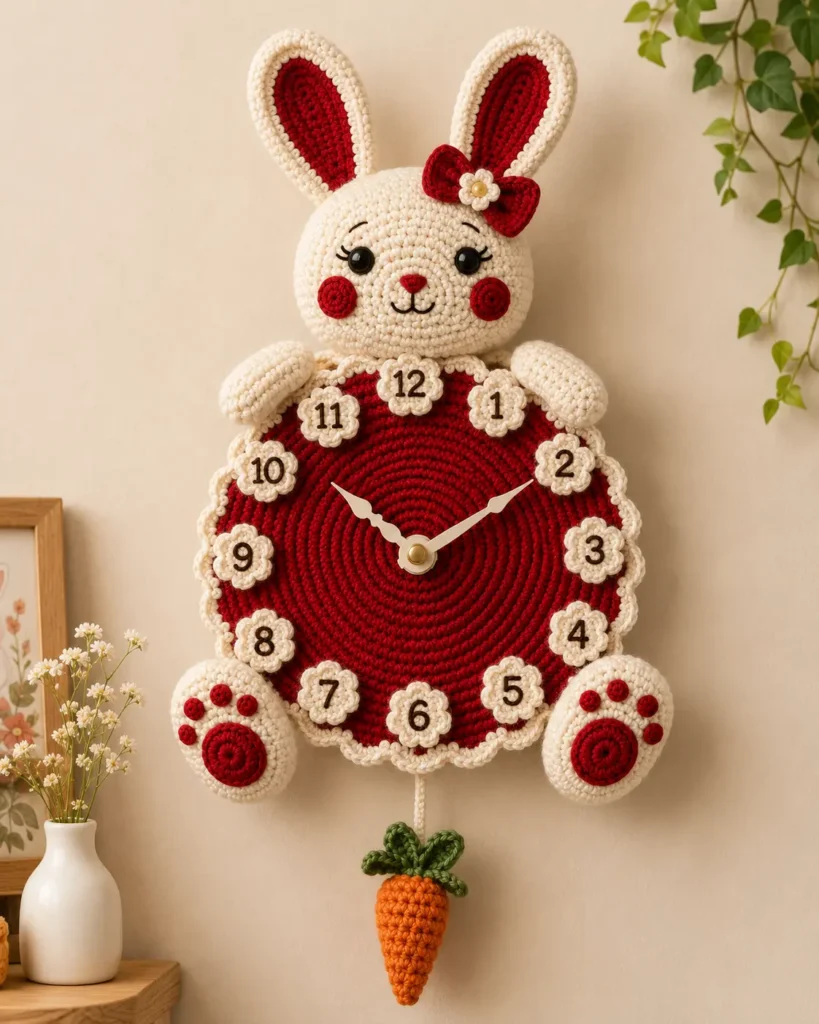
That’s pretty wonderful. ♡
Make It Your Own
Once you understand the construction, you don’t have to make exactly the same bunny.
Try:
- Cream + cherry red for a warm classic look
- Cream + sage green for a calm nursery
- Beige + terracotta for an earthy style
- White + dusty blue for a softer version
- A bear instead of bunny ears
- A cat with little triangular ears
- Stars instead of flowers for the hour markers
- A strawberry instead of the carrot
That’s the fun part of handmade decor: the second version doesn’t have to look like the first.
Can You Sell a Crochet Bunny Wall Clock?
Absolutely — a finished handmade clock like this has the potential to feel more premium than a small crochet accessory because you’re combining crochet work, assembly, decorative finishing, and a functional clock mechanism.
But don’t price it by looking at the yarn alone.
Consider:
Materials + clock mechanism + packaging + selling fees + your working time + profit.
For example, if your materials and mechanism cost around $20, and the project takes six hours, selling it for $30 would leave almost nothing for your time.
For a neatly finished handmade version, a starting range around $65–$85 could be reasonable to test, while larger or more detailed versions may justify $90+. That’s a pricing suggestion, not a market guarantee—your actual price should reflect your costs, time, workmanship, platform fees, and what your customers are willing to pay.
Handmade Selling Tip
Don’t just photograph the clock against a blank table.
Style it on a beautiful wall, show a close-up of the stitches, photograph the back/clock mechanism, and include an image that makes its size clear.
You’re not only selling yarn and a clock mechanism.
You’re selling the hours of handmade work that turned them into something special.
One Last Stitch ♡
If this project looks intimidating when you see the finished bunny, remember how it was actually made:
A circle.
Then another shape.
Two ears.
A paw.
A flower.
One small piece after another.
That’s one of my favorite things about crochet. Something that looks complicated at the end often began with the simplest little loop.
So choose your colors, make that first circle, and don’t worry about the bunny waiting at the finish line.
Just make the next stitch. 🧶♡
And if this little bunny has inspired your next project, there are plenty more cozy ideas waiting for you at Tiny Crochet Nest.
♡ Join the Tiny Crochet Nest newsletter to get fresh crochet ideas, creative projects, and handmade inspiration delivered straight to your inbox.
♡ Follow Tiny Crochet Nest on Pinterest for even more original crochet ideas, cute projects, amigurumi inspiration, and cozy creations to save for later.
Happy crocheting — and I hope your next ball of yarn becomes something you love. ♡